26.03.1996 • KHH SEENXL13A
•For Authorized KCI Service Agents Only•
KCI Hoists Corporation reserves the right to alter or amend the above information without notice
Page 33
XL
Service Manual
CU1
KCI KONECRANES GROUP
KCI HOISTS CORPORATION
CU1:2
CU1:2
CU1:3
CU1:3
CU1:4
CU1:4
CU1:3
CU1:2
VDC
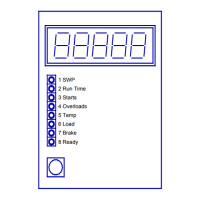
1 SWP
2 Run Time
3 Starts
4 Overloads
5 Temp
6 Load
7 Brake
8 Ready
APPENDIX 3b:
APPENDIX 3b:APPENDIX 3b:
APPENDIX 3b: How to replace a CU1 (without a test load)
How to replace a CU1 (without a test load)How to replace a CU1 (without a test load)
How to replace a CU1 (without a test load)
In this appendix, it is described how to replace a CU1-unit by a new one without a
test load. It is also described how to enter existing supervisory values into the new
unit.
It is always recommended to use a test load for setting up a CU1. However, if a
test load is not available, it is possible to replace a CU1 without a test load.
In this routine, with a calibrating load sensor and a multimeter, the technician can
measure the load sensor voltages at 0 % and 100 % loads (i.e setting voltages)
and input those voltages into the new CU1.
Before changing the CU1, make this instruction clear to yourself!
Before changing the CU1, make this instruction clear to yourself!Before changing the CU1, make this instruction clear to yourself!
Before changing the CU1, make this instruction clear to yourself!
1 Fill in the CU1 control page (see appendix 8).
2 Change the CU1's display into the load mode and check the mounting of the
hoist's load sensor.
Check that 'L 0' is displayed with no load on the hook, if not, see Appendix 4
(steps 3, 4 and 5) or Appendix 5 how to refit the hoist's load sensor.
Note:
Note:Note:
Note: After the hoist's load sensor has been checked (and refitted if
After the hoist's load sensor has been checked (and refitted ifAfter the hoist's load sensor has been checked (and refitted if
After the hoist's load sensor has been checked (and refitted if
needed), it is not necessary to fix again its mechanical position
needed), it is not necessary to fix again its mechanical positionneeded), it is not necessary to fix again its mechanical position
needed), it is not necessary to fix again its mechanical position
during this routine.
during this routine.during this routine.
during this routine.
3 Switch the power off. Disconnect the hoist's load sensor wires (CU1:2,3,4) and
connect the calibrating load sensor (CU1:2,3,4) and a voltage meter
(CU1:2,3). See Figure 1.
Figure 1. Connections of a calibrating load sensor and a voltage meter.
Load sensor voltages and display with:
0 % load: L 0
00
0 % / 4,1
4,14,1
4,1 VDC 100 %
load: L 100
100100
100 % / 5,3
5,35,3
5,3 VDC
(Signal = green)
(10 VDC = red)
Load sensor (on the hoist)
Kalibrating
load sensor
ultimeter