AccurioPress C2070/C2070P/C2060/C3080/C3080P/C3070, AccurioPrint C2060L/C3070L 3-95
3.6 Details of quality adjustment items
3
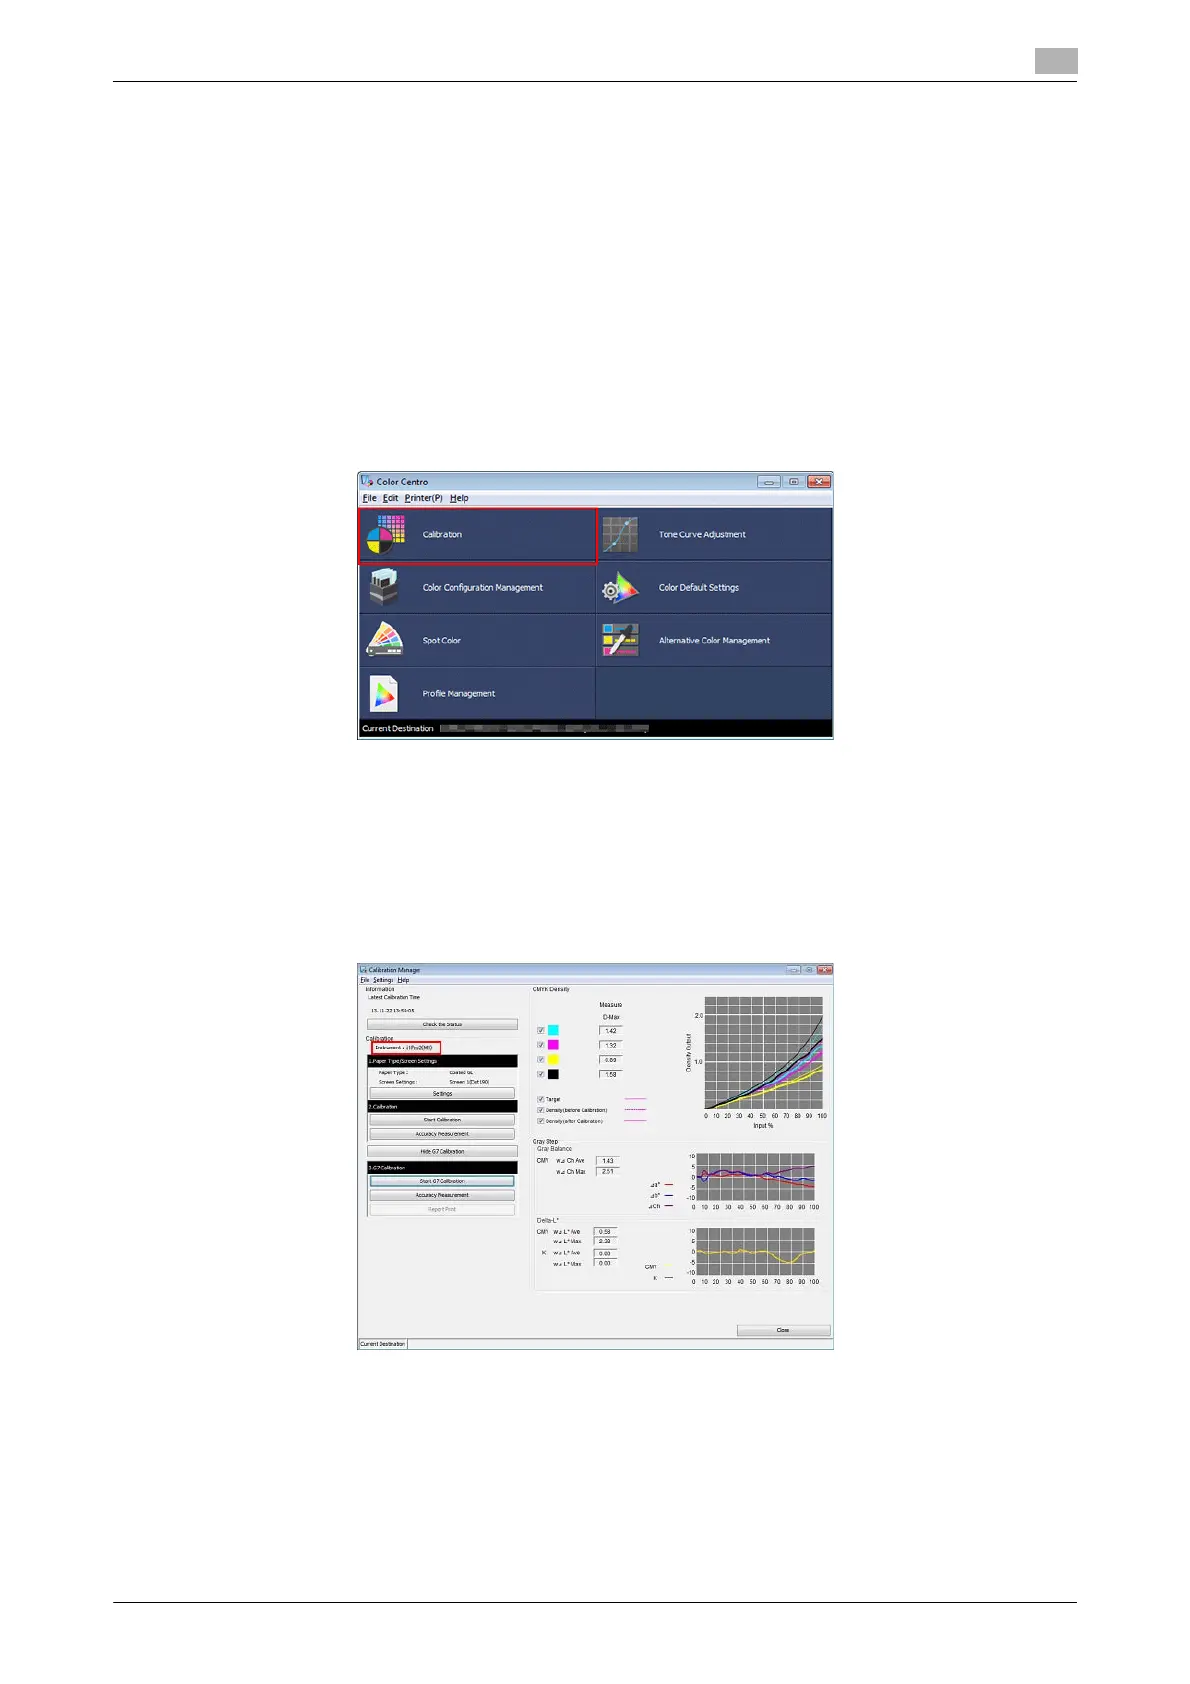
Executing G7 Calibration: Color Centro
By executing the G7 calibration, you can apply the correction to the controller for enhanced color reproduc-
tion accuracy.
1 Connect the instrument to the computer.
Example: The i1Pro2 is connected.
% The device driver for the instrument must be installed on your computer beforehand. For details,
refer to the instrument's manual.
2 Start Color Centro and log in to the machine.
The Color Centro top screen is displayed.
3 Click [Calibration] on the top screen.
The [Calibration Manager] screen is displayed.
4 Check that the instrument to be used is displayed under [Calibration].
% If the correct instrument is not displayed, select the instrument to be used from the menu bar [Set-
tings] - [Instrument].
Example: Check that [Instrument: i1Pro2(M1)] is displayed.
 Loading...