Connecting the VP-311DVI Automatic DVI / Audio Switcher
KRAMER: SIMPLE CREATIVE TECHNOLOGY
10
5.4 Controlling via the ETHERNET
You can connect the VP-311DVI via the Ethernet, using a crossover cable
(see section 5.4.1) for direct connection to the PC or a straight through cable
(see section 5.4.2) for connection via a network hub or network router.
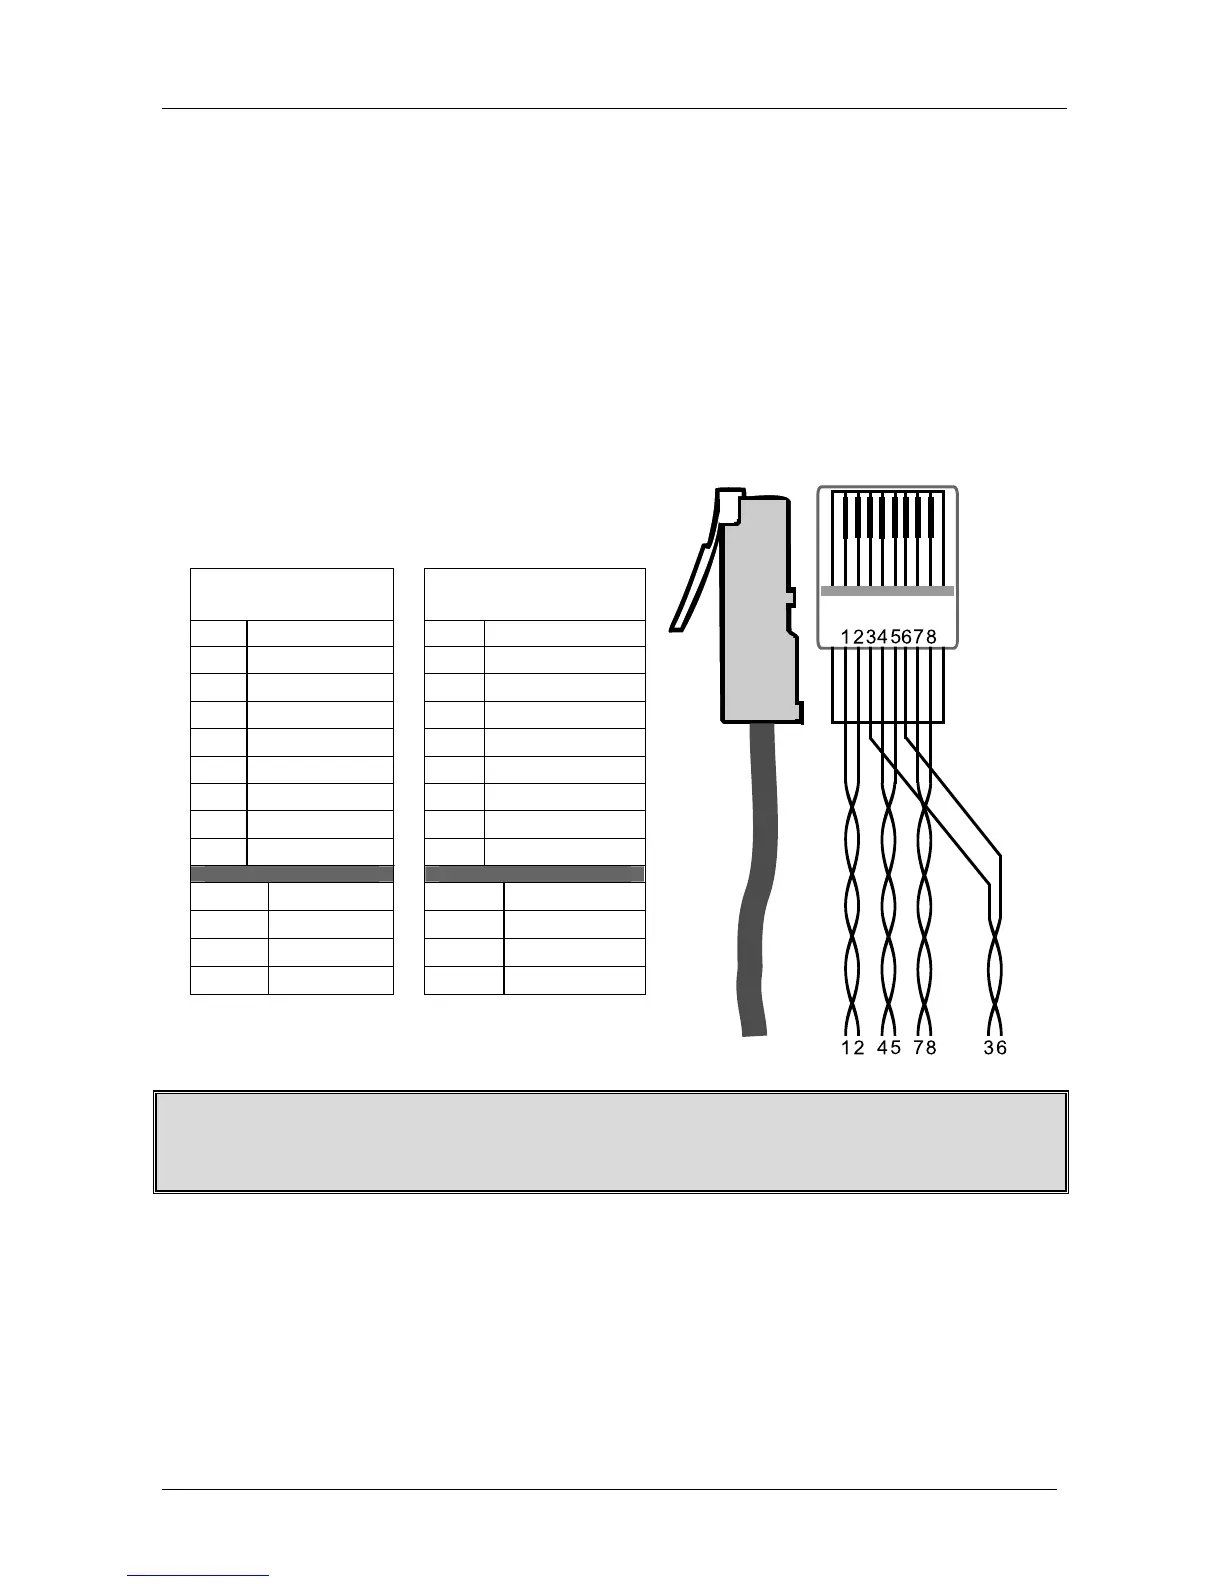
5.4.1 Connecting the ETHERNET Port directly to a PC (Crossover Cable)
You can connect the Ethernet port of the VP-311DVI to the Ethernet port on
your PC, via a crossover cable with RJ-45 connectors, as Table 5 and Figure 6
define.
Table 5: Crossover Cable RJ-45 PINOUT
EIA /TIA 568A
Side 1
EIA /TIA 568B
Side 2
PIN Wire Color PIN Wire Color
1 White-orange 1 White-green
2 Orange 2 Green
3 White-green 3 White-orange
4 Blue 4 Blue
5 White-blue 5 White-blue
6 Green 6 Orange
7 White-brown 7 White-brown
8 Brown 8 Brown
Pair 1 4 and 5 Pair 1 4 and 5
Pair 2 1 and 2 Pair 2 3 and 6
Pair 3 3 and 6 Pair 3 1 and 2
Pair 4 7 and 8
Pair 4 7 and 8
Figure 6: RJ-45 PINOUT
This type of connection is recommended for identification of the factory default
IP Address of the VP-311DVI during the initial configuration
After connecting the Ethernet port, configure your PC as follows:
1. Right-click the My Network Places icon on your desktop.
2. Select Properties.
3. Right-click Local Area Connection Properties.
4. Select Properties.
The Local Area Connection Properties window appears.