Special equipment
114
Pos: 113.1 /Übersc hriften/Überschri ften 1/P-T/Sonderausst attung @ 2\mod_1202808 469779_78.doc x @ 61649 @ 1 @ 1
17 Special equipment
Pos: 113.2 /Übersc hriften/Überschri ften 2/P-T/Spezielle Sic herheitshinweise @ 0\ mod_1196660495760_78. docx @ 9134 @ 2 @ 1
17.1 Special Safety Instructions
Pos: 113.3 /BA/Sic herheit/7. Gefahrenhin weise alt/Mähwerke/ Warnung - Reparatur_W artung_Reinigungs_4 al lgemein EasyCut @ 292\ mod_1410941423112_78. docx @ 2299026 @ @ 1
WARNING!
When performing repair, maintenance or cleaning work or in case of technical
intervention, drive elements may start moving (caution: cutting discs continue to run).
Effect: Danger to life, injuries or damage to the machine.
• Turn off the PTO shaft.
• Move the machine to the working position and lower it to the ground.
• Switch off the engine of the tractor, remove the ignition key and carry it with you.
• Secure the tractor against accidental start-up and against rolling.
• After the repair, maintenance, cleaning work or technical modifications are completed,
mount all protective covers and safety devices properly again.
• Avoid skin contact with oils, greases, cleaning agents and solvents.
• In the event of injuries or burns due to oils, cleaning agents or solvents, contact a physician
immediately.
• All other safety instructions must also be followed to avoid injuries and accidents.
Pos: 113.4 /BA/Sonder ausstatung/EasyCu t / AM Mähwerke/Hochschni ttkufen EasyCut @ 3\mod_12 04783761105_78.doc x @ 72974 @ 2 @ 1
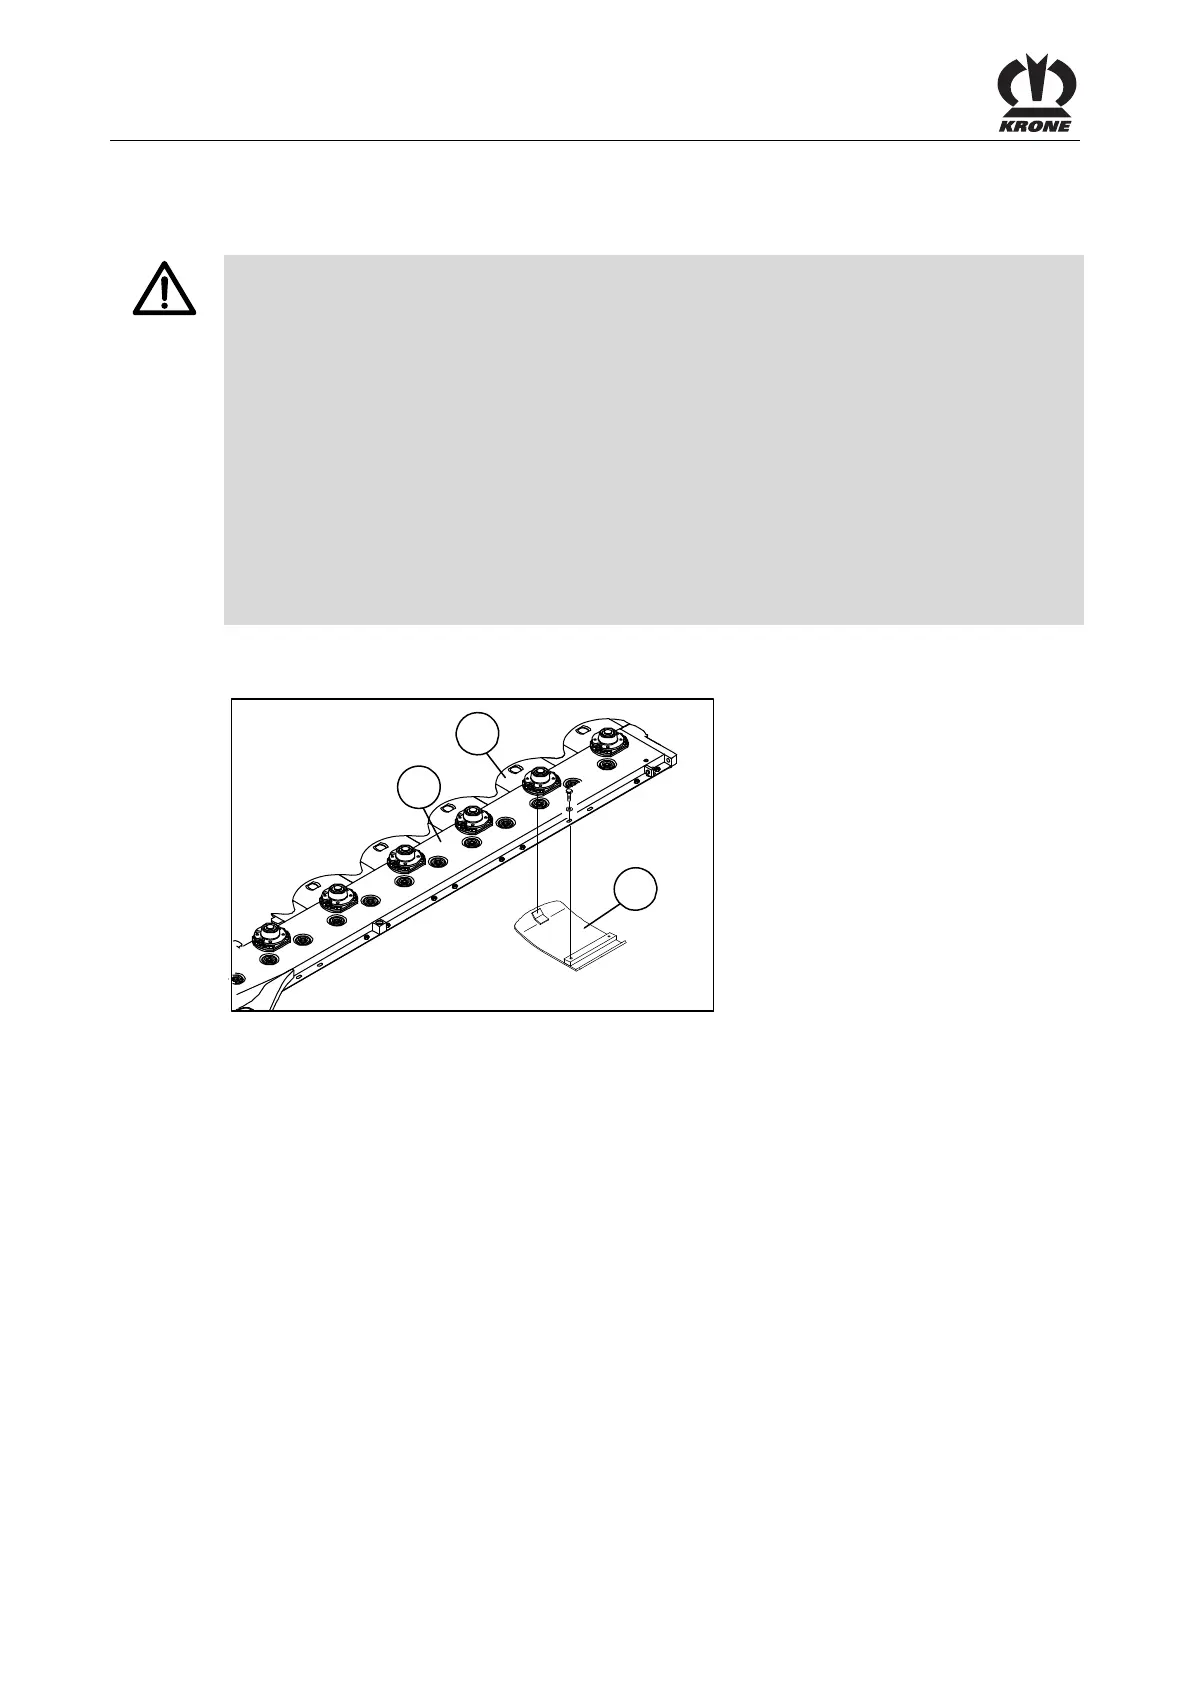
17.2 Adjusting Skids
1
3
EC-192-1
2
Fig. 78
Adjusting skids can be used to increase the cutting height (see chapter entitled "Adjusting the
cutting height")
To do this, insert the adjusting skids (3) into the glide skids (2) and screw them in place. The
adjusting skids must always be mounted underneath the mowing discs that run next to the
mower drum.
Pos: 114 /Layout Module /---------------Seitenumbruch--------------- - @ 0\mod_1196175311226_0. docx @ 4165 @ @ 1

 Loading...