Maintenance
114
Pos: 42.26 /Übersc hriften/Überschri ften 2/U-Z/ZZinken tausc hen (im Reparaturfal l) @ 224\mod_1392293057621 _78.docx @ 1816928 @ 2 @ 1
12.8 Replacing the tines (in case of repairs)
Pos: 42.27 /BA/W artung/Schwader/Zinken / Zinkenarme/Zinken ta uschen (im Reparaturf all) mit Abweisblech Bi ld mit Tabelle @ 357\mod_14387 54688087_78.doc x @ 2656307 @ @ 1
8
10
7
6
4
9
7
4
3
III
I
II
1
SW9070092_2
2
3
5
6
5
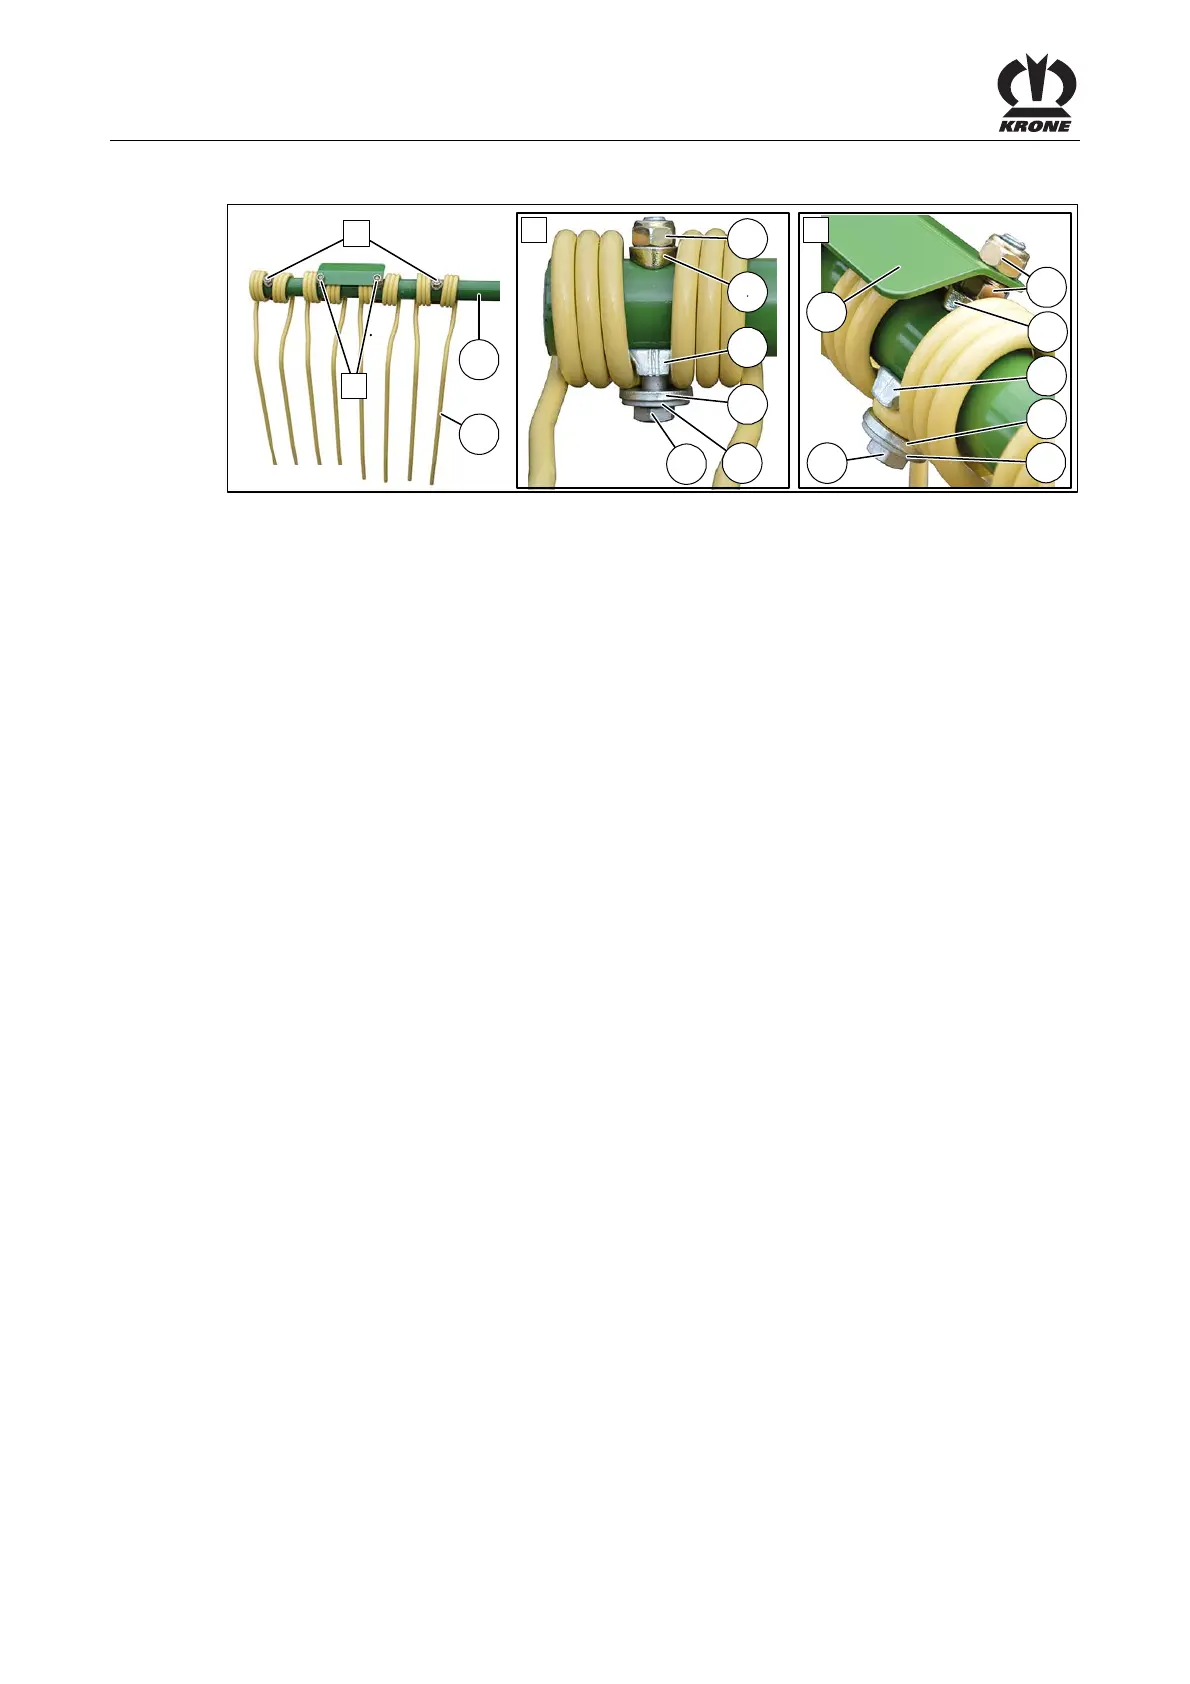
Fig. 66
1 Tines 2 Tine arm
3 Locknut M12 4 Base
5 Tine holder 6 Disc 13 x 35 x 5
7 Detent edged washer SKB 12 8 Hexagon head screw M12 x 85 10.9
9 Hexagon head screw M12 x 100 10 Deflection sheet
Adhesive (high-strength) (order no. 938 627
0)
Pos: 42.28 /BA/W artung/Schwader/Zinken / Zinkenarme/Zinken ta uschen (im Reparaturf all) mit/ ohne Abweisblec h_Text @ 381\mod_144 4051432268_78.doc x @ 2750485 @ @ 1
• To remove the broken tine, remove all tines in front of the broken tine.
• Remove the broken tine.
Mounting new tine
• Insert tine holder into tine. In doing so, make sure that the tine holder is positioned
according to the figure.
• Slide tine with tine holder on tine arm.
• Guide hexagon head screw with detent edged washer and disc from below through tine
holder and tine arm.
• Apply adhesive (high-strength) on threading overhang of hexagon head screw.
• Mount support, locknut and deflection sheet, if necessary.
• Raise the tines at their end and tighten locknut with tightening torque = 95 Nm.
• Proceed with all tines as described above.
Pos: 42.29 /Layout Module /---------------Seitenumbruch---------------- @ 0\mod_1196175311226_0. docx @ 4165 @ @ 1
 Loading...