WKT
22
7.5.2.3 Assembly of thrust bearing
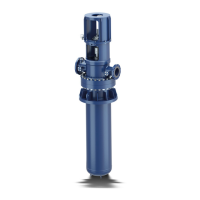
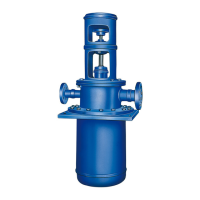
Fig. 07 and 08
1. Thoroughly clean centering sleeve (526) and examine
the oil retaining tube for unimpeded flow.
2a. Slip the four point contact bearing (320) with one
inner race onto the centering sleeve and then slip on
the second inner race.
2b. Slip de bearing(s) (320) onto the centering sleeve, in
case of deep groove ball or pair of contact angular
bearings.
Note: Prior to this, warm up the antifriction bearing to
80ºC approx. in an oil bath.
3. Slip on locking washer (931.2), screw on withdrawal
(923.2) nut , tighten it and lock it with the locking
washer.
4. Fit bearing housing (350) including oil stand pipe (641)
and gasket (400.6/4) on the distributor casing (10-1)
and fasten it.
5. Twist centering sleeve (526) together with previously
mounted antifriction bearing onto drive shaft (213).
6. Insert gasket (400.3), mount bearing cover (360) and
fasten it. The vee notches integrally cast into the
bearing housing and bearing cover must register
opposite one another on reassembly, and so must the
cut-out on the gasket, to enable the oil return flow
grooves to fulfill their function properly.
7. Adjust the axial rotor position in accordance with
section 7.5.2.4.
8. Mount deflector (270).
9. Fit constant level oiler (638) together with its
connecting pipe.
7.5.2.4 Adjustment of axial position of pump rotor
The pump rotor position must be adjusted axially after
completion of mounting of the bearings and motor lantern
and before the drive coupling is mounted.
The total axial play of the rotor is ascertained by lowering
and raising it to its bottom and top abutments by means
of the centering sleeve (526) which has a 1,5 mm screw
thread pitch. The rotor is subsequently raised to its top
abutment, then lowered by an amount equal to 0,4 times
the total axial play. Thereafter the centering sleeve (526)
is locked in position by means of the gib key.
If the gib key cannot be slotted in because the slot in the
centering sleeve does not register immediately opposite,
twist the sleeve to right or left until the nearest slot
registers with the gib key.
7.5.2.5 Final assembly and installation of pump
1. Mount pump end half coupling on drive shaft (213).
2. Lay internal auxiliary piping in accordance with the
installation drawing.
3. Examine barrel for dirt and clean it if necessary.
4. Carefully clean the sealing faces on the barrel and
distributor casing and insert the o’ring or gasket.
Check the parallelism of the sealing faces between
barrel flange and distributor casing flange.
5. Attach ropes to the motor lantern, carefully raise the
pump to a vertical position and fit in the barrel. Check
the alignment and bolt the distributor casing (10-1) on
to the barrel (10-3).
6. Connect the suction line and discharge line, refer to
section 5.7.
7. Mount driver and check coupling alignment. (see
section 5.6).
8. Fill in oil (see section 6.1.4).
9. Start up the pump in accordance with section 6.2.
7.5.2.5.1 Final assembly of pumps installed very deep
down
If the pumping set cannot be inserted in the barrel as a
complete unit because of its length, the pump body,
column pipe main, distributor casing, shaft seal and
bearings should be assembled as follows.
1. Inspect barrel for dirt and clean it if necessary.
N.B. Do not damage the special coating inside barrel and
column pipe main.
2. Assemble pump body in accordance with section
7.5.2.3, points 1 to 8.
3. Connect the pump shaft to the intermediate shaft by
means of a screwed or muff coupling (see section
4.3.4.2.1). Slip gasket (400.1) and column pipe (711.2)
over the shaft and attach them to discharge casing
(107). Mount a pipe clip on column pipe 711.2 and
fasten it securely.
4. Carefully raise the pump body to a vertical position and
lower it into the barrel (10-3) until the pipe clip rests on
the top rim of the barrel. Take care not to damage the
sealing face of the barrel flange. Then place the
intermediate shaft bearing with gaskets in position.
5. Mount the drive shaft (213) or the next length of
intermediate shaft (212). Slip the column pipe (711.1)
over the shaft and fasten it. Fasten a second pipe clip
on the upper length of column pipe (711.1). Lift the
pump, undo and remove the lower pipe clip, and lower
the pump into the barrel until the upper pipe clip rests
on the barrel flange.
6. Lay the gasket (between barrel and distributor casing)
on the pipe clip.
 Loading...