WARNING
Use of the option PURGE is limited to cleaning work. Use during run-
ning operation is precluded in order to prevent the emission of foreign
particles.
11.5.1.1 Installing PURGE option D
Procedure
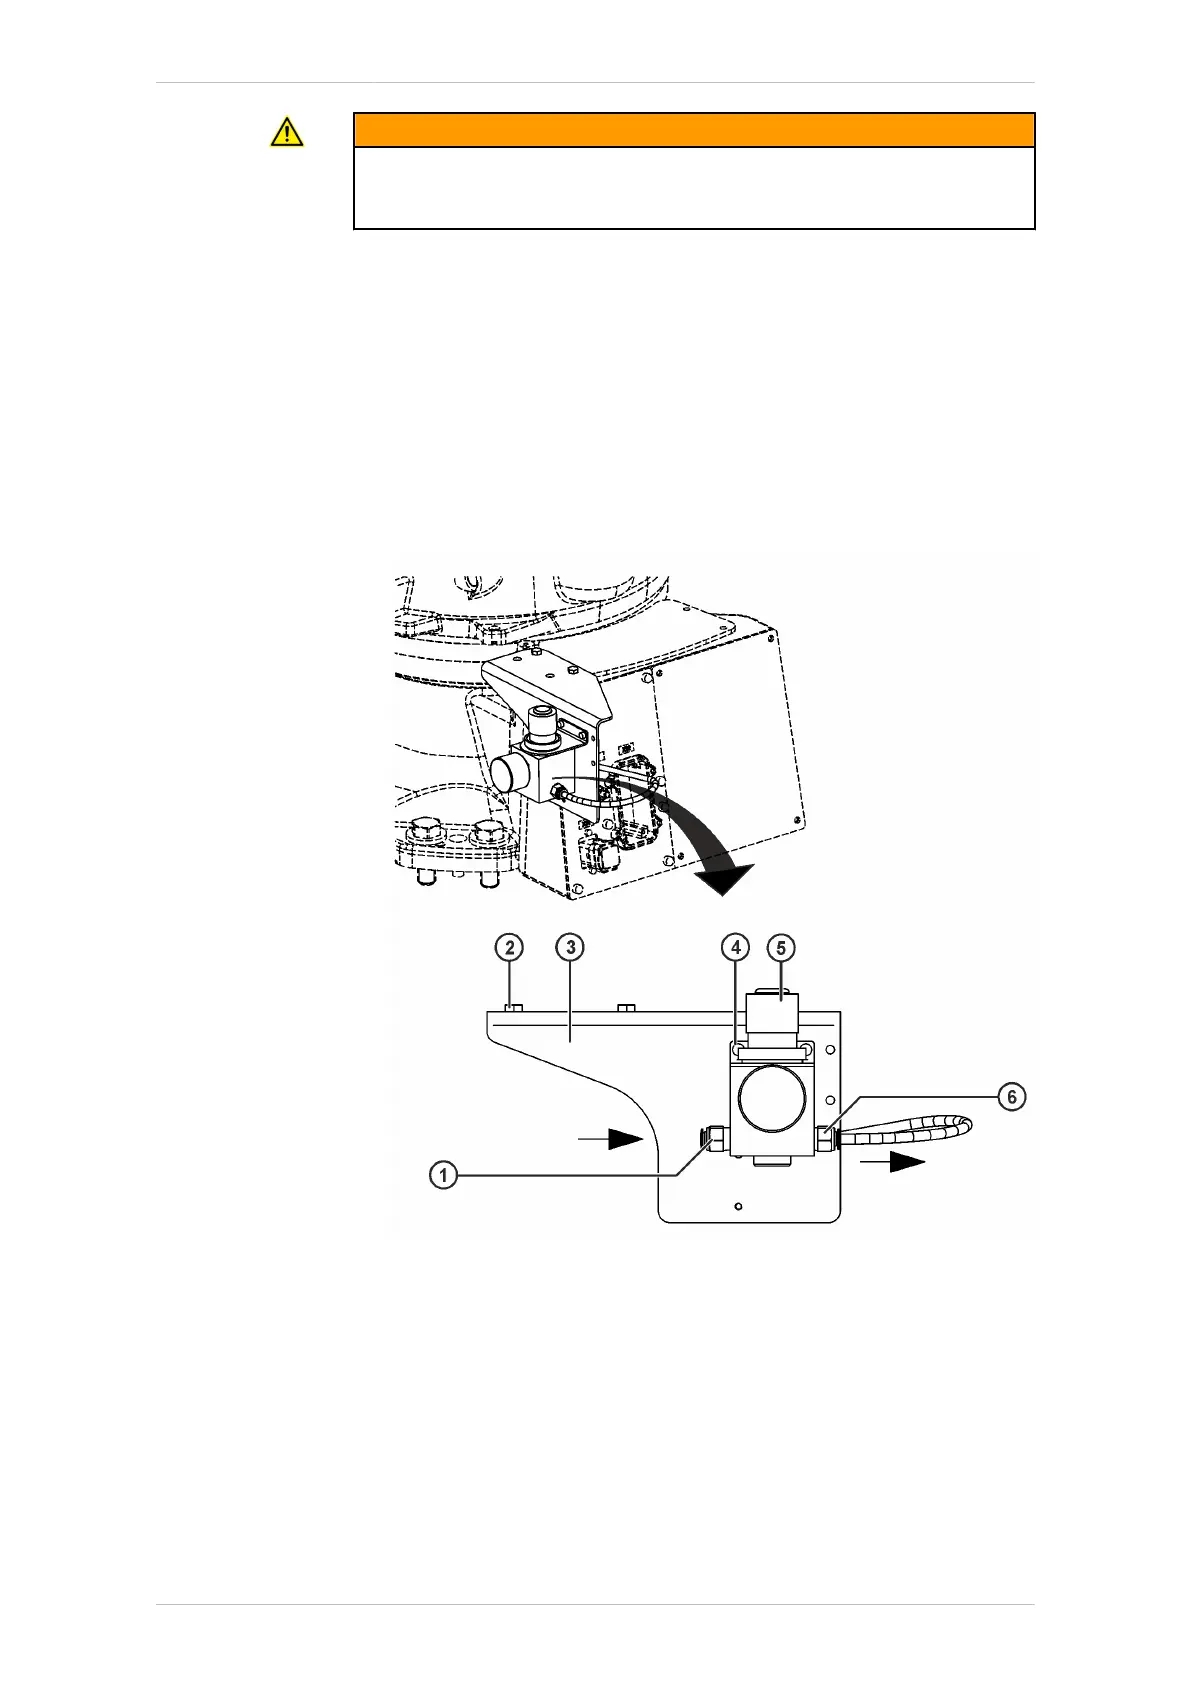
1. Screw the holder for the pressure regulator and the pressure regulator
together to the bracket using 2 M4x6-8.8 Allen screws
(>>> Fig. 11-12)
2. Position the bracket with assembly on the base frame and insert and
tighten 2 M6x16-8.8 hexagon bolts. Increase the tightening torque to
the specified value in several stages.
3. Connect compressed air hose to interface A1.
Fig. 11-12: Installing PURGE option D
1 Compressed air supply connection
2 M6x16 hexagon bolt (2x)
3 Bracket
4 Holder for pressure regulator
M4x6 Allen screw (2x)
5 Pressure regulator
6 Robot connection with plastic hose
KR IONTEC
MA KR IONTEC V4 | Issued: 11.05.2021 www.kuka.com | 333/344
Options
 Loading...