24 25
SETUP
SETUP
Connecting Defibrillation Pads or
Adapter Plates
The Patient Simulator can be defibrillated with semi automatic
defibrillators and manual mode defibrillators.
Using Defibrillation Training Cables
The Patient Simulator is fitted with two defibrillator connectors
(Apex and Sternum) for attachment of a Defibrillator Training Cable.
Laerdal can provide adapters that make the Defibrillation Cable fit
several defibrillator brands. Designated Training defibrillator pads may
also be fitted around the defibrillator connectors to resemble real
defibrillator electrodes.
The Patient Simulator is not designed for use with single use real
adhesive defibrillation electrodes.
Using Defibrillation Adapter Plates
To use a defibrillator with defibrillator paddles on the Patient
Simulator, the defibrillator connectors must be fitted with designated
Training Defibrillator Adapters Plates.
Press the Adapter Plates firmly into place.
Note: Always follow the safety instructions from the
defibrillator manufacturer when using the defibrillator on the
Patient Simulator.
During Defibrillation
During live defibrillation, the defibrillator and Patient Simulator may
present a shock hazard. All standard safety precautions must be
taken when using the defibrillator on the Patient Simulator.
Note: Defibrillation must be performed on the defibrillator
connectors only.
To prevent overheating during defibrillation, do not exceed a
defibrillation sequence of 3 shocks in 45 seconds followed by
1 minute of CPR.
After 30 minutes there must be at least 15 minutes pause in
defibrillation before starting a new sequence.
Note: Do not repeat this for more than a 4 hour period.
Warnings and Cautions
Warning: Do not spill fluids on the defibrillator connectors.
Wet defibrillator connectors may lead to a shock hazard during
defibrillation of the simulator.
Warning: The Patient Simulator must not be in contact with
electrically conductive surfaces or objects during defibrillation.
Warning: Do not defibrillate the Patient Simulator when it is OFF or
if it is not functioning normally.
Warning: Do not defibrillate the Patient Simulator without the
torso skin.
Warning: Do not defibrillate the Patient Simulator in a flammable
or oxygen enriched atmosphere.
Warning: The Patient Simulator torso must always be kept dry.
Allow the Patient Simulator to acclimate before defibrillating.
Sudden changes in temperature (moving the Patient Simulator
from a cold environment to a warm environment and vice versa)
may result in condensation collecting on the base board and pose
a shock hazard.
SimMan 3G will automatically shut down whenever it detects
a significant increase in internal temperature. If automatic
shutdown occurs, allow the Patient Simulator to cool down
before resuming the training session. Open the torso skin to
speed up the cooling process.
Warning: Ensure that the Patient Simulator defibrillators connectors
are securely tightened before connection of the Defibrillation
Training Cable or Manual Defibrillation Adapters. Loose connectors
may represent a shock hazard.
Caution: Do not defibrillate on the ECG connectors on the Patient
Simulator. This will damage the Patient Simulator.
Caution: In hot conditions, intensive defibrillation may cause
thermal shutdown of the Patient Simulator.
Caution: To prevent torso skin electrode pitting, do not apply
conductive gel or conductive defibrillation pads intended for
patient use.
Caution: Do not use automated chest compression machines on
the Patient Simulator.
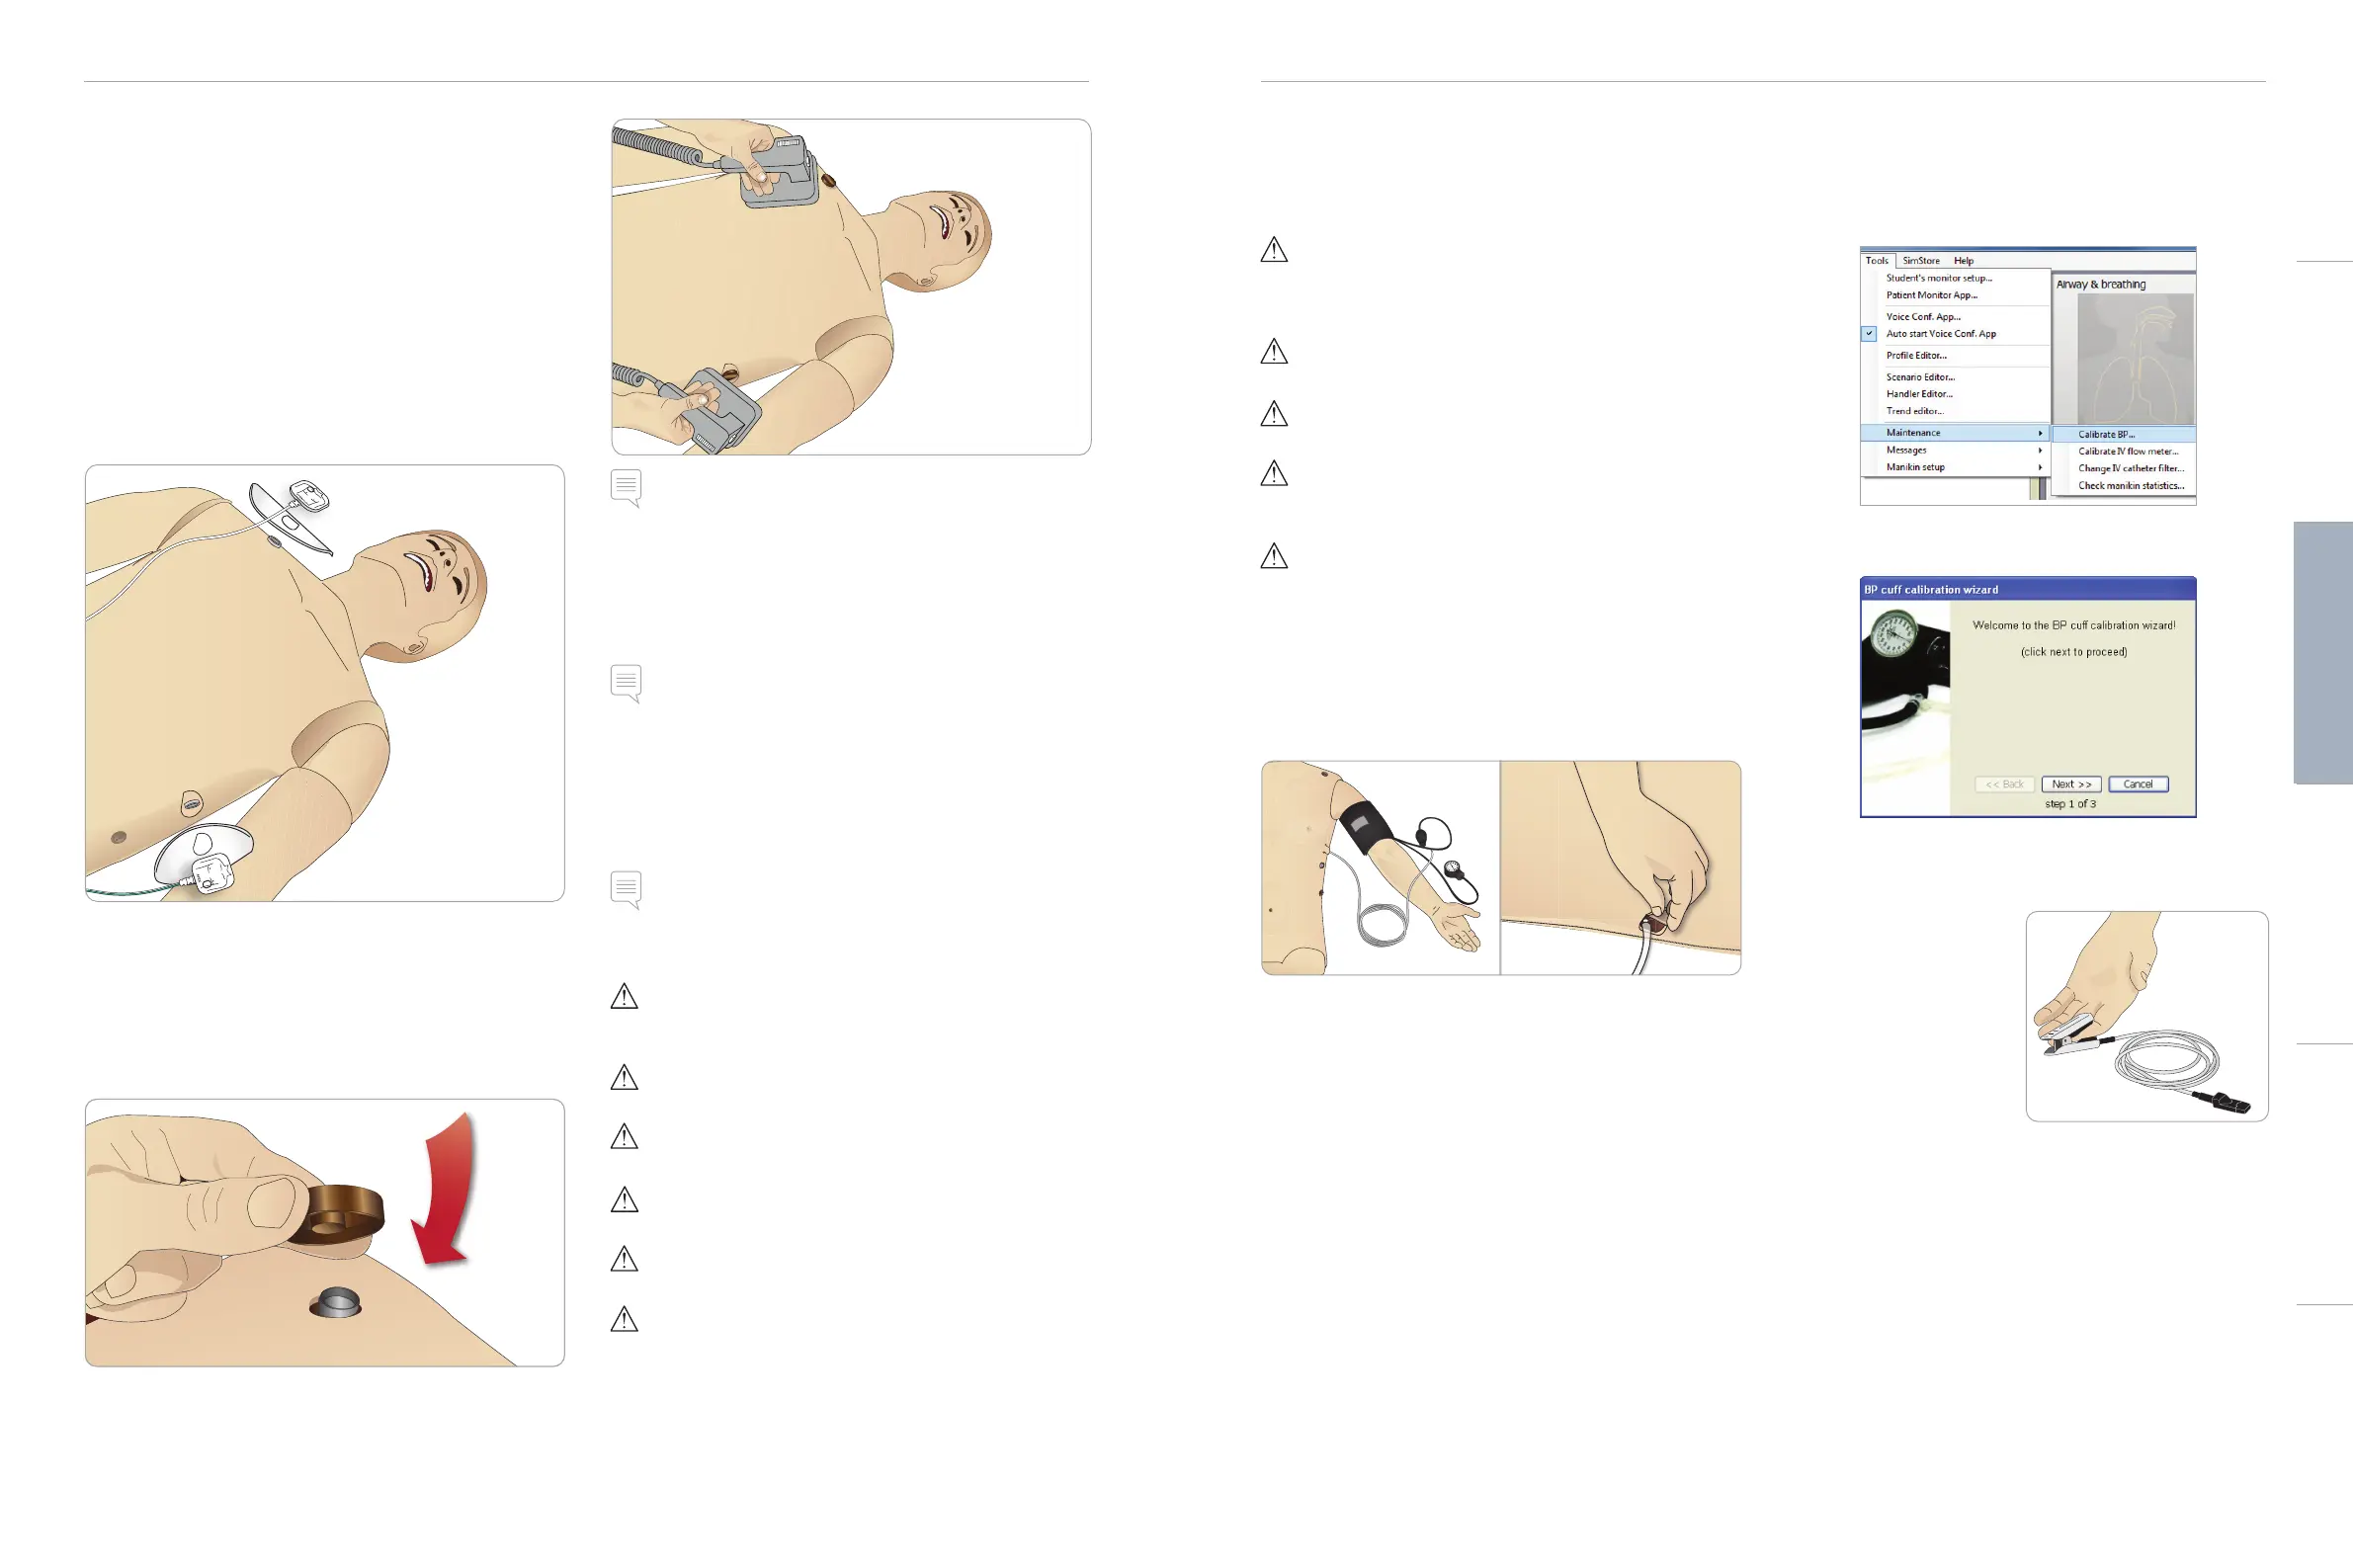
Connecting the Blood Pressure Cuff
The Patient Simulator is delivered with a specially adjusted blood
pressure cuff. Connect the tube to the white BP connector at the
side of the Patient Simulator before use.
Calibrating the Blood Pressure Cuff
Using LLEAP
1 Select <Tools> <Maintenance> and choose <Calibrate BP...>
2 Follow the onscreen wizard instructions to perform the
calibration.
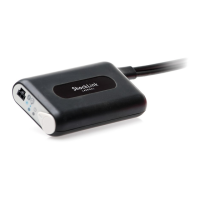
Connecting the SpO
2
Probe
The SimMan 3G SpO
2
probe is
made up of a light diode and
light sensor. When the beam
between the diode and sensor
is broken, the Patient Monitor
Application registers that the
SpO
2
probe is connected.
1 Connect the probe’s USB
plug to the Patient Monitor
PC.
2 The probe can be placed on any suitable area on the Patient
Simulator, Ensure that the probe is always firmly fixed in position.
Cautions and WarningsFeaturesSetupMaintenanceSpare Parts Troubleshooting