28 29
SETUP
SETUP
Attaching SimMan 3G Amputation or
Shotgun Arm
The Arm Adapter and Adapter Screw are designed to attach an
Amputation or Gunshot Arm to the Patient Simulator.
1 Fit the Arm Adapter into the hole in the arm bracket from inside
of the torso.
Note: Ensure that the flat edge of the adapter is facing the chest
hinge.
2 The Adapter is now in place and the Trauma Arm can now be
connected with the Adapter Screw.
3 Thread the Adapter Screw through the Amputation Arm and
align the screw with the hole in the Arm Adapter.
4 Secure the Adapter with one hand from inside the torso. Screw
the Adapter Screw using the Phillips screwdriver.
Note: Tighten screw as desired to simulate more or less Arm Range
of Motion.
5 Connect the red tube from the Amputation Arm to the nearest
blood port on the torso.
Caution: Do not over rotate arm. Over rotating the arm may cause
the red vinyl tubing to disconnect.
Replacing SimMan 3G Left Leg with
Trauma Leg
1 Remove the SimMan 3G default leg. Open Torso Skin and
stomach foam as shown in Maintenance.
2 Unscrew hip joint connector. Remove the leg cables and tubes
from the connector.
3 Carefully remove the left leg with cables and tubes.
4 Insert the Amputation or Gunshot Leg with blood tube into the
leg socket.
5 Insert the blood tube into the side slot of the connector. Screw
the connector in place with one hand.
6 Connect the leg tube to the corresponding tube, as labelled
inside the torso.
7 Close the Stomach Foam and zip the Torso Skin back into place.
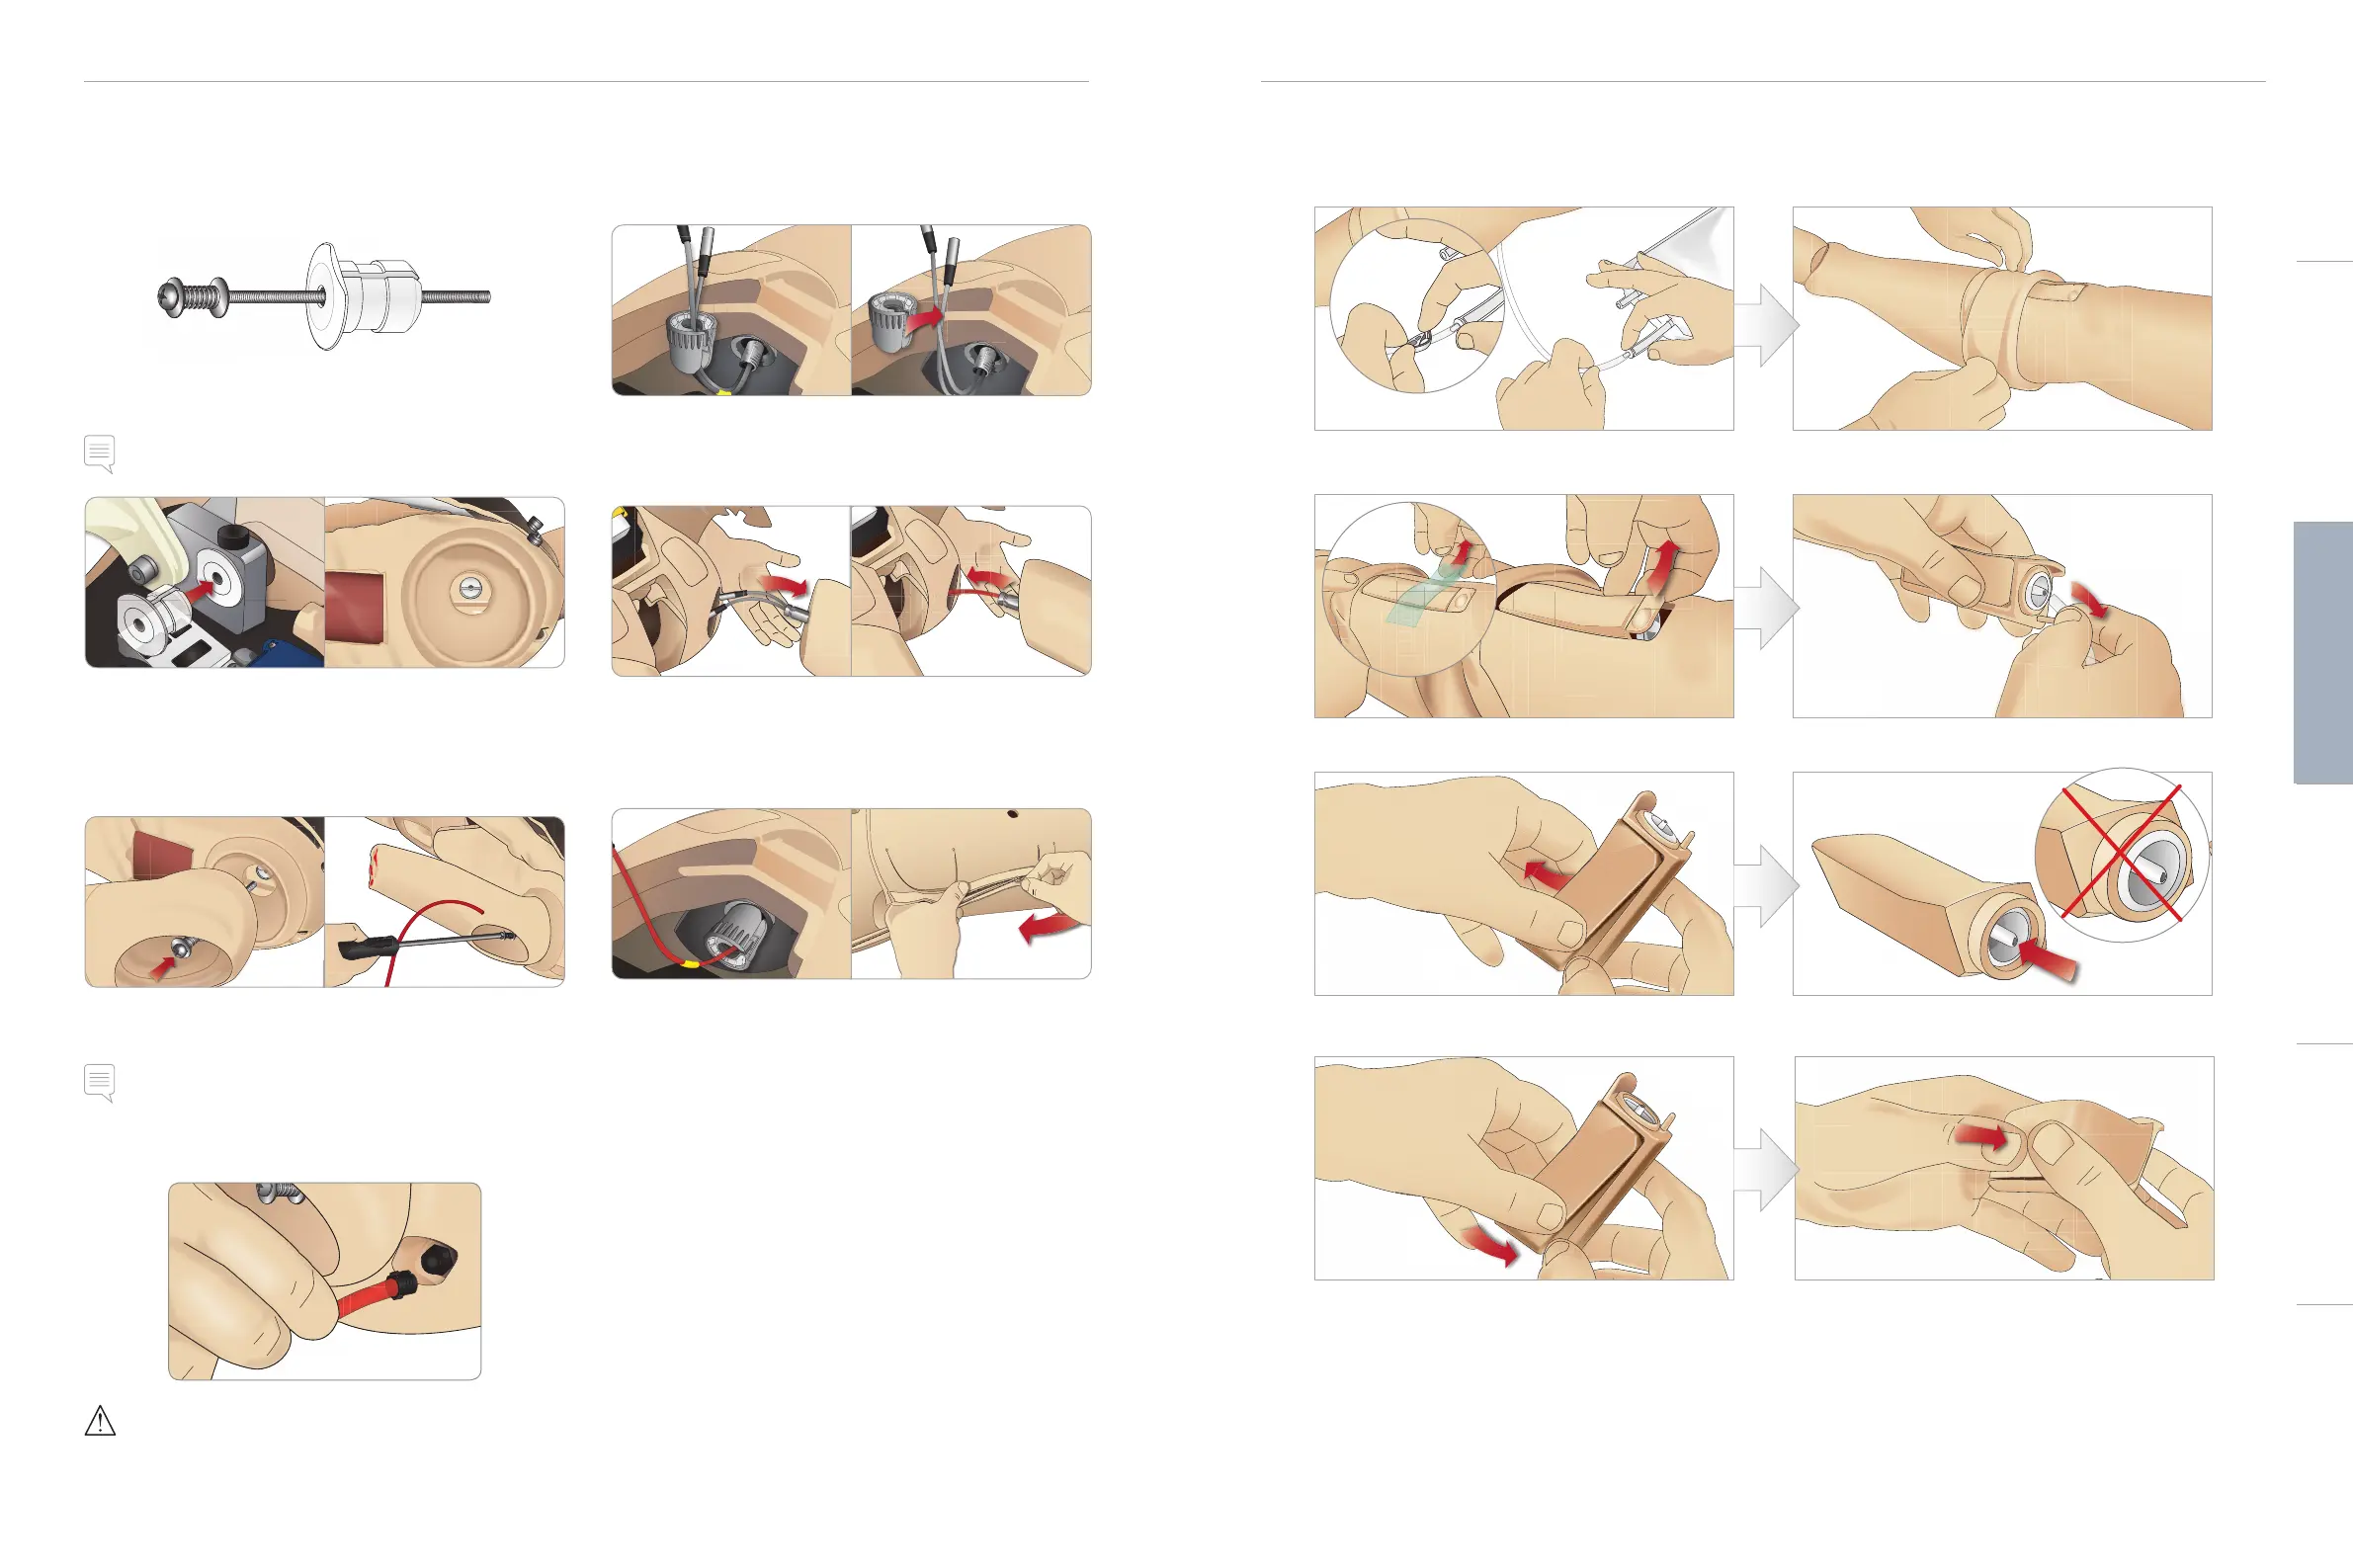
Replacing and Filling Tibial IO Module with Blood
1 Attach the Tibial IO bag to the Tibial tube and close off
the pinch clamp.
2 Roll the leg band, to expose the Tibial IO module.
3 Remove the IO tape. Then remove the Tibial IO unit
from the leg.
4 Remove the tube from the Tibial IO module.
5 Remove the Tibial IO Pad from the Tibial IO
chassis.
6 Before replacing the new Tibial IO, ensure that the
nipple is retracted in the Tibial IO Pad.
7 Fit the new Tibial IO pad into the chassis. 8 Secure the Tibial IO pad in place by pressing the rear
of the pad with thumbs until the nipple moves forward
and locks the unit in place.
Cautions and WarningsFeaturesSetupMaintenanceSpare Parts Troubleshooting