Do you have a question about the laerdal SimMan Essential and is the answer not in the manual?
States that the SimMan Essential system should be used under supervision and acknowledges potential inaccuracies in anatomical features and physiological modeling.
Directs users to the Laerdal Global Warranty or www.laerdal.com for warranty information.
Informs that US and International patents are pending for the SimMan Essential.
Specifies that SimMan Essential is made in Norway, with manufacturing details provided.
Introduces the document and its purpose in providing comprehensive instructions and illustrations for SimMan Essential functionality.
Describes the included illustrated step-by-step poster for assembling the manikin and listing spare parts, consumables, and accessories.
Explains that software help files are accessible via the SimMan Essential software help menus for instructors and system administrators.
Advises users to contact the local Laerdal Technical Service Center for technical assistance.
Emphasizes following original manufacturer's manuals and clarifies the DFU does not replace them.
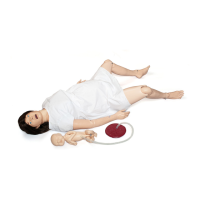
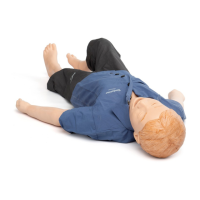
Describes the SimMan Essential as a patient simulation system for Basic and Advanced Life Support training, aiding skill assessment.
Lists key features including configurable airway, interchangeable pupils, QCPR, vascular access, and automatic simulation control.
Details the adult manikin, instructor application, and PC software programs for scenario creation and debriefing.
Explains the use of WLAN for communication between the manikin and tablet PCs, with options for LAN connection.
Mentions optional components like the Patient Monitor PC, SpO2 probe, and web-camera for enhanced simulation and debriefing.
Outlines general handling procedures, emphasizing operation by trained personnel and treating the manikin like a real patient.
Provides guidelines for maintaining manikin hygiene, including hand washing, using gloves, and using specific airway lubricant.
Warns against using colored gloves or staining materials that could discolor the manikin's skin.
Advises allowing the manikin to reach room temperature before switching it on.
Stresses the importance of securing the manikin during transport due to its weight to prevent injury or damage.
Clarifies that the system is not supplied with anti-virus programs and highlights the user's responsibility for security and updates.
States the customer's responsibility for file security and backup of simulation data according to local regulations.
Lists critical precautions for handling the manikin, including avoiding fluids, humidified air, and improper use during ventilation or in extreme conditions.
Details safety precautions for defibrillation, emphasizing correct connectors and avoiding specific conditions to prevent shock hazards and damage.
Warns about pinch hazards and sharp edges on the manikin, advising to avoid them to prevent personal injury.
Refers to the Manikin Setup section for detailed information on battery use and other battery-related procedures.
Recommends regular full servicing by qualified personnel and specifies conditions requiring immediate service, like liquid spills.
Instructs on disassembling the manikin legs from the torso and packing them into respective cases for transport or storage.
Notes that storage cases may exceed airline weight allowances and some parts might need separate transport.
Illustrates and labels key components of the SimMan Essential manikin, including speakers, connectors, power panel, and fluid fill panel.
Shows the location of the power panel and the air/CO2 panel on the manikin for easy reference.
Details procedures for opening the manikin torso, including unzipping, removing pads, and folding the skin.
Outlines procedures for attaching/detaching manikin legs and arms, and exchanging default arms for specialized ones.
Lists common maintenance tasks such as changing batteries, replacing bladders, skins, IO modules, and general inspection.
Provides step-by-step instructions and diagrams for attaching the left leg to the manikin torso.
Details the cable and tube connections for the left leg to the pelvis, including color coding and connector descriptions.
Offers step-by-step instructions and diagrams for attaching the right leg to the manikin torso.
Details the cable and tube connections for the right leg to the pelvis, including color coding and connector descriptions.
Provides step-by-step instructions and diagrams for attaching the left arm to the manikin torso.
Details the cable connections for the left arm to the torso, including labels and connector descriptions.
Offers step-by-step instructions and diagrams for attaching the right arm to the manikin torso.
Details the cable connections for the right arm to the torso, including labels and connector descriptions.
Provides step-by-step instructions with images for inserting and connecting the manikin batteries.
Lists the battery cable name/label, tube/cable color, and connector description for proper connection.
Describes the location and access to the manikin's power panel and its overview.
Explains the meaning of different LED colors for power status, battery status, and charging status.
Details the procedure for connecting the manikin to an external power supply to charge the internal batteries.
Instructs on connecting the manikin to external power for battery charging, noting the manikin does not need to be switched on.
Explains how to charge batteries using an external battery charger, including plug selection and charging time.
Provides a table detailing the indicator light colors and characteristics for the external battery charger.
Lists precautions for using, charging, transporting, and storing SimMan Essential batteries for optimal performance and safety.
Explains how to check battery status using the Instructor Application's technical status window.
Details the procedure for replacing batteries during a simulation session, emphasizing replacing one at a time.
Provides guidelines for storing and transporting batteries, including temperature recommendations and air freight compatibility.
Outlines maintenance tasks like draining batteries every 30 charge cycles and specifies expected battery life.
Lists critical warnings related to battery handling, charging, and potential hazards like explosion or damage.
Guides users through the initial setup of the SimMan Essential manikins and Instructor PC, including unpacking and connecting power.
Refers to the Manikin Setup section for assembling the manikin torso and legs after unpacking.
Instructs on connecting the manikin batteries and closing the torso skin for simulation readiness.
Details the sequence for switching on the manikin and the Instructor PC, including a waiting period for the manikin to start breathing.
Guides on starting the Patient Monitor PC, connecting the web-camera, and starting the Patient Monitor Application.
Explains how to start the Instructor PC, connect the headset, and launch the Instructor Application software.
Describes selecting a patient case or scenario to begin the simulation and notes that power cables can be disconnected once batteries are charged.
Explains the process for activating the Instructor Application license, including internet and manual activation methods.
Introduces the SimMan3G Network Configuration Tool (SNCT) for managing network behavior and refers to its help file.
Details the two ways the manikin's router can be configured: Access Point mode or Station/Client mode.
Describes the default AP mode where the manikin creates a network named SimMan3G, with WPA2/PSK-AES security.
Explains how to connect the manikin and Instructor PC to an existing network by changing the router switch to client mode.
Describes how to disable WLAN using the SNCT for environments where wireless transmission is prohibited.
Provides instructions on how to remove or change the router, including connecting Ethernet cables directly if the router is removed.
Advises contacting Laerdal representatives for instructions on turning off radio transmission in specific environments.
Explains that the Instructor PC uses the Instructor Application software, which supports Auto Mode and Instructor Mode for managing simulations.
Provides an overview of Auto Mode, directing users to help files for more information on software and system setup.
Describes the simulation control panel for monitoring and modifying pathology, and the session log for recording events.
Explains the use of the 'All learner events' menu for registering events not listed under 'Common learner events'.
Details the 'Performance' window for viewing learner ventilation and compression effectiveness, either as an average or in real-time.
Describes the 'Instructor's Patient Monitor' window for displaying the patient's vital signs throughout the simulation.
Explains the 'Airway Status' window for real-time animation of the patient's airway and symptom list.
Describes the 'Neurology' status list for patient position on the Glasgow Coma Scale and Visual Analog Scale, including eye animation.
Explains the 'Circulation & Fluids' tab for controlling pulses and bleeding information.
Details the 'Body Sounds' button for accessing sound settings for heart, bowel, and lungs.
Describes the 'Technical Status' window for monitoring the manikin system's technical status, including battery life and connectivity.
Lists learning objectives and required events for a scenario, allowing instructors to record learner actions in the Session Log.
Explains how Simulation Control manages pre-programmed aspects and how the Session Log records patient responses and learner events.
Describes the menu for registering all available learner events, with common events listed for easier access.
Details the 'Performance' window for assessing learner effectiveness in ventilation and compressions during simulation.
Explains how to monitor and directly adjust patient monitor waveforms and parameters in Instructor Mode.
Describes the 'Eyes' window for configuring the state of the patient's eyes, including animation and blinking frequency.
Details the 'Airway/breathing' tab for configuring airway and breathing settings and status.
Explains how to use the 'Circulation & fluids' tab to control pulses and configure fluid settings.
Describes the 'Sounds' tab for controlling body sounds and vocal sounds from the manikin.
Explains the 'Technical Status' window for monitoring system technical details like battery life and connectivity.
Presents two view options for simulation: 3G View for SimMan Essential scenarios and Classic View for older versions.
Guides users through launching the Instructor Application, selecting a manikin, and opening a patient case from the library.
Explains how to start or pause a simulation using the spacebar or the 'Start session'/'Pause session' button.
Instructs instructors to monitor and adjust patient status using master controls, including severity sliders and restore buttons.
Identifies areas displaying patient status: Simulation control graph, timer, Instructor's Patient monitor, and Airway status window.
Guides instructors on registering learner events using 'Common Learner Events' or the 'Learner Events menu'.
Explains the 'Common Learner events' window for listing required events and registering learner performance with a check-mark.
Describes the Learner Events Menu for registering events by clicking manikin body parts or using an event search function.
Details how to launch the Instructor Application and select a manikin to start a simulation in Instructor Mode.
Guides on browsing the scenario library, selecting a scenario, and starting or pausing the session.
Instructs instructors to monitor patient status, simulation progress, and adjust trends using the Simulation control graph.
Explains how to manually adjust patient parameters via pop-up menus or using the scroll wheel on numeric parameters.
Guides on registering learner events using 'Common Learner events' or the 'Learner Events menu'.
Describes using the Voice Conference Application to communicate with learners and respond via microphone.
Instructs on how to end a simulation session using the 'End session' button.
Guides on saving session logs for debriefing and starting the Debrief Viewer.
Details the steps to start the Patient Monitor Application, including selecting the manikin.
Shows an example of the Patient Monitor interface, displaying various vital signs and parameters.
Explains the functions of the top menu, including display settings, alarm volume, and parameter readout area.
Describes the functions of the second set of bottom menu buttons, such as QRS Volume, Alarm Volume, Radiology, Media, and Labs.
Details the controls in the first bottom menu, including Silence Alarm, Pause Alarms, Start/Stop, Zero Press, Cardiac Output, Wedge, TOF, and Graph Trends.
Guides on how the instructor can make media files (radiology, video, lab reports) available to learners during a session.
Explains the options for displaying media files immediately or after a selected time delay.
Describes how learners can order radiology, media, or labs through the Patient Monitor Application.
Introduces the Voice Conference Application for two-way vocal communication, adding realism to simulations.
Details ways to access the application, including from an open simulation or via the Windows Start menu.
Explains the ON/OFF button, microphone button (SPEAK), and loudspeaker volume adjustment for voice communication.
Describes how to add instructor channels for communication among instructors and add members to these channels.
Introduces the Debrief Viewer tool for reviewing saved simulation sessions, including session logs, patient monitor video, and microphone inputs.
Outlines two methods to access the Debrief Viewer: from the Instructor Application after ending a session or from the Windows Start menu.
Explains the process for converting SimMan Scenarios from previous versions to be compatible with SimMan Essential.
Guides users on how to access software help files via the Windows Start menu and the F1 key within applications.
Explains that the manikin's movement and systems are driven by compressed air, with an internal compressor in the right leg.
Advises on cooling the manikin and avoiding covering it to prevent overheating and reduce wear.
Details how to switch off the internal compressor from the Instructor Application to conserve batteries and reduce wear.
Explains that default compressor settings can be changed via the Profile Editor.
Indicates the location of the Air/CO2 panel on the manikin's left torso side and how to access it.
Provides instructions for connecting external compressed air and CO2 sources to the manikin for extended use or specific simulation needs.
Introduces the IV Arm for SimMan Essential, stating the manikin must be switched ON for its use.
Illustrates the IV Arm with skin, highlighting the filling/priming port, priming switch, IV Arm Pad, and drain tube.
Illustrates the IV Arm without skin, showing the filling/priming port, priming switch, tourniquet area, IV Arm chassis, and drain tube.
Describes the IV Arm Pads' capability for multiple insertions and suggests optimal insertion points to maximize pad life.
Provides detailed step-by-step instructions with diagrams for filling and priming the IV arm system with simulated blood.
Guides on how to remove and replace the IV Arm Pad, ensuring it is pressed firmly into place.
Instructs on refilling the IV arm with blood if veins do not respond, emphasizing slow filling to avoid leaks.
Provides step-by-step instructions for cleaning the IV Arm system after each session and before storage using water and air.
Lists solutions for when the IV arm veins do not energize, including checking connections, reservoir levels, and pressure.
Addresses problems with fluid visibility in the drain tube during injection and issues with injecting more than 16ml of fluid.
Provides solutions for leaks between the IV Arm Pad and chassis, and issues with flashback during catheter insertion.
Guides on how to remove, replace, and fill the Tibial IO module with simulated blood.
Continues instructions for installing the Tibial IO module, including filling with blood and securing the skin.
Lists tested and approved devices for use with the Tibial IO module, such as the BIG Automatic Intraosseous Device and Jamshidi needles.
Explains how to change the default neutral genitalia pad for male or female pads to simulate urine flow and catheterization.
Provides step-by-step instructions for removing the current genitalia pad and connecting the new module.
Describes the location and function of the right leg fill panel for filling fluid reservoirs.
Details the procedure for filling the manikin's fluid reservoir using the fill panel and fluid fill unit.
Explains how to empty the manikin's internal fluid reservoir by connecting an empty fluid fill unit.
Guides on filling the manikin with external fluid after draining the internal reservoir, and charging the system.
Provides instructions for cleaning the fluid system using an isopropanol solution to prevent clogging.
Instructs on fitting adapter plates onto the torso stud connectors for defibrillator cables before use.
Details how to fit foam pads around the defibrillator studs for sessions involving live defibrillation.
Outlines critical safety precautions for defibrillation, including using correct connectors and avoiding specific conditions to prevent hazards.
Guides on connecting the specially adjusted blood pressure cuff to the manikin's white BP connector.
Explains how to calibrate the blood pressure cuff using the BP cuff calibration wizard accessed via the Tools menu.
Details how to connect the SpO2 probe to the Patient Monitor PC and place it on the manikin.
Provides instructions for replacing the default soft upper teeth with a hard set for enhanced realism during intubation practice.
Guides on changing the manikin's irises using a suction wand to simulate different clinical states, with instructions to stop blinking function first.
Lists the manikin's dimensions, weight, and notes the default male body with interchangeable genitalia pads.
Details configurable features like genitalia pads, teeth, and the mobility of various joints on the manikin.
Describes the manikin's custom-designed clothing, including shirts, trousers, and boxer shorts with zippers for easy removal.
Explains how to simulate clothing removal by unzipping the full-length zippers found along the seams.
Describes the anatomically correct airway and how learners can manipulate it, including techniques like head tilt and jaw thrust.
Lists suitable airway adjuncts and methods for securing the manikin's airway, such as Laryngeal mask airways and endotracheal tubes.
Identifies features that indicate incorrect tube placement, like right main stem intubation, stomach distention, and lack of chest sounds.
Explains how airway features can be configured to simulate various scenarios, including obstruction levels and edema.
Details how to set left lung resistance to simulate obstruction, correlating 'Off' to resistance 0 and 'On' to resistance 3 in the scenario editor.
Explains how to activate or deactivate stomach distention and allow trapped air to exit.
Describes how to enable or disable CO2 exhalation, noting the requirement for an external CO2 reservoir.
Explains how to simulate tongue fallback, which occurs unless head tilt or jaw thrust is applied.
Details the Airway/breathing tab for configuring patient breathing status and settings.
Lists the manikin's breathing simulation capabilities, including chest rise, breath sounds, and CO2 exhalation.
Outlines optional breathing parameters displayable on the patient monitor, such as SpO2, awRR, and CO2 levels.
Provides specifications for the manikin's lungs, including max tidal volume and airway pressure limits.
Explains how to simulate tension pneumothorax with needle decompression, noting bladder piercing limits and recommended needle gauge.
Describes how to simulate chest tube insertion at specific intercostal spaces on the manikin.
Lists replaceable parts for the thorax, including lung bladders, pneumothorax bladders, and chest drain modules.
Details the manikin's cardiac features, including ECG library, heart sounds, ECG monitoring, pacing, and defibrillation capabilities.
Explains that defibrillator energy level and waveform are registered, and sets energy levels for automatic conversion.
Lists circulation features like BP measurement, synchronized pulses, and pulse palpation detection.
States CPR compliance with guidelines and describes how compressions generate palpable pulses, waveforms, and are monitored for depth and frequency.
Lists circulation parameters displayed on the patient monitor, including ECG, heart rate, NBP, ABP, PAP, and C.O.
Lists temperature parameters (TPeri, Tblood) displayed on the patient monitor.
Describes the Circulation & Fluids tab for controlling pulses and selecting settings like Normal, Weak, or Absent.
Explains how to use the 'Sounds' tab to control body sounds and vocal sounds from the manikin.
Lists options for heart sounds, including normal, murmurs, and pericarditis, selectable from a dropdown menu.
Lists options for left and right lung sounds, such as normal, stridor, crackles, and pneumonia, selectable from dropdown menus.
Lists options for bowel sounds, including normal, hyperactive, hypoactive, and various types of ileus or diarrhea.
Describes accessing advanced sound controls for fine-tuning sound settings and volumes for each speaker.
Explains how to use 'Auscultation Focus' to temporarily disable mechanical noise for 30 seconds.
Details how the manikin can vocalize sounds automatically or through instructor interaction via the loudspeaker.
Explains how to set the eyelid status to Closed, Half open, Wide open, or combinations of open/closed eyes.
Describes how to configure the blinking frequency of the manikin's eyes, with options from Off to 1 both.
Guides on manually registering administered drugs and concentrations via the Instructor Application's Register Drug dialog.
Details the steps for selecting drug categories, finding drugs via quick search, and selecting administration routes.
Identifies vascular access points, including the left tibia for intraosseous access and the right buttock for intramuscular injections.
Mentions the IM injection pad located under the torso skin on the right buttock.
Lists preventive measures required after each session to ensure the manikin's longevity.
Instructs to flush the IV arm system with 60% Isopropanol alcohol after each session where it was used.
Advises powering off the manikin and PCs and charging batteries if necessary.
Guides on wiping the skin with a moist cloth to remove stains and cleaning glue residue from wound modules.
Lists single-use modules like cricothyrotomy tape, chest drain pleura, and IO-modules that may need replacement.
Lists multiple-use modules such as IV-catheters, bladders, skins, and the urine tank that may require replacement.
Instructs to flush the IV arm and clean the blood system before storage or shipping, and detach/pack the manikin's legs.
Explains that SimMan 3G software comes pre-installed and guides on downloading and installing updates from Laerdal.com.
Details prerequisites for PC setup, including powering on computers and ensuring no SimMan applications are running.
Provides step-by-step instructions for updating the manikin's software via a wired network connection, emphasizing not switching off the manikin during the process.
Explains how the Update Manager Report displays the status of software updates for various manikin components.
Offers solutions for common software update issues, such as component update failures or the 'Some problem occurred' message.
Guides on replacing the crico tape and neck skin after creating an emergency airway, ensuring a proper seal.
Instructs on replacing the chest drain module's pleura skin after each session of use.
Details how to replace pneumothorax bladders after multiple decompressions, including disconnecting tubes and inserting new bladders.
Guides on replacing chest rise bladders located in the chest plate assembly, including disconnecting tubes and inserting new ones.
Lists the tube color and connector description for the chest rise bladders (Pneum L/R, Chest L/R).
Provides step-by-step instructions for replacing lung bladders if leaking occurs, including opening the chest plate and ensuring correct band placement.
Explains when and how to replace manikin skins that are torn, perforated, or stained, including powdering for reduced friction.
Addresses issues with lost data or total system failure, advising to contact Laerdal Service Center.
Details common causes and solutions for lost WLAN connectivity, including interference and configuration checks.
Provides troubleshooting steps for when the manikin works via LAN but not WLAN, including checking security keys and dongle settings.
Advises on ensuring unique SSID names for multiple manikins and refers to the Wireless and LAN configuration section.
Addresses issues with the instructor microphone not picking up sound, suggesting checks for headset connection, device selection, and mute status.
Offers solutions for instructor microphone issues, including unplugging/replugging the headset and checking sound device settings.
Provides troubleshooting steps for missing video capture in the debrief viewer, checking web-camera connection and settings.
Advises checking for loose cables, tubes, or connectors, and contacting service for fluid leaks or unpredictable behavior.
Explains how to clean contaminated manikin airways and advises against mouth-to-mouth rescue breathing or disinfection.
Lists potential causes for no chest rise, including power status, sleep mode, valve settings, airway complications, and compressor issues.
Addresses lack of motion in the legs, suggesting loosening and readjusting hip joint nuts.
Provides solutions for lung malfunction, including checking airway resistance, cable restrictions, bladder connections, and for flaws.
Suggests using the 'auscultation focus' feature in the Instructor Application to mitigate mechanical noise.
Offers solutions for short battery life, including checking battery age and potential compressor malfunction.
Suggests readjusting skin and rebooting if pedal pulses cannot be felt.
Provides solutions for non-functioning pneumothorax bladders, primarily checking tubing connections.
Explains how to force shutdown the manikin by pressing and holding the ON/OFF button for 10 seconds.
Lists key physical and power specifications for the manikin, including dimensions, weight, and power requirements.
Specifies the minimum software requirements for using the SimMan Essential, including operating systems and .NET framework.
Lists acceptable cleaning fluids (Isopropanol alcohol) and simulated IV fluids (purified water) for the manikin.
Lists minimum hardware specifications for tablet PCs used with the SimMan Essential system.
Provides FCC statement regarding compliance with Part 15 of FCC Rules and cautions about modifications.
Details the FCC compliance statement and cautions regarding interference and user authority.
Explains WEEE marking and proper disposal procedures for the appliance to prevent negative environmental and health consequences.
Advises that Li-ion batteries should be recycled according to local regulations.
Lists consumable items for the SimMan Essential, such as bladders, drain kits, and skin sets.
Lists the soft cases designed for transporting and storing the manikin torso and legs.
Lists required PC hardware and accessories, including Instructor PCs, Patient Monitors, and webcams.
Lists various power cords, external battery chargers, and power supplies for the system.
Lists individual manikin components that can be replaced, such as adapters, bushings, connectors, and batteries.
Lists accessories used for clinical procedures, like BP cuffs, defib adapters, and SpO2 probes.
Lists software licenses and tools, such as the Instructor Application license and arm replacement tools.
Lists available support materials, including the Directions for Use manual and the Quick Setup Guide poster.
| Category | Medical Equipment |
|---|---|
| Product Name | SimMan Essential |
| Type | Patient Simulator |
| Manufacturer | Laerdal Medical |
| Wireless Operation | Yes |
| Airway Management | Yes |
| CPR Feedback | Yes |
| ECG | Yes |
| SpO2 | Yes |
| Blood Pressure | Yes |
| Breathing Sounds | Yes |
| Heart Sounds | Yes |
| Pulse Points | Yes |
| IV Arm | Yes |
| Catheterization | Yes |
| Defibrillation | Yes |
| Pacing | Yes |
| Seizures Simulation | Yes |
| Wireless Control | Yes |
| Connectivity | Wi-Fi |