26 27
SETUP
SETUP
Changing Genitalia Modules
The SimMan 3G is shipped with a neutral genitalia pad as its default.
The pad can be exchanged for a male or female genitalia pad with
urine catheter to simulate urine flow and catheterization.
Note: The Patient Simulator legs do not need to be removed
before the genitalia pad can be replaced.
1 Remove the Patient Simulator’s genitalia pad by gripping the pad
at the top and pulling forward and down.
2 Disconnect any tubes or cables.
3 Connect the new genitalia module’s urine tube and the
catheterization sensor cable from inside the Patient Simulator
pelvis to the urine bladder module.
4 Place the new genitalia module back into the Patient Simulator’s
pelvis.
Inserting Urine Catheter
Always use a water based lubricant liberally when inserting a urine
catheter.
Use the following catheter sizes:
Female genitalia – Foley 14Ch and Lofric 16Ch
Male genitalia – Foley 16Ch and Lofric 16Ch
Changing the Upper Dentures
The SimMan3G Patient Simulator comes with a set of soft upper
teeth as default. The soft set may be replaced with a hard set of
teeth.
1 Remove the teeth from the mouth.
2 Align the new set of teeth with the gums and push them back
until the teeth engage and lock onto the gums.
3 Ensure that the new set of teeth is properly aligned with the
gums before pushing them into places.
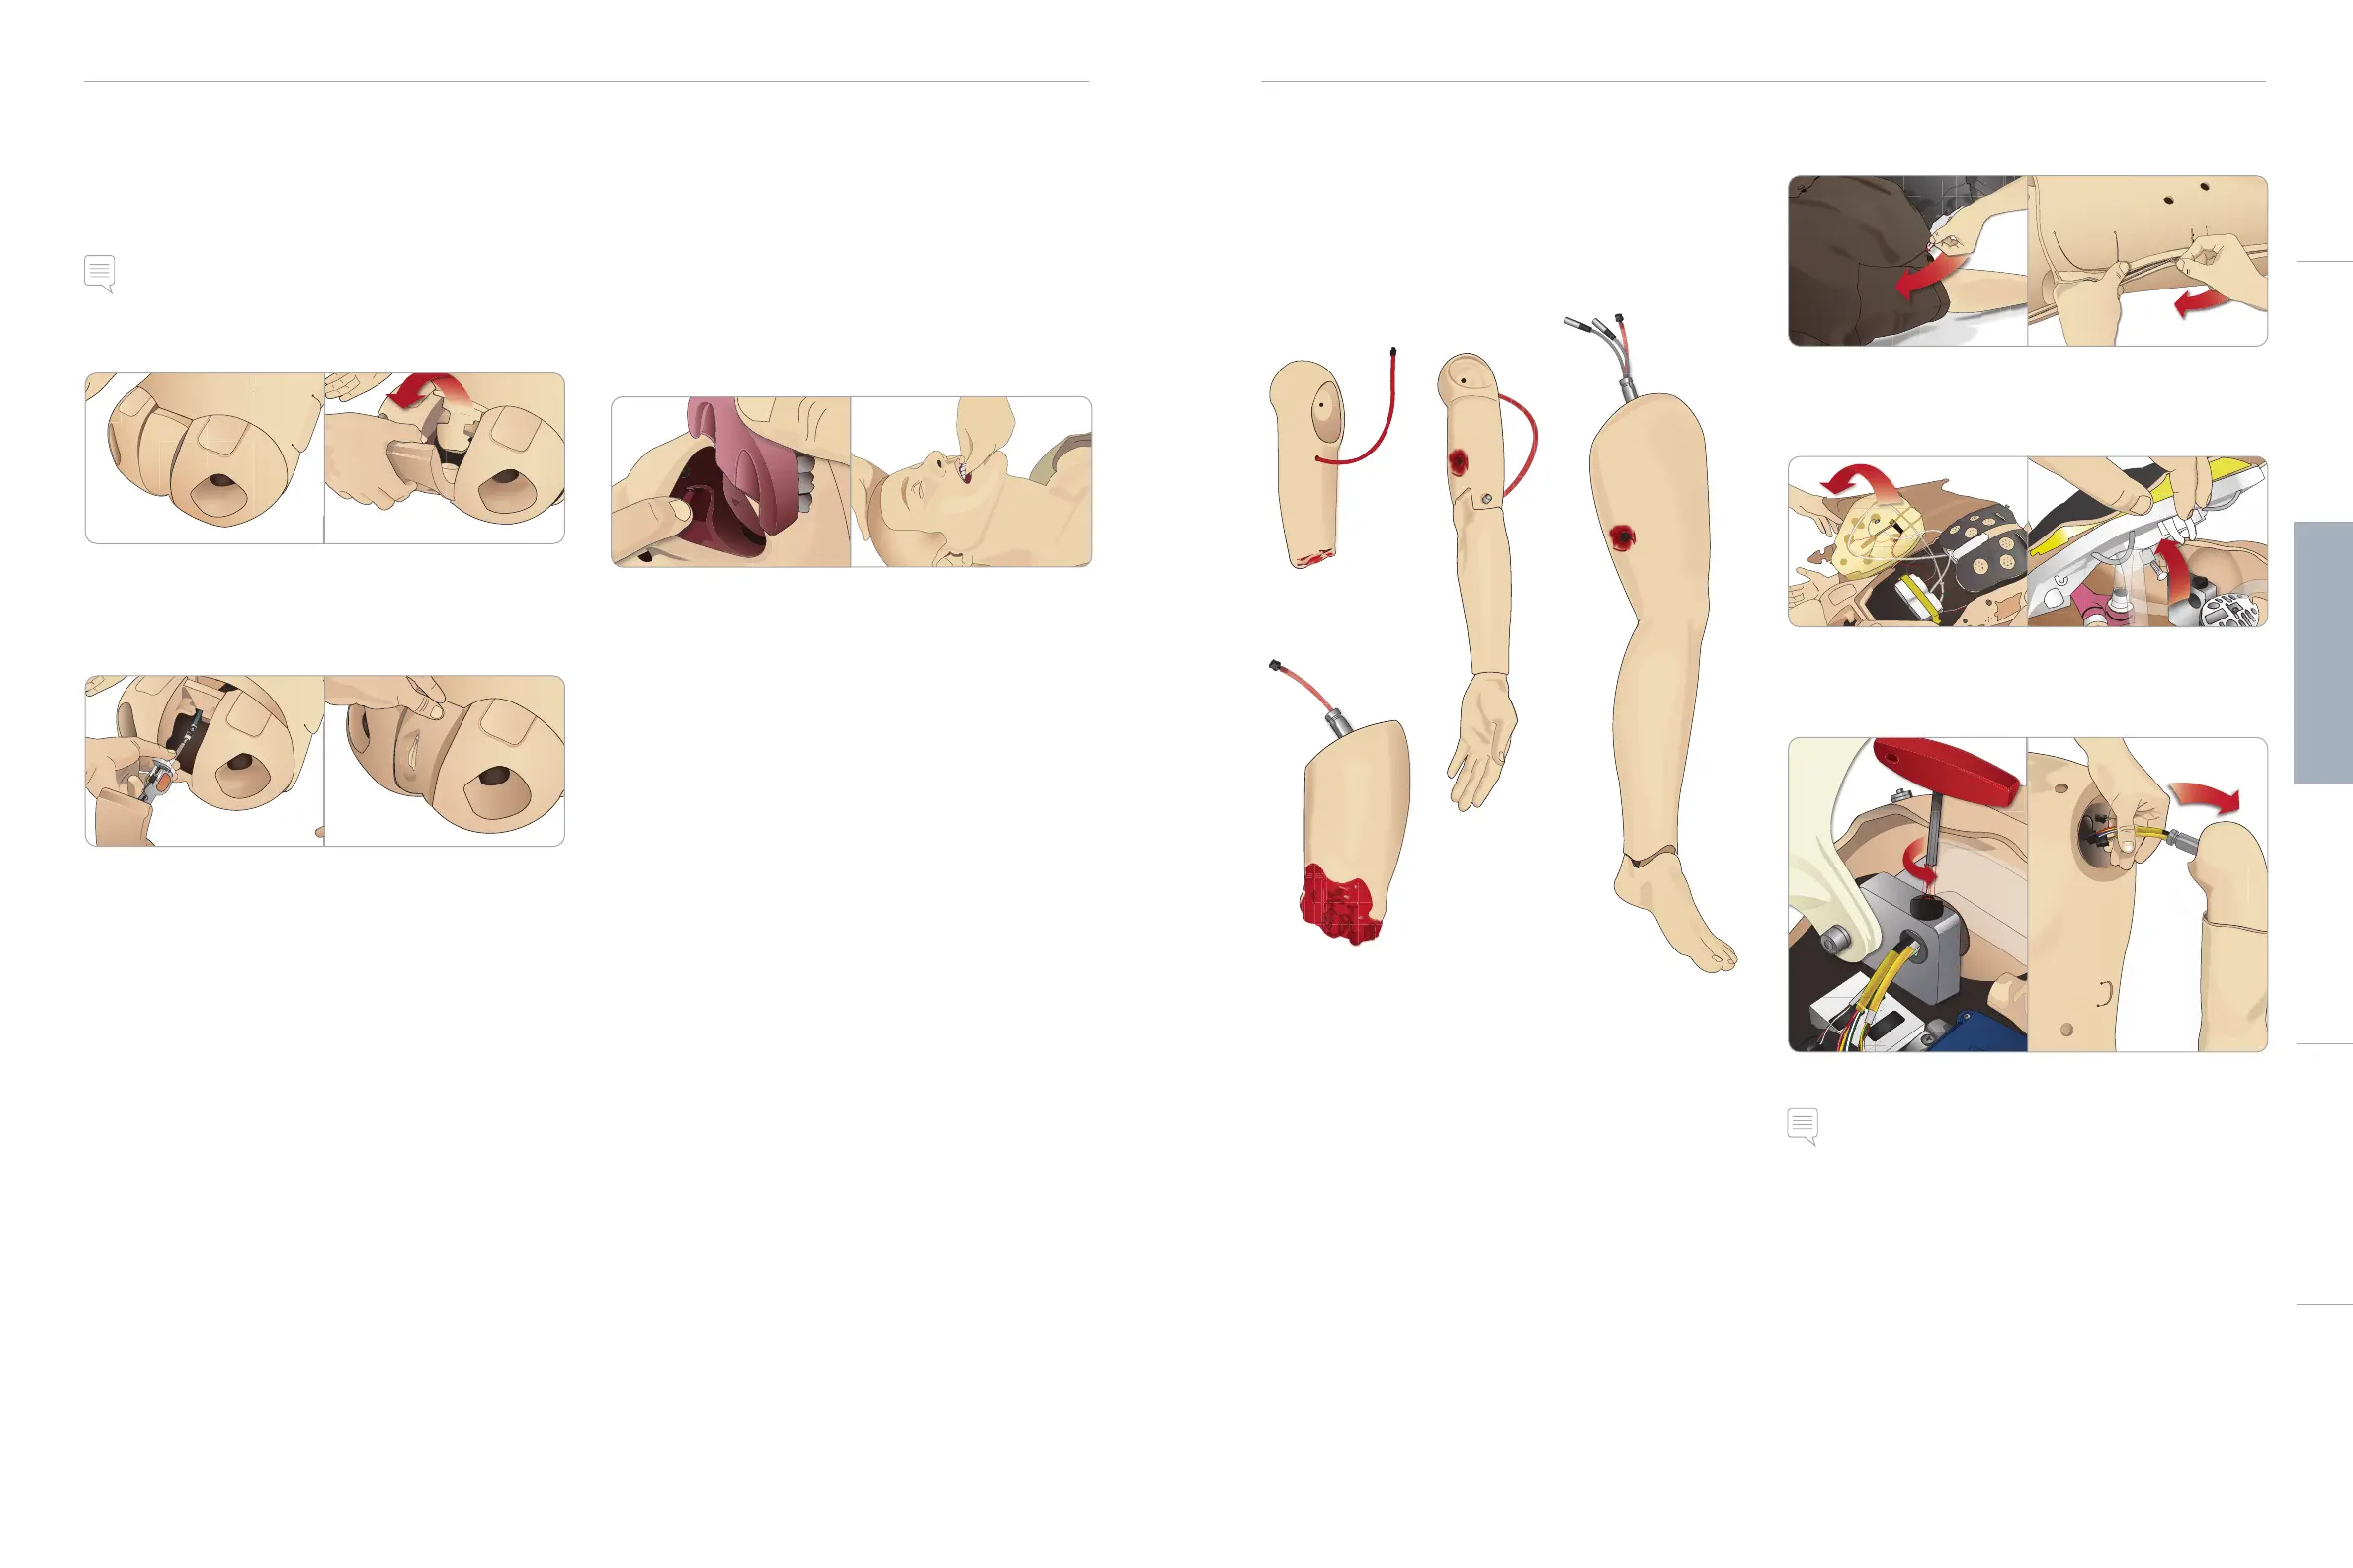
Bleeding Modules (Optional)
Introduction
The SimMan 3G Bleeding Module kit includes trauma modules which
can be fitted to SimMan 3G to simulate bleeding patient cases. After
the simulation is completed, leave the trauma modules connected,
and perform the cleaning instructions as stated in Maintenance.
– Amputated Arm SimMan 3G
– Gunshot Arm SimMan 3G
– Amputated Leg SimMan 3G
– Gunshot Leg SimMan 3G
Removing SimMan 3G Left Arm
1 Unzip the clothing zippers on the right side. Remove the shirt.
2 Unzip the zippers on the left side of the torso. Open the Torso
Skin to one side.
3 Open the Stomach Foam to one side.
4 Lift the hinged chest plate to access the arm bolt.
5 Unscrew the left Arm Screw with the allen key and disconnect
all Arm cables.
6 Remove the arm with cables from the arm socket.
Note: Do not unscrew the Arm Screw fully.
Cautions and WarningsFeaturesSetupMaintenanceSpare Parts Troubleshooting