36 37
MAINTENANCE
MAINTENANCE
Left Leg to Pelvis – Cable and Tube Descriptions
Name/Label Tube/Cable Color Connector Description
Left Pedal Grey cable black with silver
coloured connector
Popliteal Grey cable black with silver
coloured connector
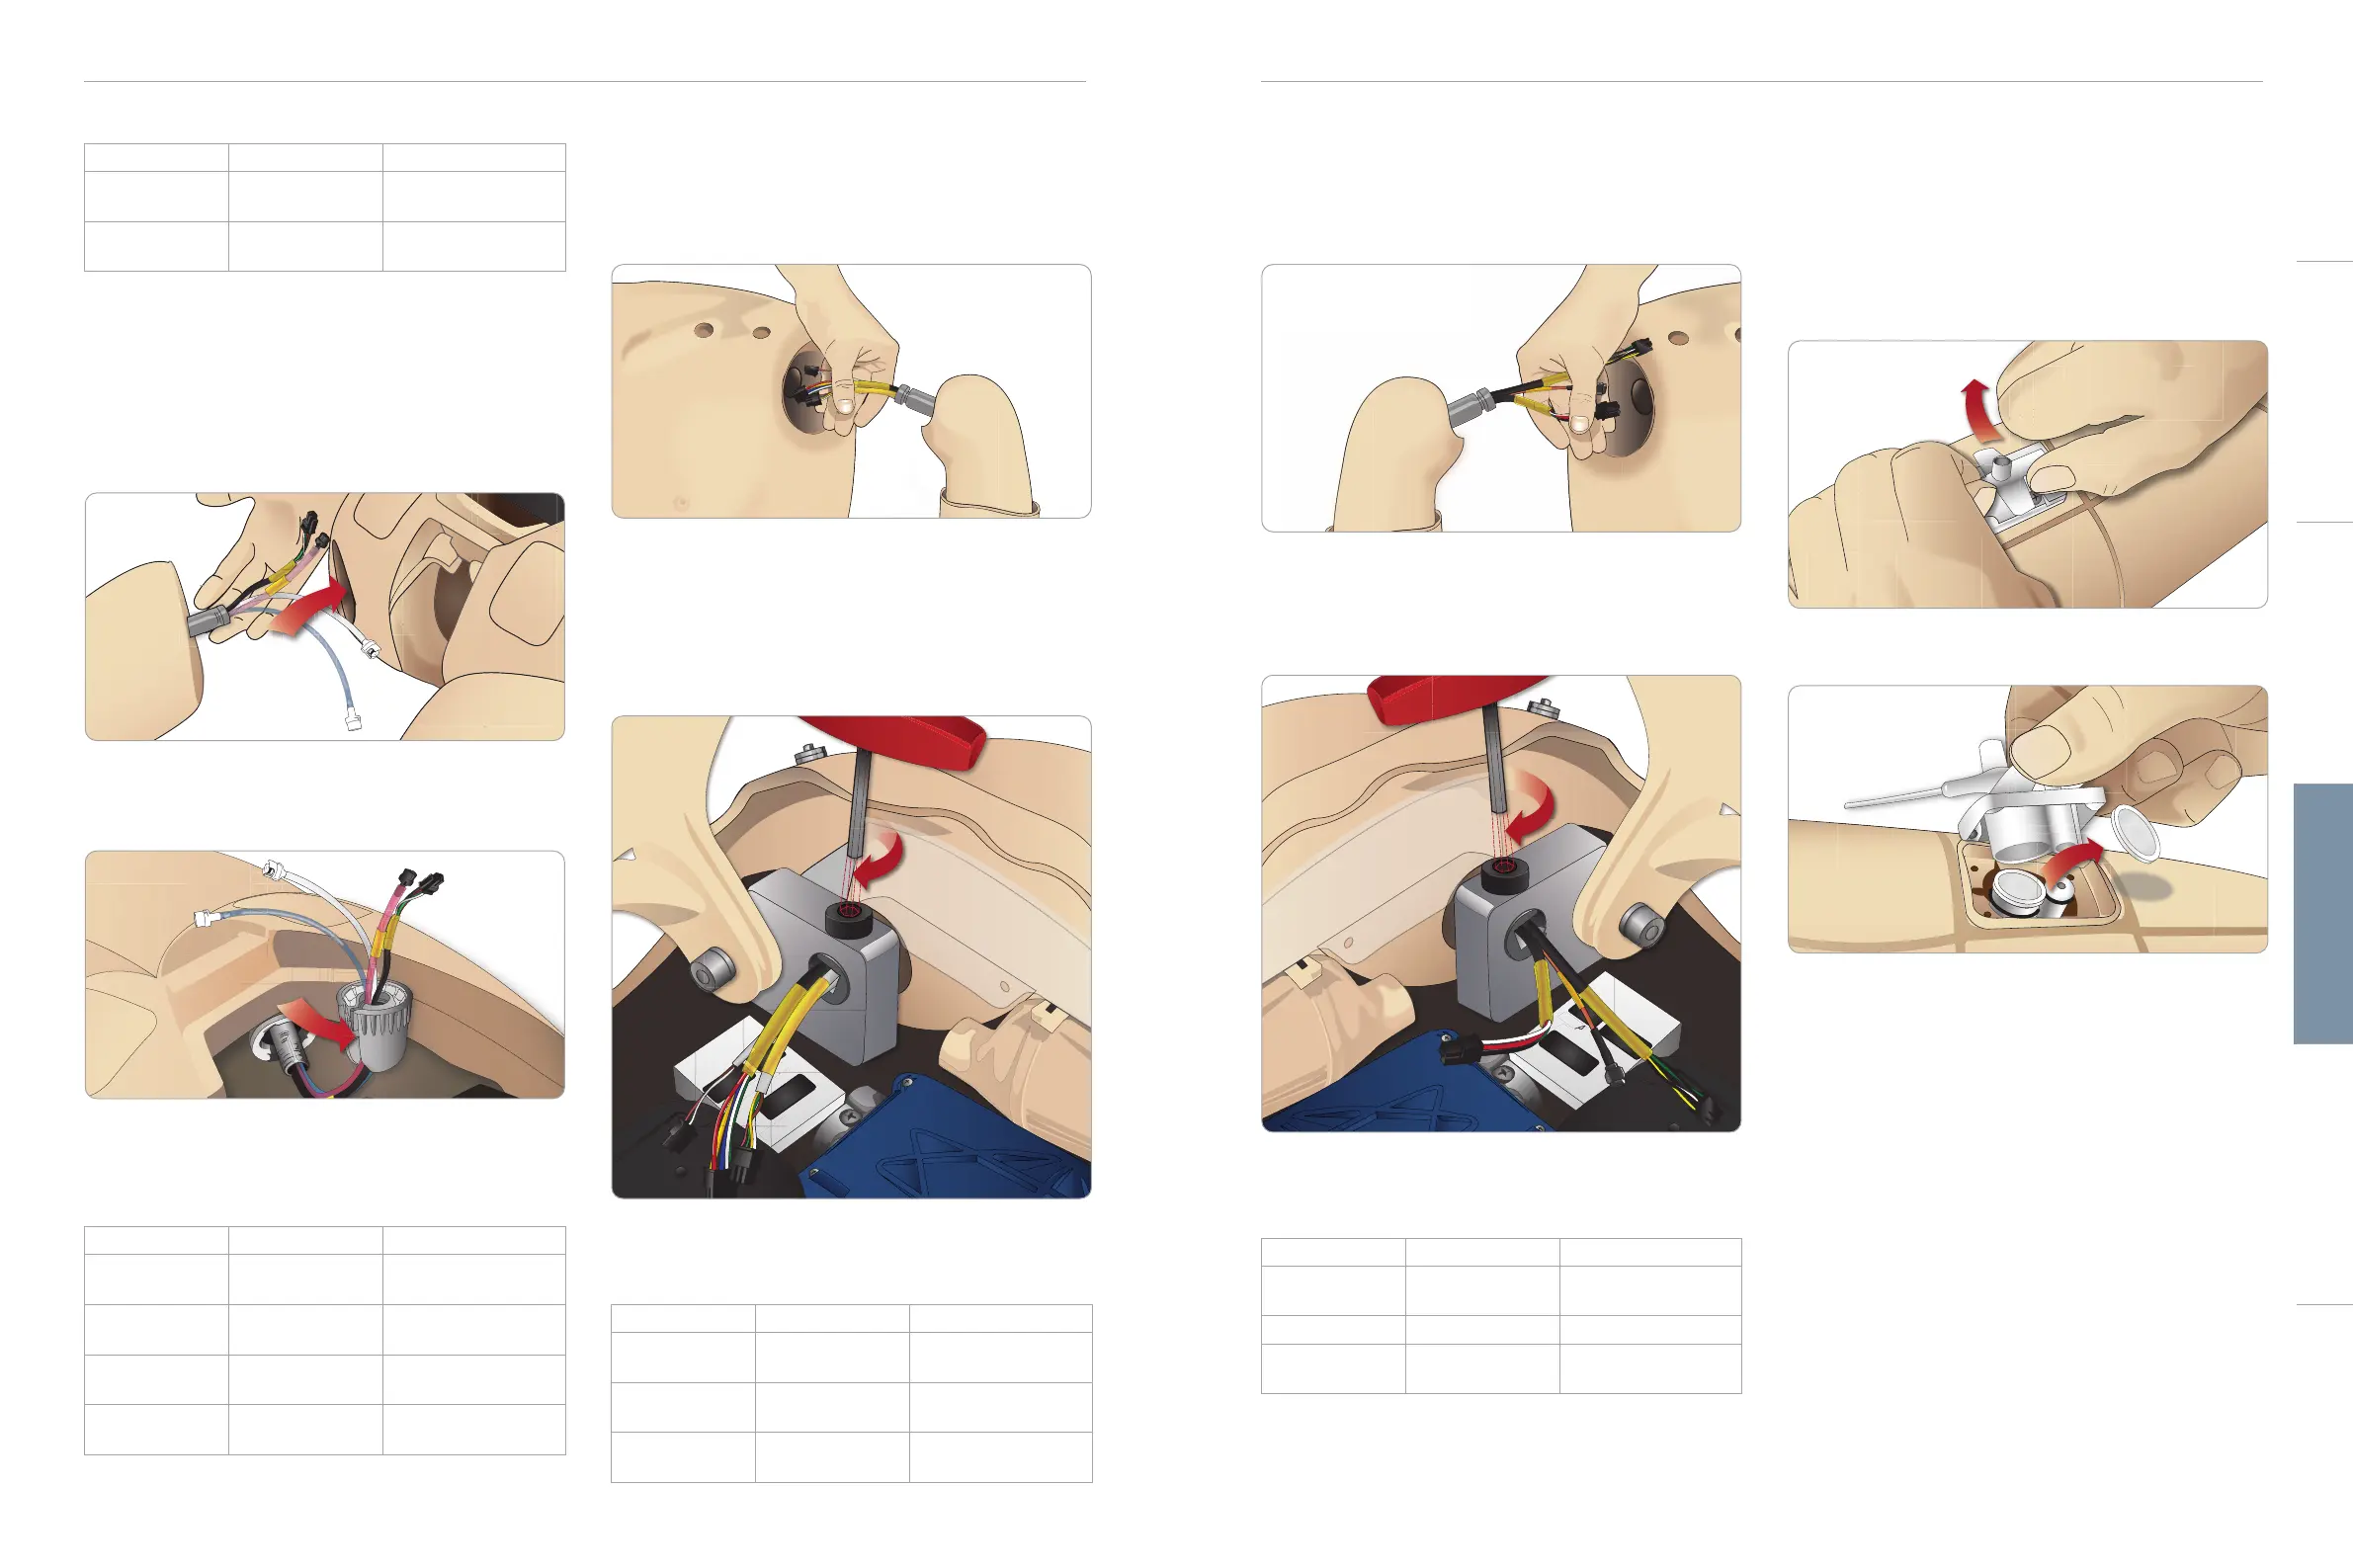
Attaching the Right Leg
Please take the same precautions as when attaching the left leg.
1 Align the right leg bolt and cables with the pelvis socket. Feed
the leg bolt and cabling through the pelvis socket.
2 Carefully push the leg in towards the pelvis to form a snug fit.
3 Secure the cables and tubes in the connector. Screw the
connector in place on the leg bolt.
4 Connect the corresponding tubes and cables as shown in the
table below:
Right Leg to Pelvis – Cable and Tube Descriptions
Name/Label Tube/Cable Color Connector Description
Blood Right leg Transparent, red
tube
Black twist and lock
connector
Right leg Black harness cable Black rectangular
connector, 4 lead
Fluid from leg Tube, blue White twist and lock
connector
Air from leg Colourless
transparent tube
White twist and lock
connector
Attaching the Left Arm
Open the torso as described in steps 1 - 4, Opening the Torso.
Follow the procedures listed below in reverse to detach the arms.
1 Align the left arm axle with the shoulder socket.
2 Ensure that the shoulder screw is loose enough to allow the arm
axle to slide easily into place.
3 Feed the cables from the arm axle through the shoulder socket.
4 Carefully push the arm axle into the shoulder bracket, so that
the axle is flush with the inside of the bracket.
5 Tighten the shoulder screw with the Allen wrench.
6 Connect the arm cables to the corresponding connection points
in the torso.
Left Arm to Torso – Cable and Tube Descriptions
Name/Label Tube/Cable Color Connector Description
LA Pulses Grey cable Black rectangular
connector, 6 lead
BP Grey cable Black rectangular
connector, 2 lead
LA Conv Black harness cable Black rectangular
connector, 8 lead
Attaching the Right Arm
Open the torso as described in steps 1 - 4, Opening the Torso.
Follow the procedures listed below in reverse to detach the arms.
1 Align the arm axle with the shoulder socket.
2 Feed the cables from the arm axle through the shoulder socket
3 Push the axle into the bracket until it is flush with the inside of
the bracket.
4 Tighten the shoulder screw with the Allen wrench.
5 Connect the corresponding cables as shown below.
Right Arm to Torso – Cable and Tube Descriptions
Name/Label Tube/Cable Color Connector Description
Right Arm Black harness cable Black rectangular
connector, 4 lead
Jaw Ant Coax Round silver connector
To LA Conv Black, insulation Black rectangular
connector, 8 lead
Replacing IV Arm Catheter/Filter
Replace the IV catheter module if it is damaged or if resistance is
unrealistically high when injecting fluids.
1 Unzip and fold down the IV arm skin to expose the IV catheter
module
2 Using the no. 4 Phillips screwdriver; remove the 4 screws and
pull the IV module out of the arm.
3 Lift the IV catheter up and out, exposing the recess where the
filter is located.
4 Lift out the IV filter and replace with a new filter.
Cautions and WarningsFeaturesSetupMaintenanceSpare Parts Troubleshooting