5
Installing an Ice maker (if necessary)
Wheninstallinganicemakeronthedispenser,usea
bin thermostat to control the ice level (see below). This
will prevent damage to the dispensing mechanism. The
bracketformountingathermostatislocatedintheice
bin. During the automatic agitation cycle and while
dispensing ice, ensure there is adequate space be-
tween the top of the ice level and the bottom of the ice
makersotheicecanmovewithoutobstruction.Con-
tactyouricemakermanufacturerforinformationona
suitable bin thermostat.
! ATTENTION
1. Install the ice maker per manufacturer specications. Points
of consideration include drainage, ventilation, and drop
zones.
2. An adapter plate is required when installing an ice maker.
Contact your Sales Representative or Lancer Customer
Service for more information.
3. A bin thermostat is required in order to control the level of ice
in the dispenser (Refer to ATTENTION above). Contact your
ice maker manufacturer to obtain the correct bin thermostat.
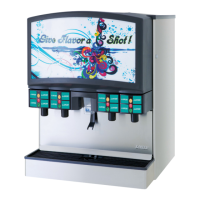
4. Bin thermostat should be a minimum of 2” below the top
edge of the dispenser. The preferred location of the bin
thermostat is on the left side wall.
Failure to use an ice bin thermostat will not only void
your IBD’s warranty but will result in the inability to
control the level of ice in the ice bin which can cause
damage to your dispenser.
! ATTENTION
4”
Attach Bin Stat Bracket As Shown Recommended Bin Stat Attachment
Bulb Tube
5. Ensure the ice maker is installed properly to allow for remov-
al of the Merchandiser.
6. Ensure manual ll is accessible.
7. Clean and maintain ice maker per manufacturer’s
instructions.
Dispenser Installation
The installation, and relocation if necessary, must
becarriedoutbyqualiedpersonnelwithup-to-date
knowledgeandpracticalexperience,inaccordancewith
current regulations.
NOTE
1. Remove the cup rest, drip tray, splash plate, and top cover
from the unit.
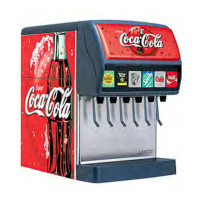
2. Remove the merchandiser by removing the two (2) screws
located on the faucet plate (from left to right) above the third
(3rd) and sixth (6th) valve.
3. Route appropriate tubing from the water source to the plain
water inlet at the front of the unit and connect tubing to inlet
using the oetiker pliers and ttings,(see Plumbing Diagrams
on the front of the unit or on pages 14-16 for reference).
A
B
C
A. Oetiker Pliers
B. Fitting
C. Tubing
D. Syrup/Water Inlet
D
4. Connect tubing to water source then ush water lines to
check for leaks.
5. Route appropriate tubing from the remote pump location to
the carbonated water inlet at the unit and connect tubing to
inlet.
6. Route appropriate tubing from the syrup pump location to the
syrup inlets and connect tubing to all syrup inlets. Repeat for
all avor injector lines.
7. Route appropriate tubing from the CO
2
source location to the
CO
2
inlet at the unit.
8. Route the power supply cord to a grounded electrical outlet
of the proper voltage and amperage rating.
DO NOT PLUG UNIT INTO GROUNDED ELECTRICAL
OUTLET AT THIS TIME. Makesurethatallwaterlines
aretightandunitisdrybeforemakinganyelectrical
connections
! WARNING
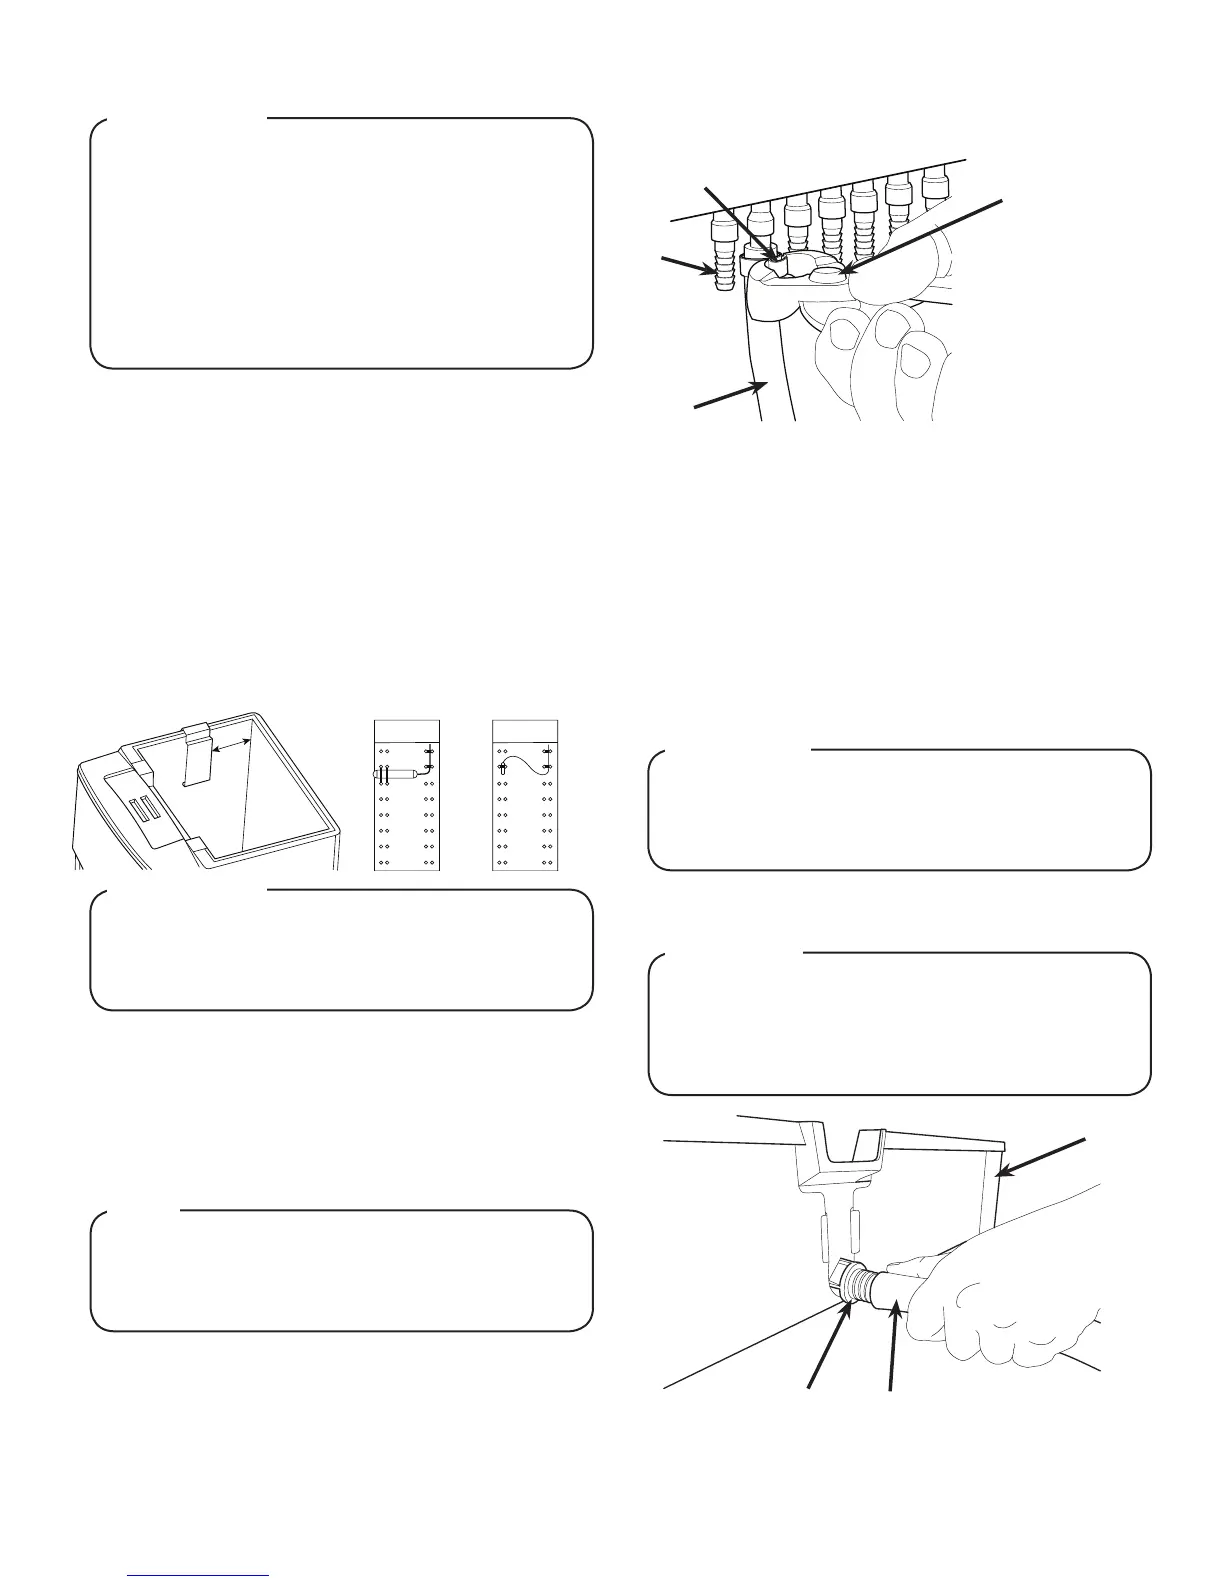
9. Route drain hose from designated open type drain to tting
on Drip Tray and connect hose to tting.
Drain line must be insulated with a closed cell
insulation. Insulation must cover the entire length of
thedrainhose,includingttings.Thedrainshouldbe
installed in such a manner that water does not collect
in sags or other low points, as condensation will form.
! CAUTION
A
A. Drain Fitting
B. Drain Line
C. Drip Tray
B
C