8
9. Turn on CO
2
at the source then, using a screwdriver, adjust
the high pressure regulator at the source to 110 PSI (0.758
MPA) then tighten locknut with wrench.
10. Adjust both of the low pressure regulators on the regulator
manifold to 75 PSI (0.517 MPA) then tighten locknut with
wrench.
11. Activate each valve until gas-out.
12. Plug in the remote pump deck, if not already done so, and
turn the switch to the ON position.
13. Activate each valve until the carbonator pump comes on.
Release the button, allow carbonator to ll and stop. Repeat
this process until a steady ow of carbonated water is
achieved.
14. Activate each valve to purge air from the syrup lines.
Adjust Water Flow Rate & Syrup/Water Ratio
1. If necessary, rotate switches panel forward and down by
releasing the two pin latches on its sides.
2. Rotate light panel, forward and up by releasing the two pin
latches on its sides towards the top.
Thewaterowcanbeadjustedbetween3.25oz/sec(96
ml/sec)and4.50oz/sec(133ml/sec)onalldispensing
valves. Ensure there is ice on the cold plate and the
linesarecoldbeforeattemptingtosettheowrateson
thevalves.Thedrinktemperatureshouldbenohigher
than40°F(4.4°C)whenowratesareset.
NOTE
There can be up to six gray water valves on this
dispenser (up to four carbonated water valves and two
plain water valves)
NOTE
4. Repeat procedure for each water valve.
A
B
C
D
Increase Decrease
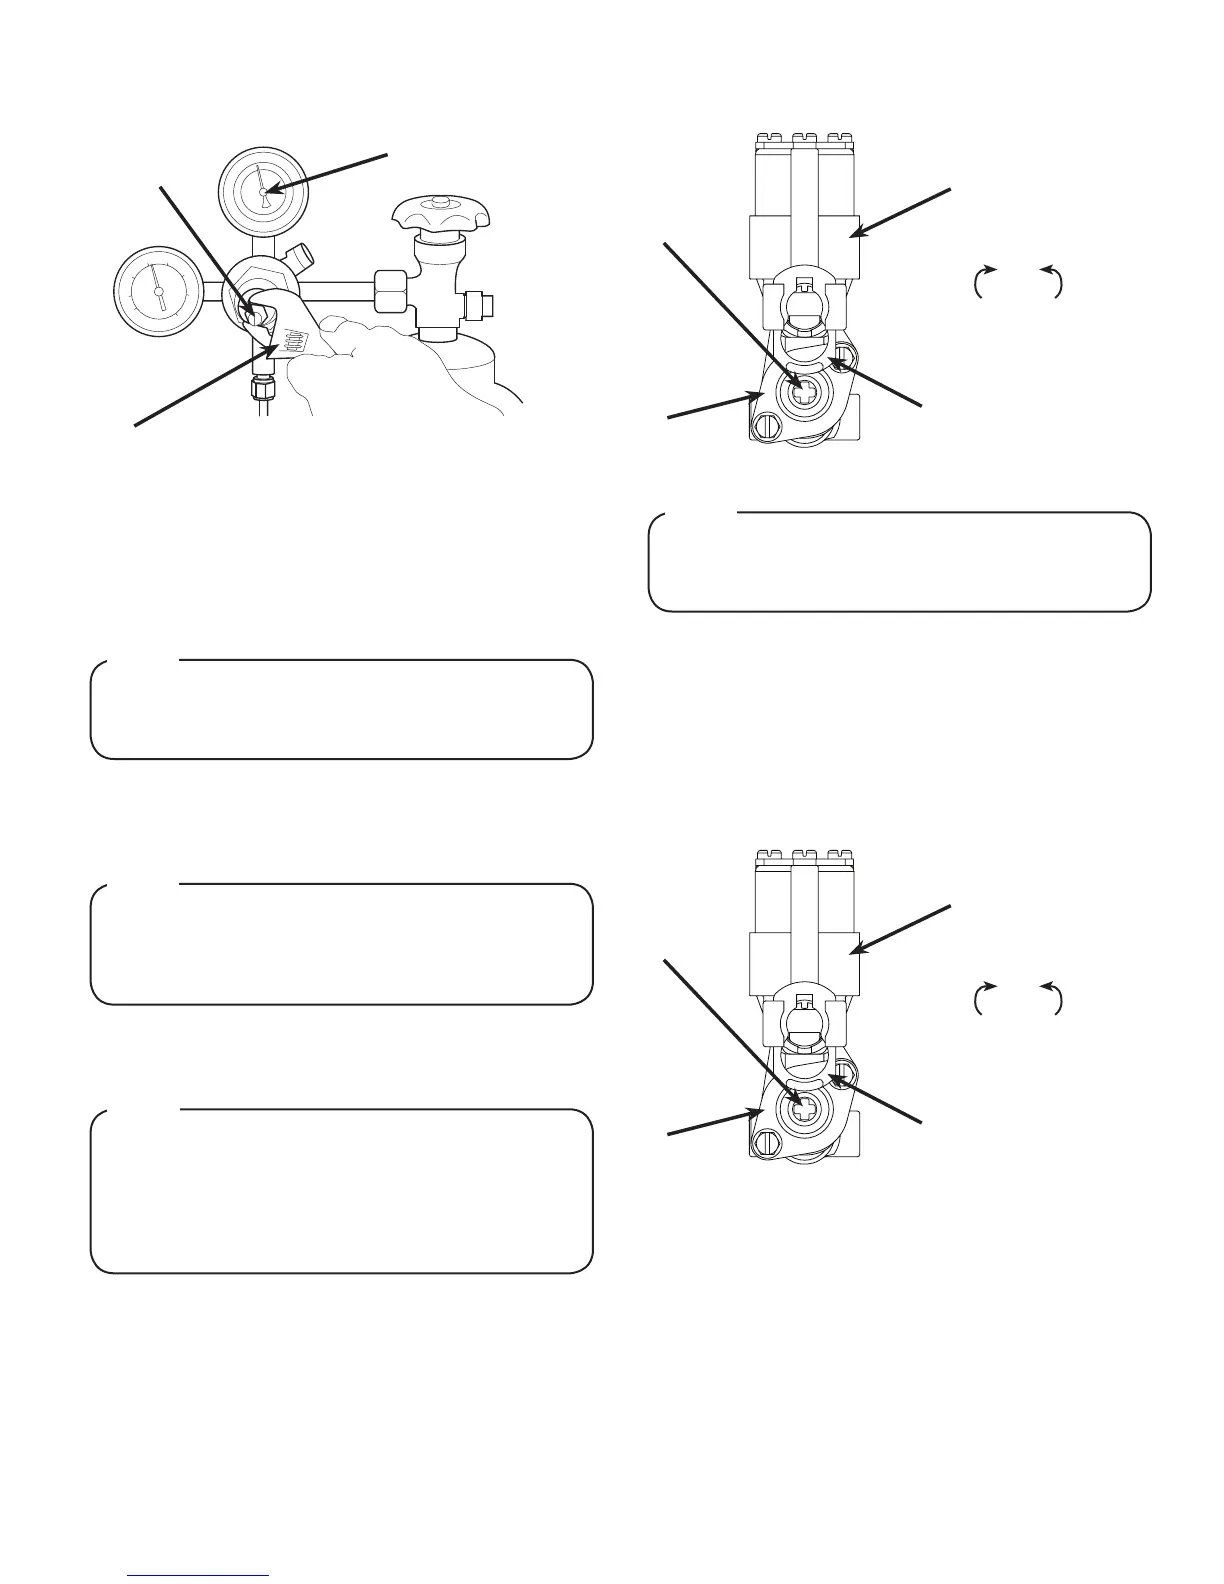
A. Flow Control
B. Valve Retainer
C. Solenoid
D. Valve Body
A
B
C
D
Increase Decrease
A. Flow Control
B. Valve Retainer
C. Solenoid
D. Valve Body
5. Remove nozzle by twisting counter clockwise and pulling
down.
6. Install Lancer syrup separator (PN 82-3458) in place of
nozzle.
7. Activate valve to purge syrup until steady ow is achieved.
8. Using a Lancer ratio cup, activate the valve and capture a
sample. Verify that the syrup level is even with the water
level. Use a screwdriver to adjust if needed.
9. Remove syrup separator and reinstall nozzle.
10. Repeat Steps 5-9 for each syrup valve.
11. Re-install merchandiser and top cover.
A. Regulator Adjustment Screw
B. Adjust to 110 PSI (0.758 MPA)
C. Wrench
A
B
C
Thepumpdeckhasa3minutetimeoutfeature.Ifthe
timeoutoccurs,turnthedeckOFFthenONbyipping
the switch on the control box.
NOTE
TocheckforCO
2
leaks,closethevalveontheCO
2
cylinder and observe if the pressure to the system
dropswiththecylindervalveclosedforveminutes.
Openthecylindervalveaftercheck.
NOTE
3. Using a Lancer ratio cup verify water ow rate. Use a
screwdriver to adjust if needed.