Laser Technology, Inc. TruPulse L2 User’s Manual 1st Edition
Section 4 - Basic Operations
Page 8
Copyright© 2023, Laser Technology, Inc. All rights reserved.
Section 4 - Basic Operations
Battery
The TruPulse L2 is powered by one CR2 battery.
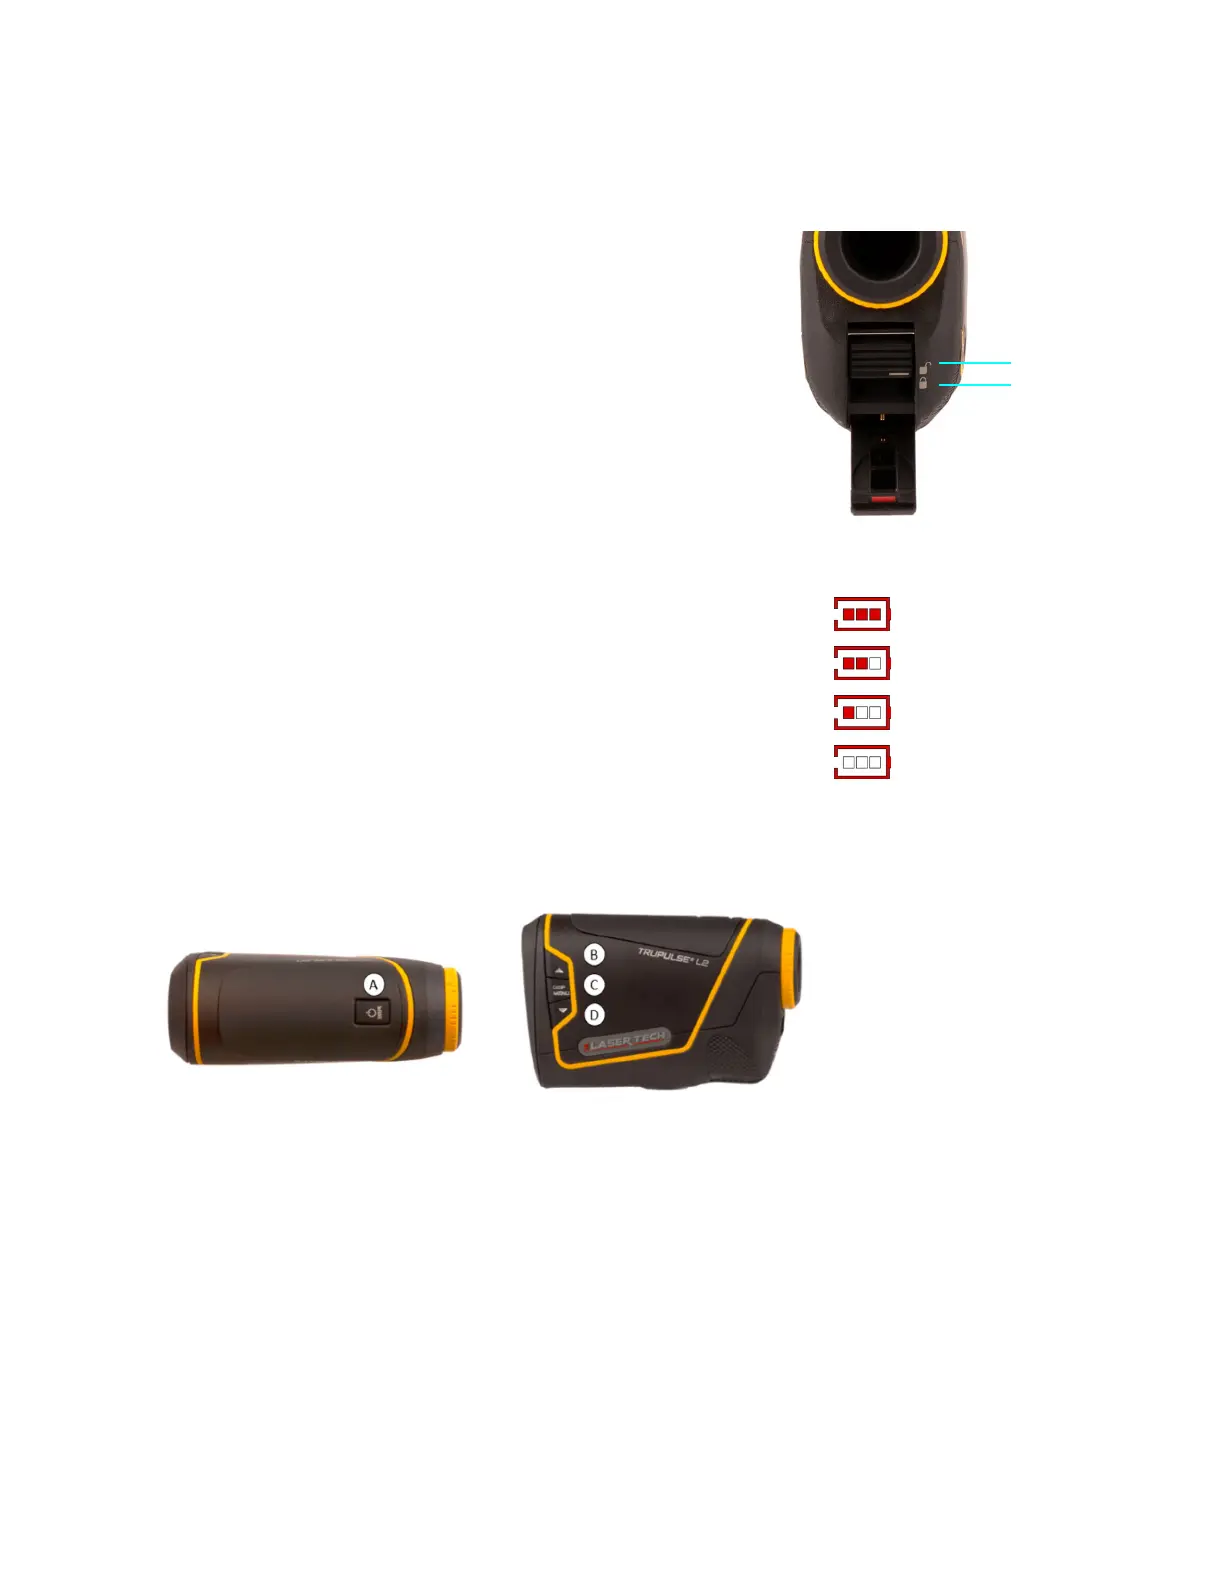
Replacement
1. Open the battery door by gently sliding the latch up to the
Unlocked symbol and pushing down the door (Figure 5A).
2. Install the battery. The battery must be oriented (+/-) with positive
end facing down. NOTE: There is an indication sticker found
inside the battery compartment.
3. Close the battery door and gently slide the latch down to the
Locked symbol.
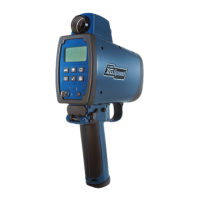
Low Battery Warning
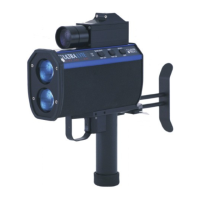
Button Navigation
The TruPulse L2 has four buttons. With the TruPulse L2 in your right hand and looking through the eyepiece,
the fire button is located on top, near your index finger The Navigation and Up/Down buttons and are located
on the left side of the instrument.
A. FIRE Button
• Powers ON the unit.
• Fires the lasers sensors to measure values.
• Short press in System Setup Menu to select option.
B. Up Navigation Button
• Press to scroll to measurement modes.
• Press to scroll to System Setup Menu options.
C. Display/Menu Button
• Short Press to toggle the Automatic brightness display.
• Long Press to enter the System Setup Menu options.
D. Down Navigation Button
• Press to scroll to measurement modes.
• Press to scroll to System Setup Menu options.
The TruPulse L2 monitors the incoming battery voltage. Within the
display, the Battery Life Indicator shows how much battery charge
is remaining. The Battery Indicator will display the first time the
POWER button is pressed and will also display in the MENU options.
•
Full
•
2/3
•
1/3
•
Battery Lock Out Screen