38
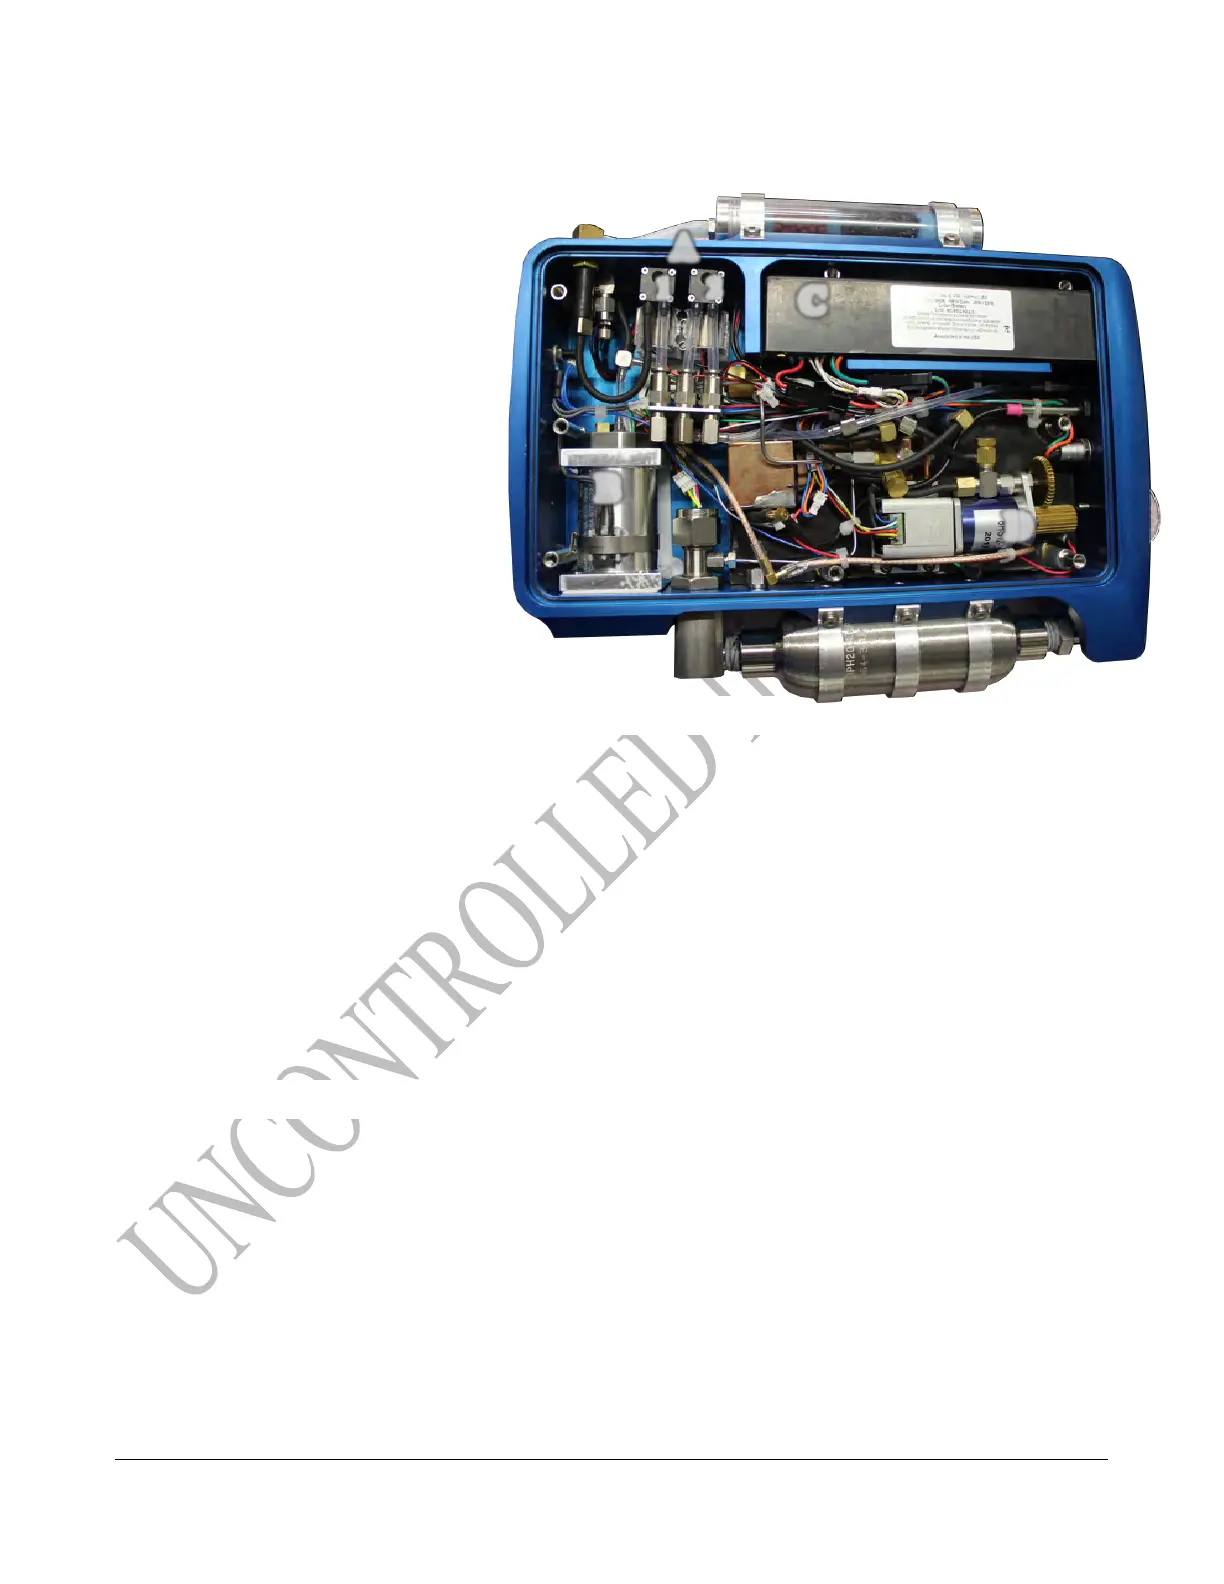
Identify phx42 Parts
A. Pumps
1) Combustion
2) Sample
B. FID Housing
C. Battery
D. Motorized Needle Valve
Removing the phx42 Lid
1. Place the phx42 in Sleep Mode.
2. Report an Issue and wait to be instructed by support staff.
3. Hold the bottom binding post(s) with a T25 Security Torque Bit or Philips screwdriver. Do
not allow the binding posts to turn.
4. Unscrew the eight screws from the top [6 short enclosure screws and 2 long enclosure screws]
on the phx42’s enclosure lid with the provided screwdriver.
5. Lift the enclosure lid once the screws are removed.
TECH TIP: Binding posts (from enclosure base) are held in place by clips. Do not attempt to remove. If the
binding posts fall out you may have popped the clip off by allowing the binding post to spin.
Reinstalling the phx42 Lid
1. Place the phx42 in Sleep Mode.
2. Replace enclosure lid.
3. Finger tighten the two longer screws in the center hole above and below the phx42 logo.
4. Finger tighten remaining enclosure screws.
5. Hold the bottom binding post(s) with a T25 Security Torque Bit or Philips screwdriver. Do
not allow the binding posts to turn.
6. Use Screwdriver to tighten until resistance is felt. Don’t over tighten as it will cause damage.