41
Glow Disk Repair Procedure
Glow Disk Installation:
1. Place the phx42 in Sleep Mode.
2. Loosen, but do not remove, the set screw on the face of the Flame Arrestor Cap with the 0.7
mm hex driver.
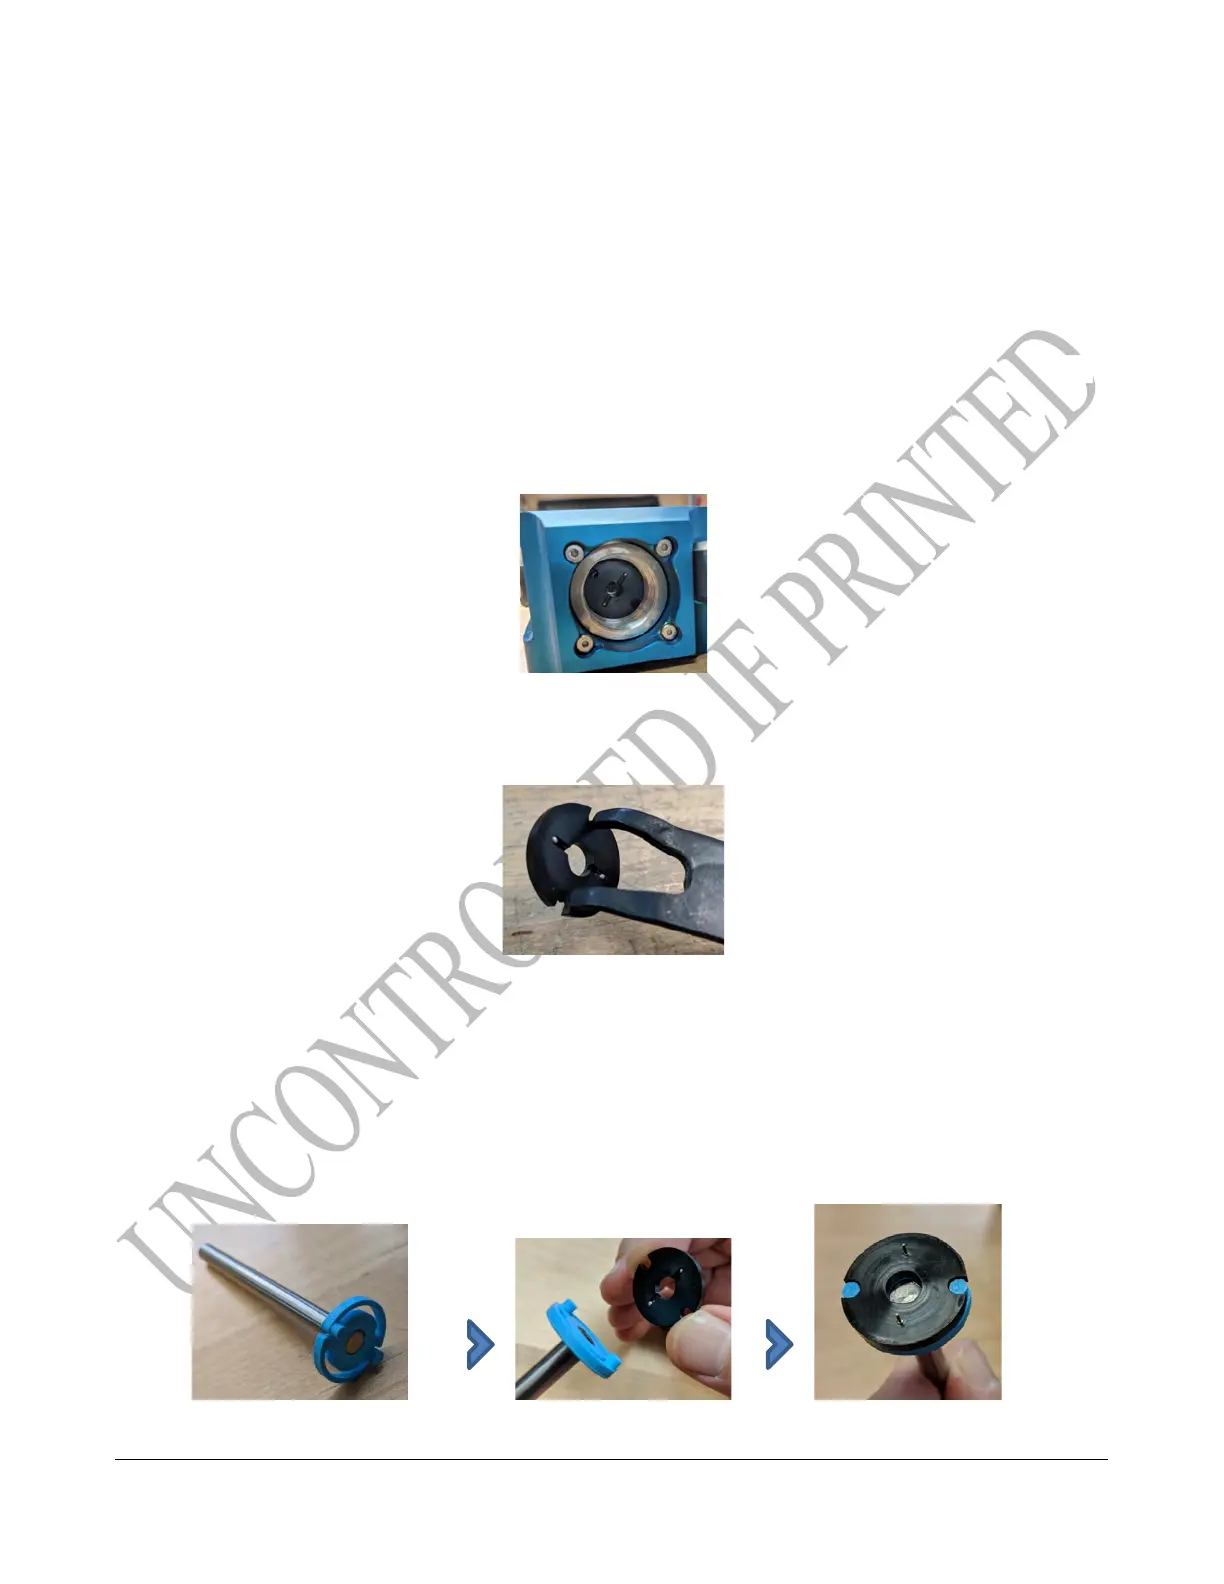
3. Use the Flame Arrestor Wrench to remove the Flame Arrestor Cap.
4. With the Fixed-Tip Retaining-Ring Pliers, reach into the FID and grasp the glow disk by
the two notches on its edge.
5. Pull the glow disk straight out to remove it from the flame arrestor housing.
REMINDER: Due to the VERY sensitive nature of the glow disk and the wire across the surface, this
is a very good opportunity to practice using the tools to do steps 5-8 using the old glow disk without
fear of damaging the wire.
6. Making sure not to touch the delicate wire on the new glow disk and holding the disk with
minimum pressure, place it carefully on the glow disk tool.