42
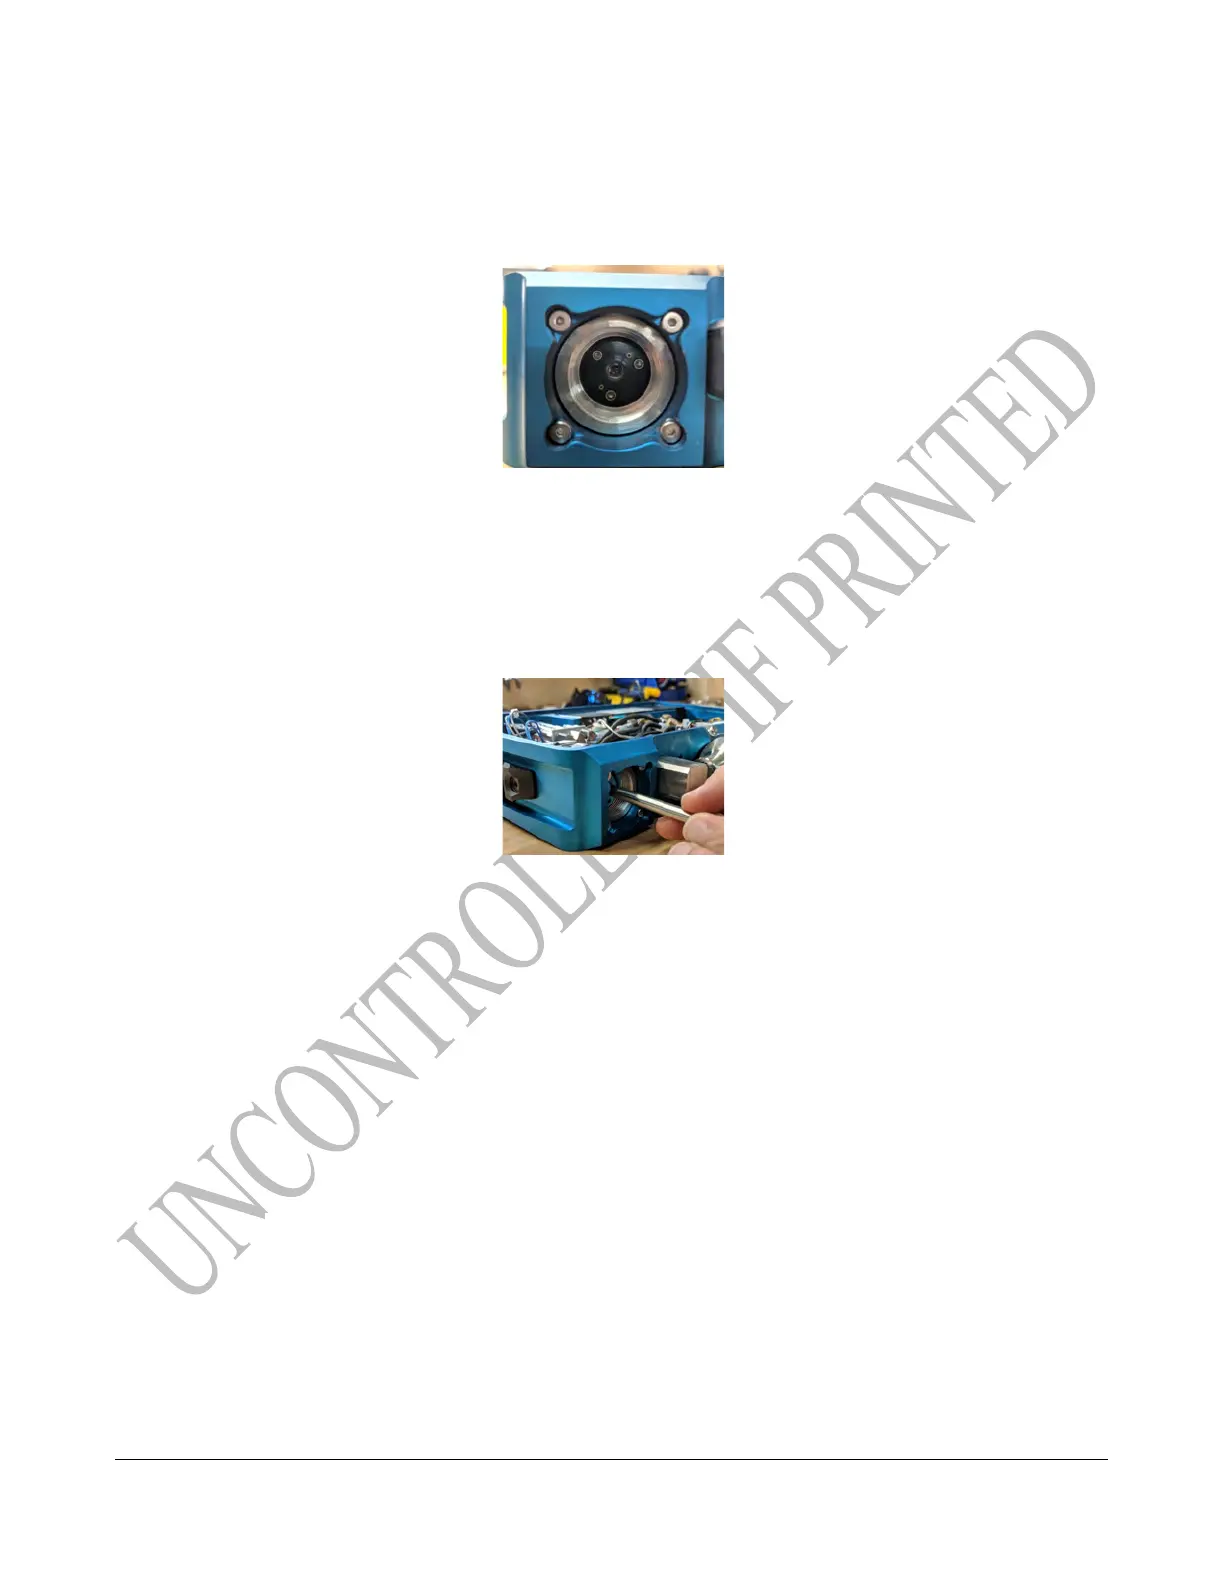
7. Look inside the FID housing to check the orientation of the sockets that the glow disk will plug
into.
TECH TIP: Practice using the tool to remove and replace the glow disk using the broken part prior
to installing the new one.
8. Using one of the two notches on the glow disk that is perpendicular to the orientation of the
pins to help align it for installation, slowly and carefully insert the glow disk installation tool
into the FID housing.
9. If necessary, slightly rotate the tool until the pins line up. Once they do, lightly push the glow
disk into position.
10. After the installation, pull the glow disk installation tool straight out.
It will automatically release from the glow disk.
11. Start threading in the flame arrestor by hand, then tighten it all the way using the flame
arrestor wrench.
12. Tighten the set screw with the 0.7 mm hex driver.
REMINDER: Do not over tighten to prevent stripping out the screw socket.
TECH TIP: If resistance is met before completely installed, stop immediately and report an issue.
Final tightening force should be like a water hose spigot.