A
A
C
C
S
S
8
8
0
0
6
6
D
D
i
i
g
g
i
i
t
t
a
a
l
l
A
A
C
C
S
S
e
e
r
r
v
v
o
o
d
d
r
r
i
i
v
v
e
e
M
M
a
a
n
n
u
u
a
a
l
l
R
R
e
e
v
v
1
1
.
.
0
0
Tel: (86)755-26434369 24 Website: www.leadshine.com
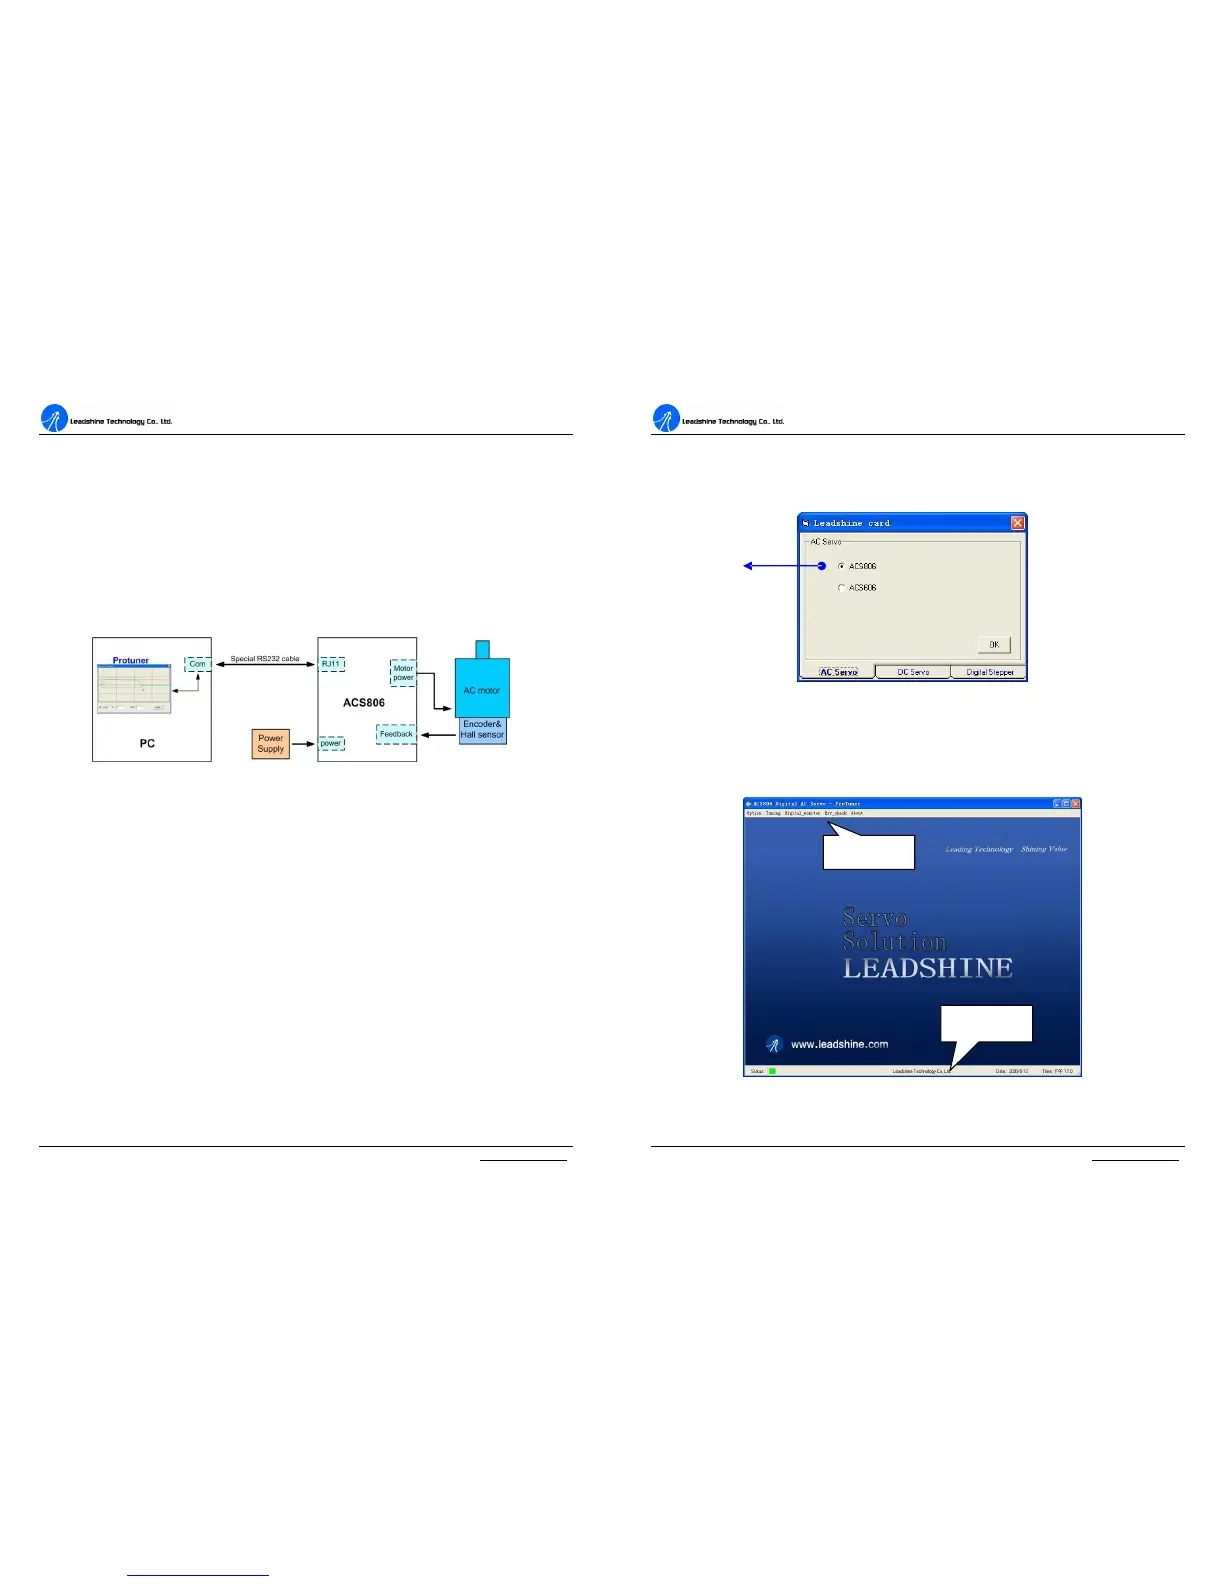
achieved as figure 20.
1. A power supply which has sufficient output current at related voltage;
2. AC servo or DC brushless servo motor (power range: 50 – 400W) with
encoder and hall sensor feedback.
3. Table PC/Notebook with one RS232 communication port at least or a USB
to RS232 adapter. Recommend using Table PC with RS232 port.
4. A special RS232 cable offered by Leadsine in which one end is a RJ-11
connector and the other end is a DB9 connector.
Figure 20: Configuration and connections before Tuning
Note:
1. If it is the first installation, strongly recommended that tuning the ACS806
and AC servo motor without motor shaft coupling to any load. After basic
values of the parameters are achieved, connect the motor to the load for
further tuning. These basic parameters can also be used for other drives
with the same servo motors.
2. Please double check the connections and make sure the motor would not
jump off before powering on the drive if start at a high acceleration.
3. In order to setup communication between the drive and ProTuner, the
ACS806 should be powered.
ProTuner for the ACS806 at Startup Window
Power on the ACS806. The green LED indicator should be on and the motor shaft
should be locked if the servo system is OK. Please refer to the protection functions
A
A
C
C
S
S
8
8
0
0
6
6
D
D
i
i
g
g
i
i
t
t
a
a
l
l
A
A
C
C
S
S
e
e
r
r
v
v
o
o
d
d
r
r
i
i
v
v
e
e
M
M
a
a
n
n
u
u
a
a
l
l
R
R
e
e
v
v
1
1
.
.
0
0
Tel: (86)755-26434369 25 Website: www.leadshine.com
to clear the errors if red LED indicator flickers.
Open ProTuner and the startup window appears as figure 21. For the ACS806,
please select the ACS806 in AC Servo tab then click OK button.
Figure 21: Startup Window of ProTuner
Introduction to ProTuner for the ACS806
1. Main Window
Many of the Leadshine products have similar user interfaces like figure 22.
Figure 22: Main window of ProTuner for the ACS806
Drive Select
Status Bar
Main Menu