A
A
C
C
S
S
8
8
0
0
6
6
D
D
i
i
g
g
i
i
t
t
a
a
l
l
A
A
C
C
S
S
e
e
r
r
v
v
o
o
d
d
r
r
i
i
v
v
e
e
M
M
a
a
n
n
u
u
a
a
l
l
R
R
e
e
v
v
1
1
.
.
0
0
Tel: (86)755-26434369 22 Website: www.leadshine.com
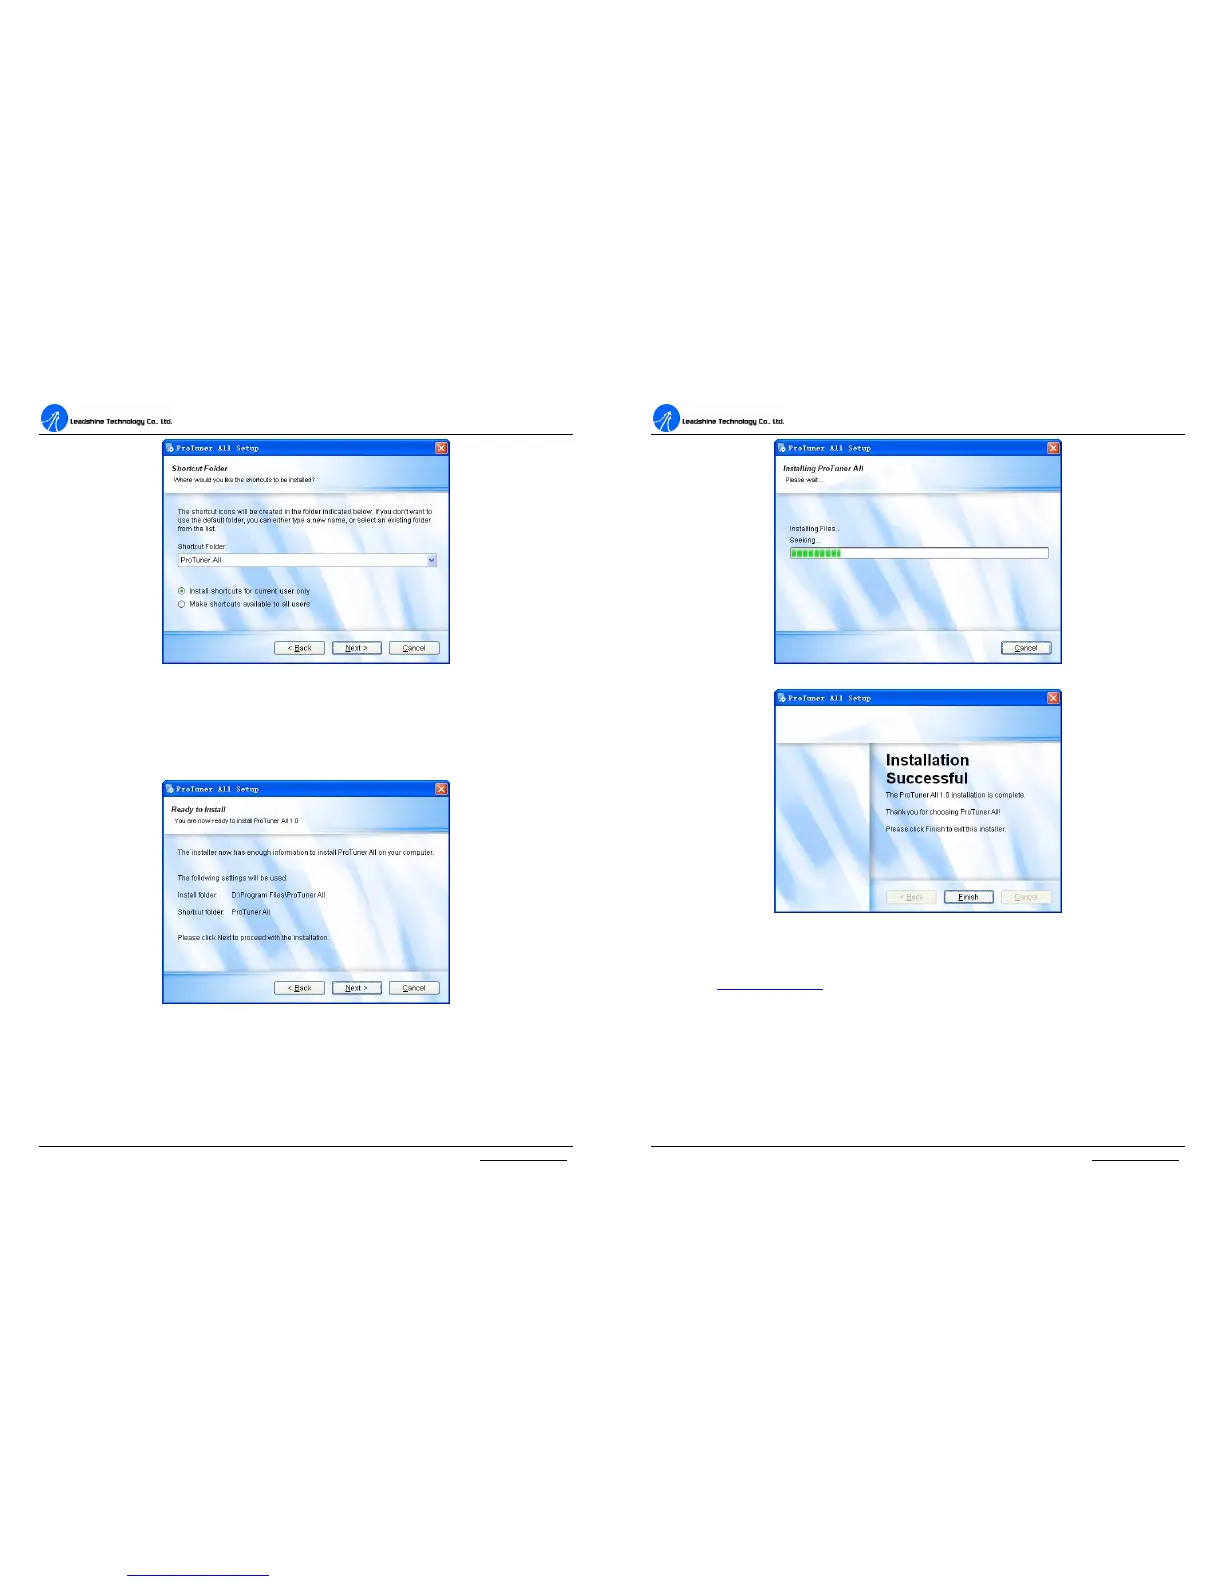
Figure 16: Shortcut folder setting
Set the “Shortcut Folder” in Figure 16 and continue to install the ProTuner by
following Figure 17 and Figure 18. An Installation Successful window will appear if
the ProTuner is installed successfully. See Figure 19.
Figure 17: Installation information summarization
A
A
C
C
S
S
8
8
0
0
6
6
D
D
i
i
g
g
i
i
t
t
a
a
l
l
A
A
C
C
S
S
e
e
r
r
v
v
o
o
d
d
r
r
i
i
v
v
e
e
M
M
a
a
n
n
u
u
a
a
l
l
R
R
e
e
v
v
1
1
.
.
0
0
Tel: (86)755-26434369 23 Website: www.leadshine.com
Figure 18: Installing the ProTuner
Figure 19: Finish installation
Note: Leadshine also offers special version ProTuner which does not need installation. Please visit
our website www.leadshine.com for latest ProTuner.
Hardware Configurations before Tuning
ProTuner uses PC RS232 port to communicate with the ACS806. The ACS806 has a
RJ-11 connector in which a special RS232 cable is connected to PC RS232 port.
Before opening ProTuner to tune the ACS806, the following configuration must be