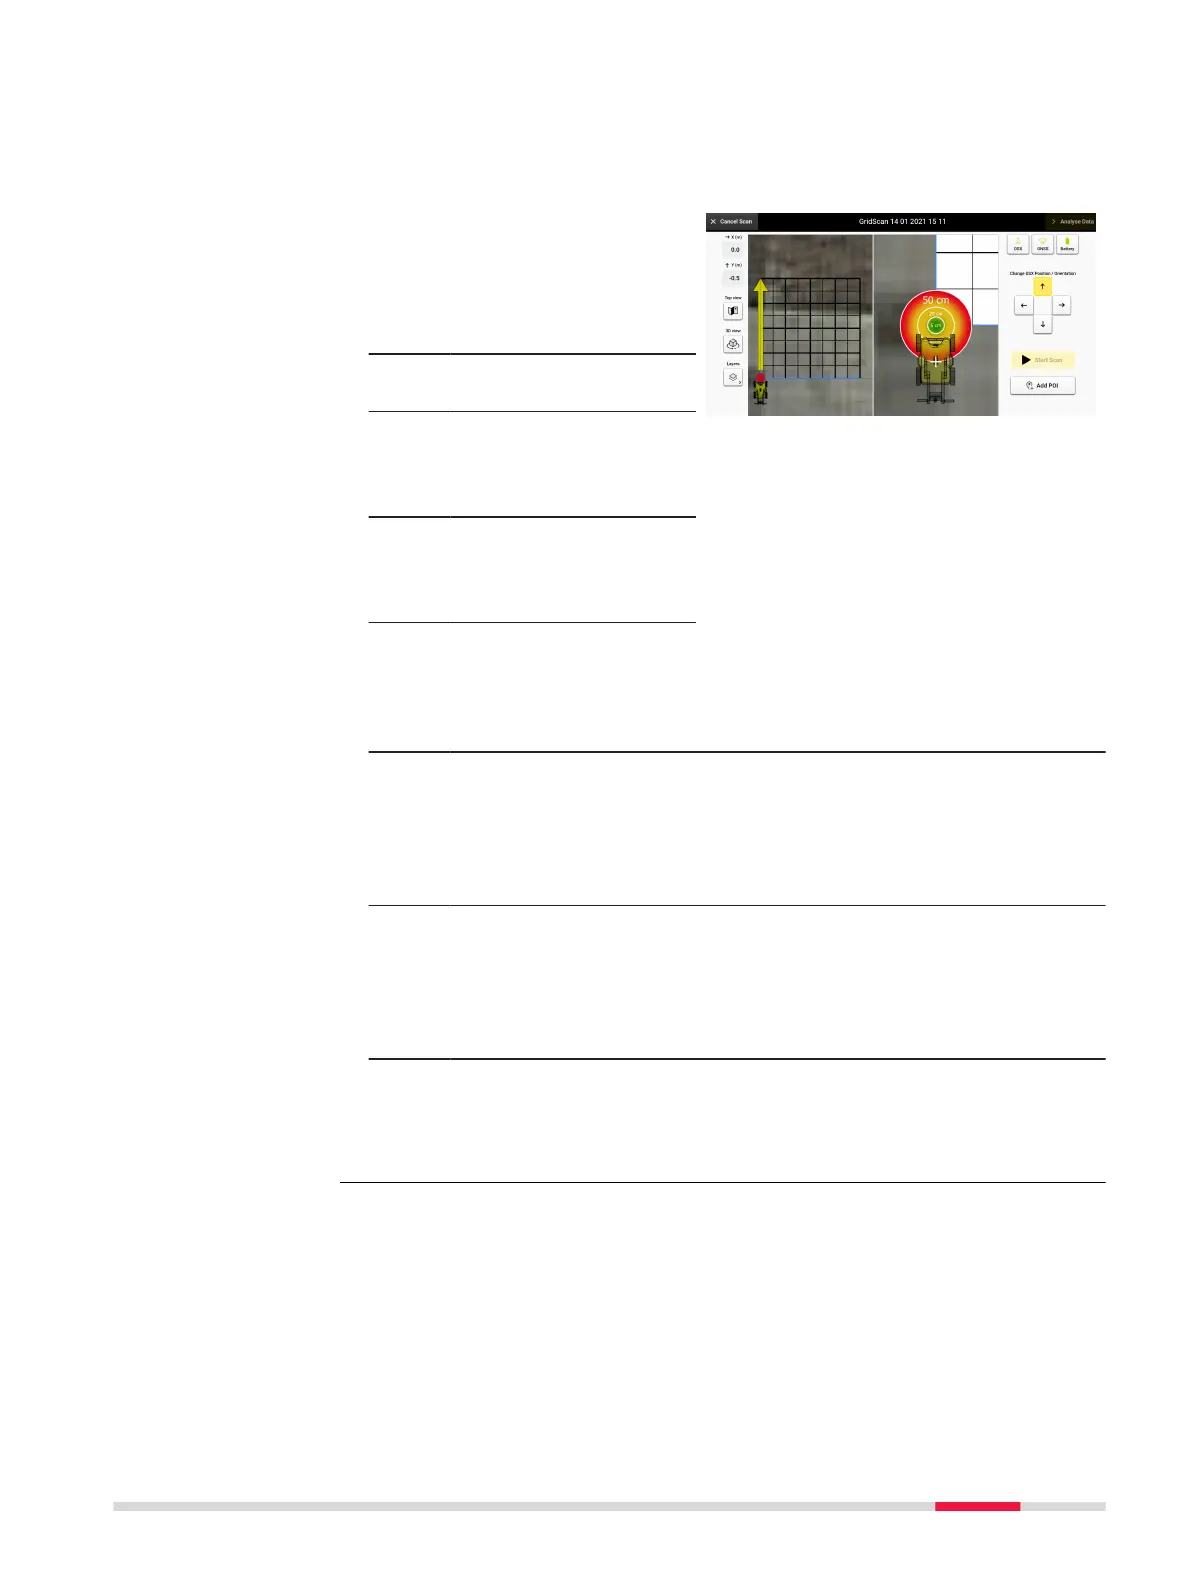
Circles are also displayed on the scan starting point, reecting a radius of 10
cm (4"), 20 cm (8") and 50 cm (20").
The right-side view mode will close, as soon as the cart gets pulled away from
the point where the red dot is set.
1. In the acquisition
screen, use the arrow
buttons to position the
red dot & yellow arrow
icon to the desired spot
and direction.
2. Move the cart towards
the desired start point.
3. When the cart nears
the point, a second
screen opens up on the
right side of the screen.
4. Use the graduated
circle to position the
cart directly over the
desired start position.
☞
Graduated circles are
displayed within the
radius: 10 cm (4"), 20
cm (8") and 50 cm
(20").
5. Once the cart is placed
within the 20 cm (8”)
radius circle, the Start
Scan button is enabled
and the scan can be
started.
☞
A scan is only possible
when the cart is posi-
tioned within a radius
of20 cm (8”) from the
dened scan starting
point.
6. The view window on
the right will automatic-
ally close after the scan
is started.
DXplore Software 35