☞
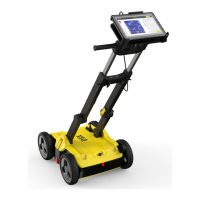
The crop feature allows
for a more exible visu-
alization of such
projects in 2D or 3D
view.
6.2 Preparing an Acquisition
☞
Before departing to the jobsite, ensure that the CT1000 tablet and
the DSX battery are fully charged. It is recommended to always have
have a second fully charge DSX battery with you as a replacement.
1. At the jobsite, set up the DSX and mount the accessories, if avail-
able. Refer to 3 Setup.
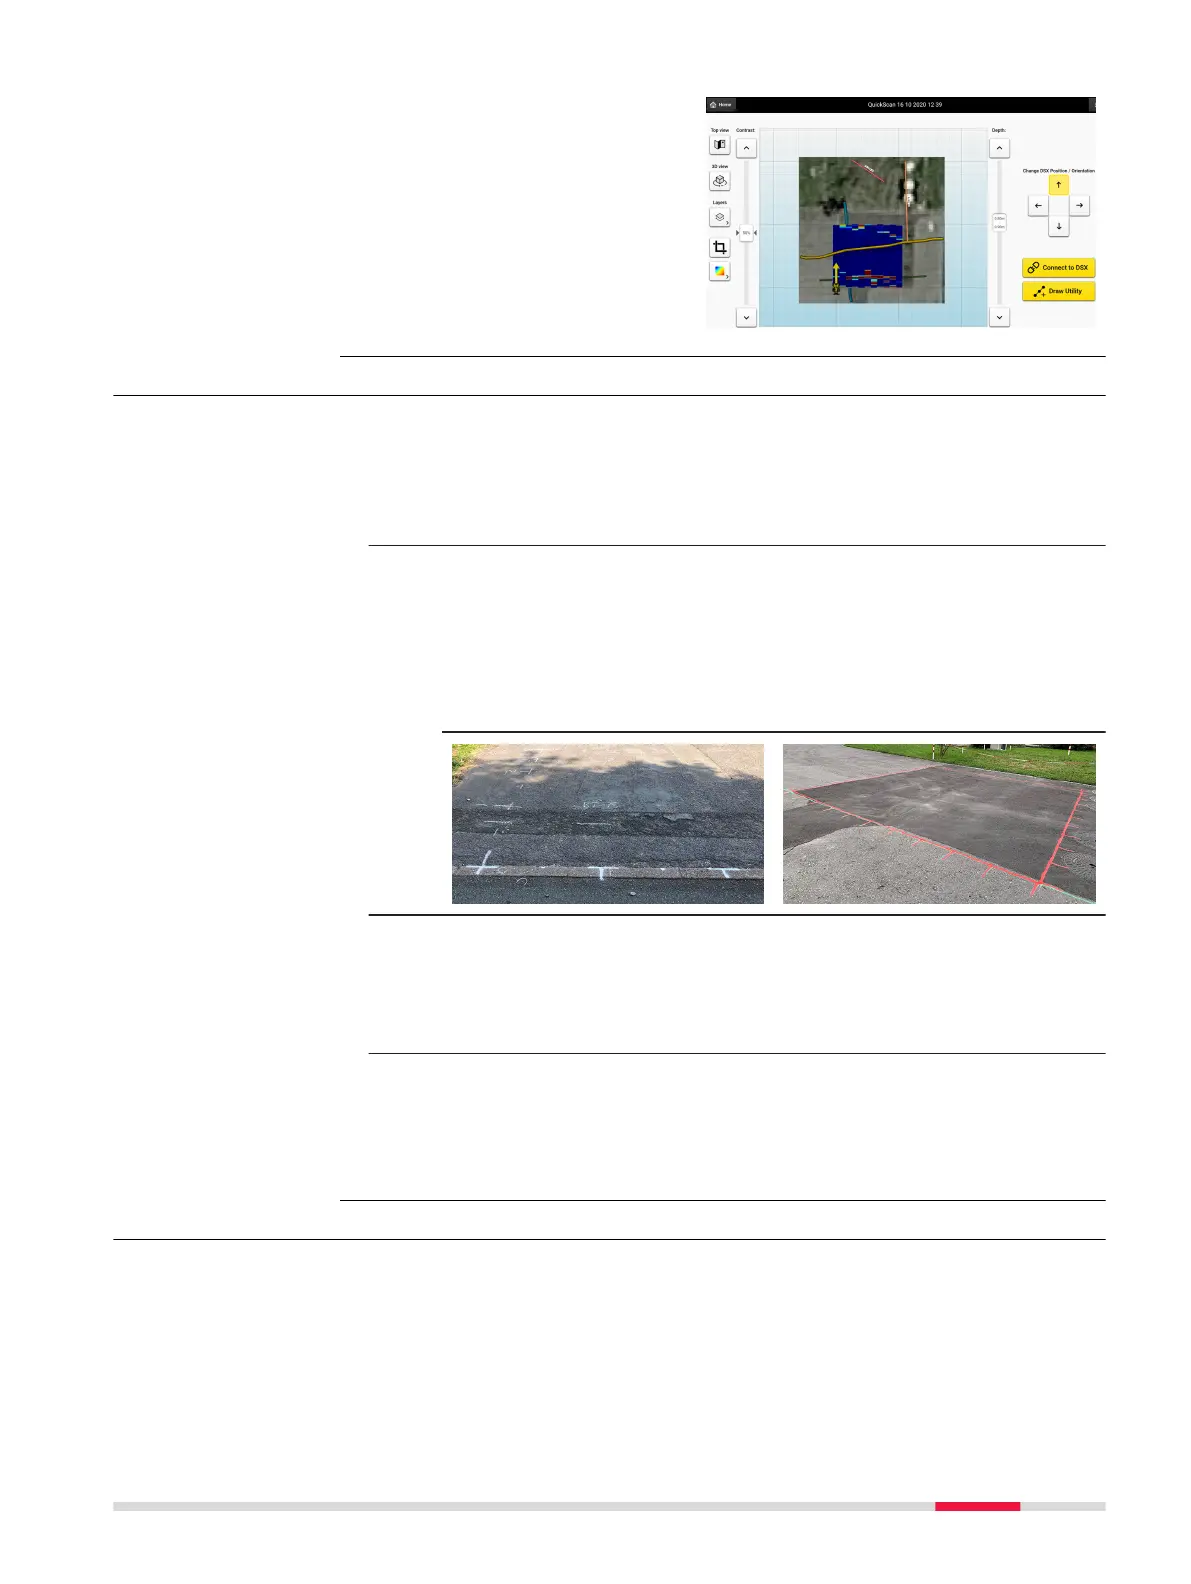
2. Pick a rectangular survey area.
☞
Each lateral has a length between 4 m/12 ft and 11 m/
33 ft and is a multiple of 0.5 m/18 in.
Use the grid assistance square, measuring tapes, chalks or
spray to mark the survey area on the ground surface.
Make sure that the corners are perpendicular and every
0.5 m/18 in on each side are clearly marked.
3. Calibrate the wheel encoders on the jobsite before proceed to scan.
☞
Measure and mark precisely a 10‑meter distance. Open
DXplore and tap on Wheel Encoder Calibration in the
setup tutorial session in Home screen. Follow the wizard
to complete the calibration.
4. Depending on the purpose of the survey and the available accessor-
ies, carry out one of the procedures described in the following para-
graphs:
•
Refer to Mapping Utilities without Using a Positioning System
•
Refer to Mapping Utilities Using a Positioning System
6.3 Mapping Utilities without Using a Positioning System
Performing a scan project
This step-by-step procedure describes how to perform a scan from scratch.
This chapter gives information on how to:
•
Set up a project, new scan
•
Perform scanning
•
Check and follow-up of scans
•
Export the project output
Step-by-step
Step-by-step
Procedures for Working with the DSX 49