50
MOTORHOME OPERATION UNITY MOTORHOME
5� Remove the mounting screws on either side
11
�
11
12
12
6� Push in the slide out room until fully retracted,
keeping both sides of the slide out level with the
coach while retracting�
NOTE: Manual movement of the slide out
requires signicant effort and may require the
assistance of several people.
7� Peel back the exterior sweep gasket
13
from the
top corners of the slide out, and reengage the
slide out motor�
8� Replace the motor mounting screw
11
on each
side of the slide out, and replace the snap-on trim
boards
12
�
9� Reconnect both electrical connectors (
5
&
6
) to
the control module
4
�
10� Install the travel lock before moving the
motorhome�
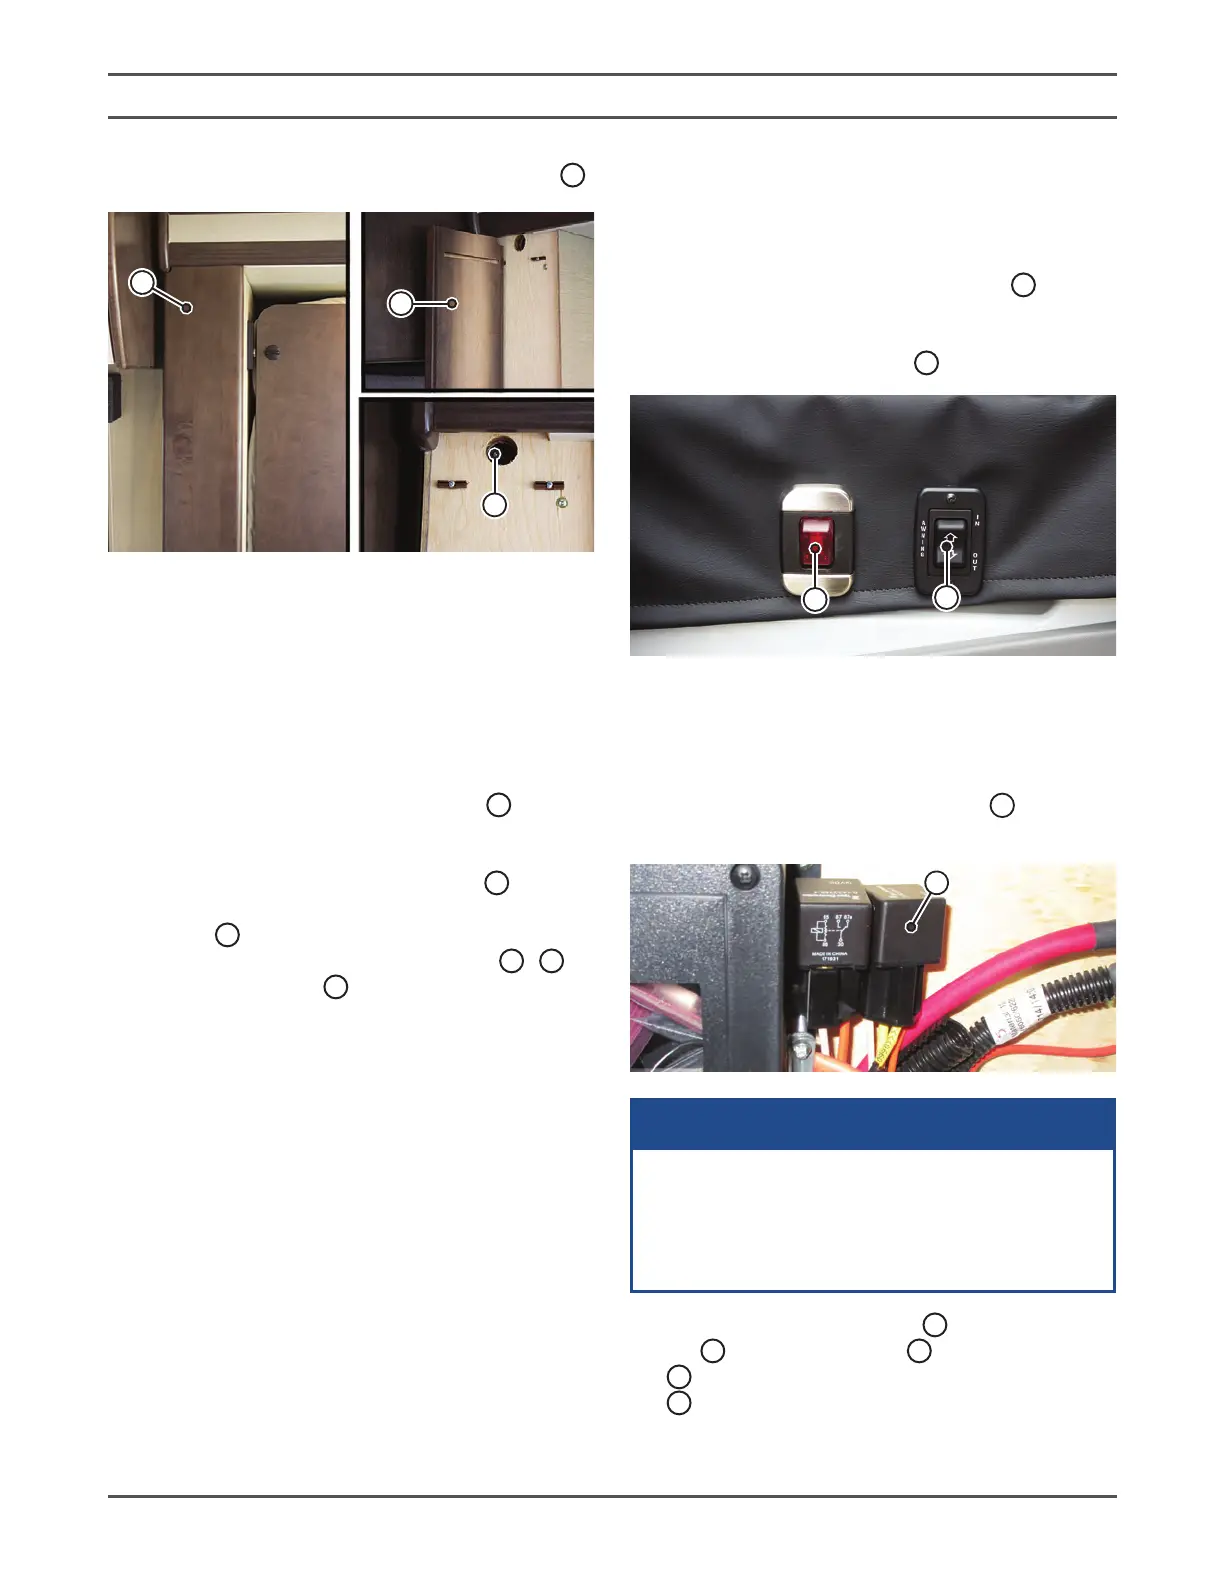
AWNING
EXTENDING THE AWNING
1� Depress and hold the awning switch
1
, located
on the passenger side seat base, in the “OUT”
(extend) position until the awning has fully
extended and the lead rail
2
is accessible�
11
1
NOTE: The power awning will not operate with
the motorhome ignition on. The power awning is
equipped with a safety feature preventing the
awning from extending while the motorhome
ignition is on (driving). This relay
3 is located
under the front passenger seat�
3
Awnings are designed to provide shade and
protection from the sun. Retract awning if
experiencing rain or wind conditions and
when leaving unit unattended. Always secure
awning in travel position when not in use.
NOTICE
NOTICE
2� Unlock the right support leg
4
, stored in the lead
rail
2
, by lifting the latch
5
and sliding the foot
6
back to clear the tabs on the lead rail end cap
7
�