96
ELECTRICAL SYSTEM OPERATION UNITY MOTORHOME
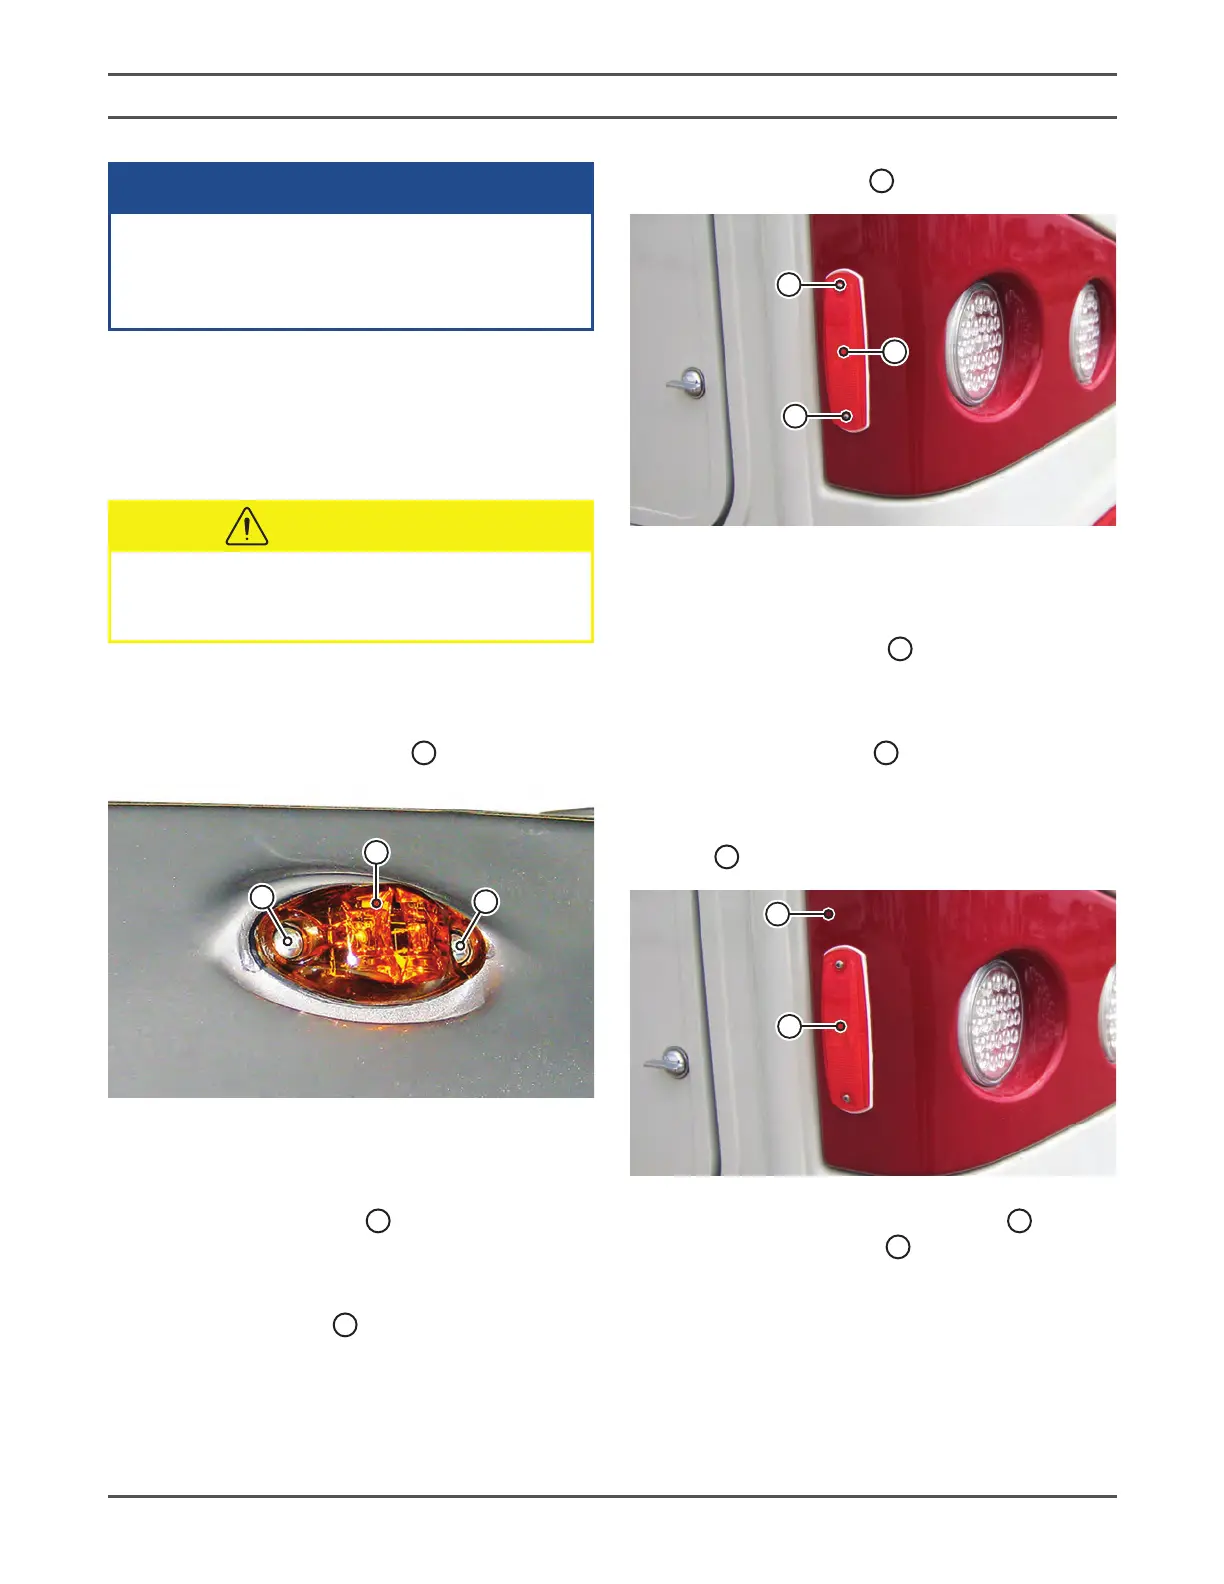
SIDE MARKER LIGHTS
4
4
5
5
NOTE: This is a sealed LED unit and must be
replaced as complete unit�
1� Remove the two screws
5
and pull the light out of
the bodywork to gain access to the connections.
2� Disconnect the old and reconnect the new light.
3� Insert the new light into the bodywork, secure
with the two screws
5
and reinstall the lens
cover.
REAR INDICATOR/REVERSE/BRAKE/ROAD
LIGHTS
7
7
6
1� Unscrew the side marker lens cover
6
�
2� Pull the light assembly
7
away from the coach
body�
The solar power unit is intended to charge
the coach batteries only. It does not generate
enough power to run the motorhome’s
electrical system.
NOTICE
LIGHTING MAINTENANCE
The following procedures detail replacement of the
coach interior and exterior lights�
Disconnect the chassis and coach batteries
before carrying out maintenance on the
lighting system.
CAUTION
EXTERIOR LIGHTING
UPPER CLEARANCE LIGHTS
2
2
3
3
NOTE: This is a sealed LED unit and must be
replaced as complete unit�
1� Remove the two screws
3
and pull the light out of
the bodywork to gain access to the connections.
2� Disconnect the old and reconnect the new light.
3� Insert the new light into the bodywork and secure
with the two screws
3
�