52
the home where the thermostat is located.
Home Wi-Fi Access Point is Visible
1. Go to menu > settings > wi- ,
2. Slide the option to ON to enable Wi-Fi.
3. Wi-Fi network will show not connected. Press on not connected to
display a list of available access points.
4. Select a network will be displayed listing all detected networks within
range. Select your home network by pressing on the network name.
NOTE: The thermostat can connect to a home wireless router that uses up to
32 characters in the access point name (visible or hidden).
5. When connecting to a secure home Wi-Fi network, a password will be
requested. Enter your home Wi-Fi network password and press join to
continue.
NOTE: If you wish to see the characters you are typing, check show password.
The thermostat will support up to a 63 character password. The
password cannot contain the % or # symbols.
Home Wi-Fi Access Point is Hidden
1. Slide the option to ON to enable Wi-Fi.
2. Wi-Fi network will show not connected. Press on “not connected”.
3. Scroll down and select other.
4. The “enter new network information” screen will appear. Enter the name
of the hidden network.
NOTE: The thermostat can connect to a home wireless outer that uses up to
32 characters in the access point name (visible or hidden). DO NOT
connect to a guest access point.
5. Select Security. Options are: none, WEP, WPA and WPA2. If your home
Wi-Fi connection is unsecured, then Wi-FI security must be enabled using
WEP, WPA or WPA2 via the router before proceeding. Consult your router
documentation on how to enable Wi-Fi security.
6. Once security type is selected, a password eld will appear. Enter the
password to access your home Wi-Fi network.
NOTE: If you wish to see the characters you are typing, check show password.
The thermostat will support up to a 63 character password.
7. Press join.
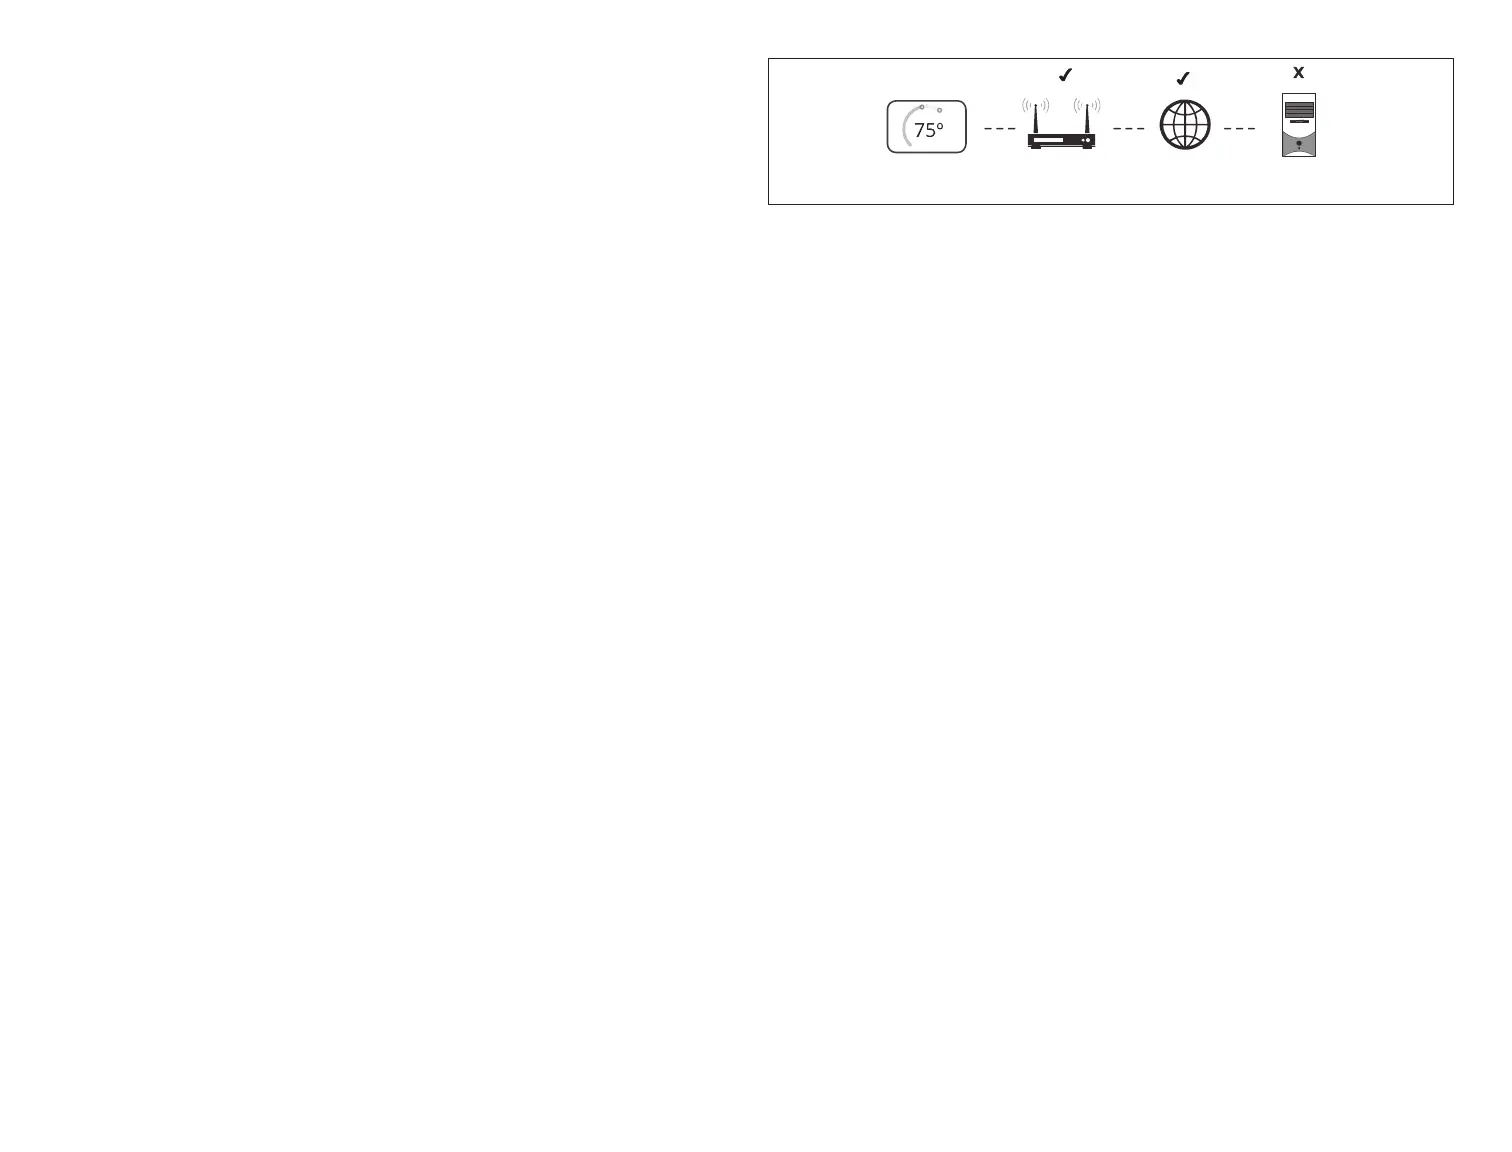
Whether connecting to a visible or hidden network, if successful, a check mark
will appear above both the router and Internet icons.
HOME WI-FI
ROUTER
INTERNET
ACCESS
SERVER
CONNECTION
E30
THERMOSTAT
Figure 21. Connection Status
Troubleshooting Wi-Fi Connection
The following terminology is used in this troubleshooting section:
• Received Signal Strength Indication (RSSI). This indicates the signal strength
of the Wi-Fi router being received by the scanning device (i.e., smart phone).
So the higher the RSSI number (or less negative in some devices), the
stronger the signal.
• Wireless networks supported by this system are:
» 802.11b is 2.4Ghz band (max 11 Mbit/s)
» 802.11g is 2.4Ghz band (max 54 Mbit/s)
» 802.11n is 2.4Ghz band (max 130 Mbit/s)
• Internet Protocol Address (IP address). This is an address assigned by your
home router for each network device (e.g., computer, printer, thermostat).
Electromagnetic Interference Causing Poor Connectivity: Locate the
smart hub and router away from other devices that could possibility interfere
with wireless communications. Some examples of other devices that could
interfere are:
• Microwave ovens
• Wireless cameras
• Portable phones and bases
• Baby monitors
• Wireless speakers
• Bluetooth devices
• Garage door openers
• Neighbor’s wireless devices
To eliminate a possible source of interference, temporally disable any devices
and see if Wi-Fi performance has improved.
Received Signal Strength Indication (RSSI)
The ideal signal strength range for the thermostat is -1 to -69 RSSI. The signal
strength can be viewed from the thermostat interface.
1. Press NETWORK SETTINGS; this screen shows a graphical view of
 Loading...