55
CLIMATIC™50 – IOM – Rooftops/ Aircoolair CL50-ROOFTOPS-IOM-1107-E
55
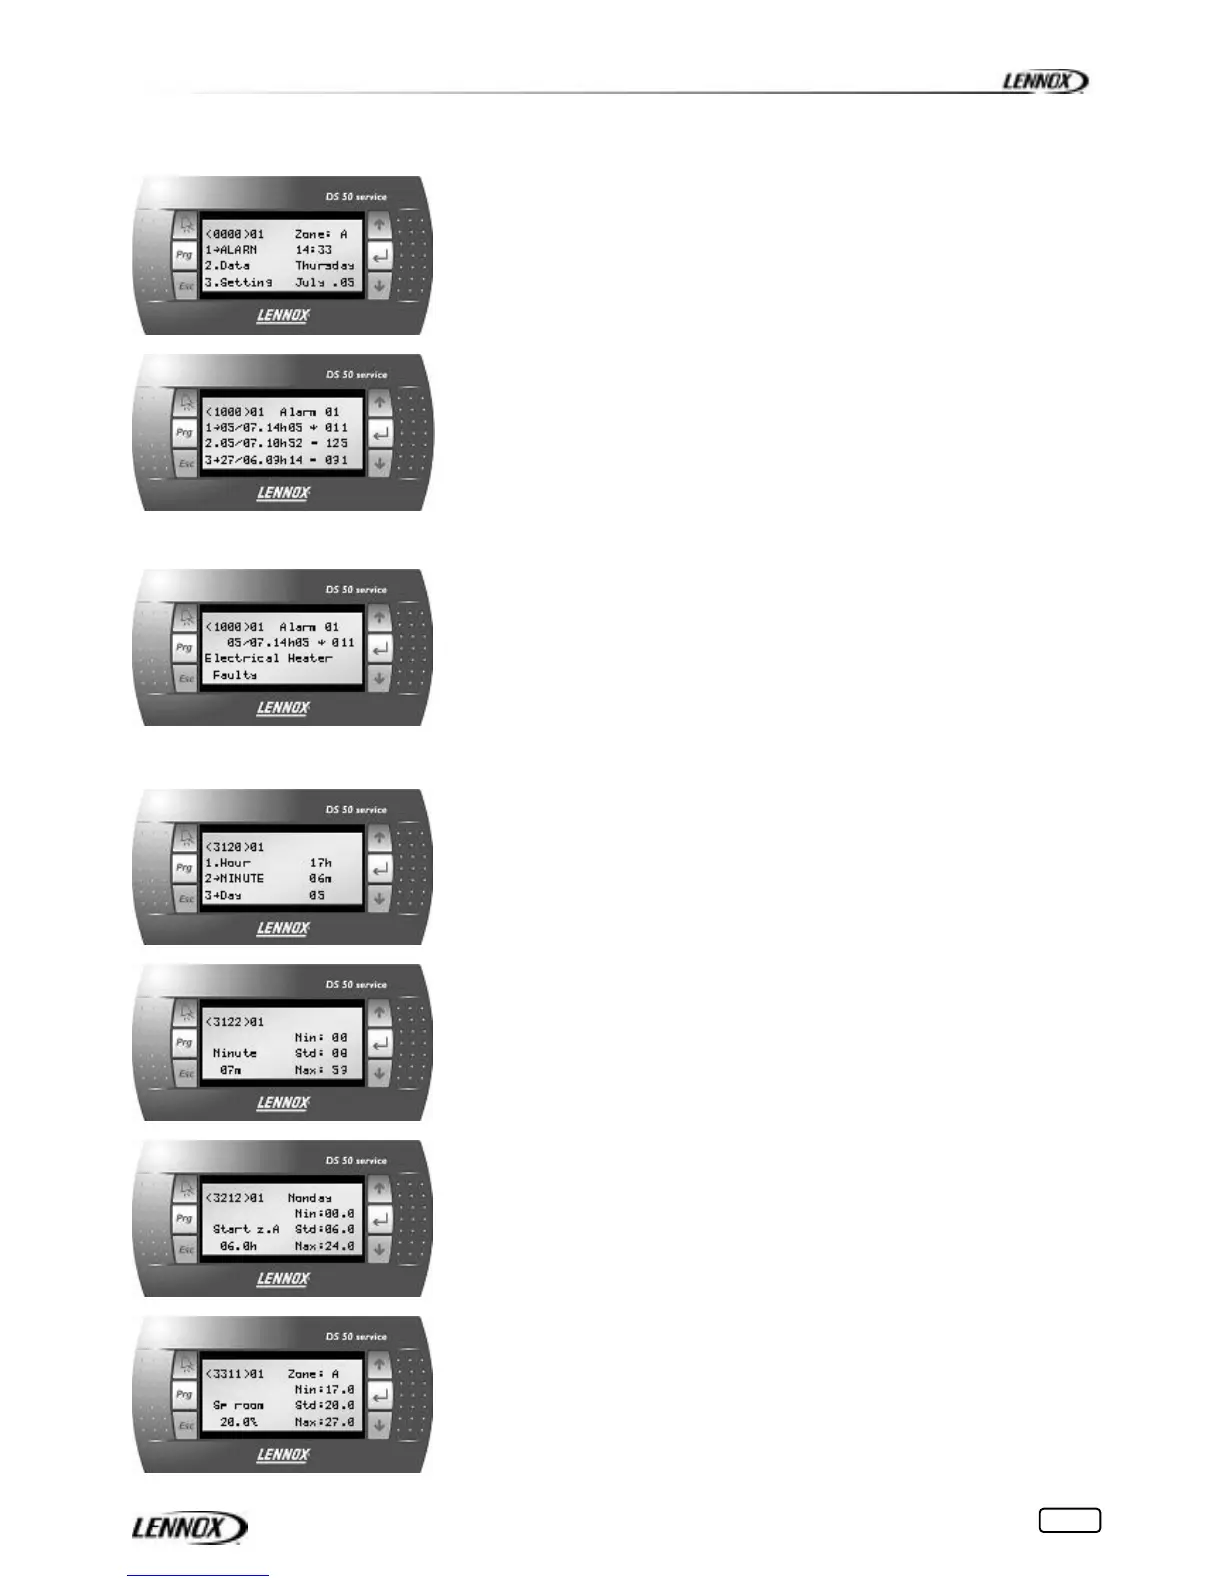
Alarms (1000)
S.10
S.11
S.12
Set points (3000)
S.13
S.14
S.15
S.16
In the event of an alarm on the unit, the ‘Alarm’ button is illuminated in red.
In the event of a filtration fault, the ‘Prg’ button is illuminated in yellow.
To display the alarm history of the unit, position the cursor over the ‘1 Alarm’
line with buttons
!or #, then confirm with button $ or press the ‘Alarm’
button directly, wherever you are in the menu tree.
The history can store the last 32 alarms occurring on the unit.
Each alarm is memorised at the date and time of occurrence of the fault.
An active alarm is signified by the symbol ‘∗’.
An acknowledged alarm is signified by the symbol ‘=’.
Each alarm is signified by a 3 digit code (see ERROR CODES)
Press the ‘Alarm’ button to reset all the alarms, if possible
The number of active alarms returns to 0, no active alarm is shown in
the menu, and the ‘Alarm’ button is no longer illuminated
Pressing the ’Alarm’ key for more than 10 seconds resets the history of
the 32 alarms to zero.
To highlight the title of the error code; position the cursor over the line
desired, with buttons
!or #, then confirm with button $
Use the ‘Esc’ button to return to the previous levels of the menu tree.
To changed a parameter on a set point;
Select the ‘SET POINTS line from the main menu, then navigate to the
sub-menus until the desired set point is displayed (e.g. 3120).
Position the cursor over the line desired (e.g. 2.) then confirm with button
$
Screen S.14 is used to change a set point (e.g. Minutes p.3122)
The maximum and minimum thresholds for the parameter are displayed
on the right of the screen, as well as the predefined default value.
With button
! or # set the desired value and confirm with button $
Use the ‘Esc’ button to return to the previous levels of the menu tree.
Pressing the ‘Esc’ button once without confirmation with the ‘Enter’ button
cancels the change.
If the day of the week is displayed on the first line, the parameter in question
can be set to a different value for each day of the week
To display and change the values of other days, press the ‘Prg’ button.
Pressing the ‘Prg’ button confirms the change in the same way as button
$.
If the period of operation is displayed on the first line, the parameter in
question can be set to a different value for each for each period (Z.A, Z.B,
Z.C, Ino and GTC).
To display and change the values of other periods, press the ‘Prg’ button.
Pressing the ‘Prg’ button confirms the change in the same way as button
$.
 Loading...