8
7. Active Alarms
• The mobile app will display other alarm
information such as time of occurrence, and
troubleshooting information.
• The mobile application will indicate all alarm
information per the active alarm requirements.
• The mobile application will indicate the number of
occurrences of a past alarm in the past thirty (30)
days.
• For alarm details, go to “13. Alarms” on page
37.
8. CORE Service App General Menu + User
Preference
• This screen allows the user to set the temperature
units (ºF or ºC).
• Allows the user to set the screen mode, options
are dark or light modes.
9. CORE Service App RTU Menu
The following options are available under this menu selection:
9.1. Setup
9.1.1. Install
This section includes the following:
• Date and time and the option to use the mobile device
data and time setting.
• RTU Name
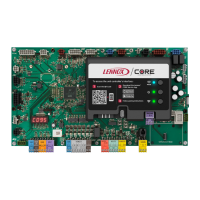
• ModelNumber(see“Figure5.CongurationID1”)and
serial number. Model , serial and catalog numbers are
located on the RTU nameplate.
• RTU Information. Conguration ID 1 and 2 can be
enteredhere.Seegures“Figure5.CongurationID
1” on page 8 and “Figure 6. Conguration ID 2” on
page 9 for further details.
This section addresses the requirement that specic
conguration information must be completed using the
SETUP / INSTALL feature if a new unit controller was being
installed. Other requirements are the addition of accessories
thatwerenotfactory-installed.Modelnumber,conguration
ID 1 and 2, catalog number, serial number and RTU
description are all key items required to be completed for the
system to operate correctly. Running the SETUP / INSTALL
wizardallowstheinstallertoverifythatalleldshavebeen
completed as required.
•
Model Number
Type [1, 2, 3]
Electric =
LCM
Gas =
LGM
Tonnage [4, 5, 6]
Efficiency [7]
High Efficiency = H
Standard Efficiency = S
Ultra-High Efficiency = U
[10] Factory Electric or Gas
Heat
See unit nameplate for applicable electric
or gas heat designation.
[11] Design Sequence
1 = First revision
[12] Voltage
See unit nameplate for
applicable electric voltage
designation.
Refrigerant [8]
HFC-410A = 4
Blower Type [9]
Belt Drive (1 speed) = B
Direct Drive = D
EBM MSAV = E
Mitsubishi MSAV = M
Belt Drive (2 speed) = T
IMPORTANT: Always refer to the model
information listed on the unit nameplate when
setting these options.
See unit nameplate for
applicable tonnage
designation.
7 8 9 10 11 121 2 34 5 6
EBM VAV = P
Mitsubishi VAV = V
Figure 4. Model Number
CONFIGURATION ID 1
Humiditrol [1]
Not Installed = N
Humiditrol Installed = H
Unconfigured = U
Economizer [2]
Not Installed = N
Motorized Outdoor Air
Damper Only = M
Economizer - Te mperature = T
Economizer Global = G
Economizer - Single
Enthalpy = S
Economizer - Dual Enthalpy = D
Unconfigured = U
Power Exhaust [3]
Not Installed = N
Single-Stage = S
Dual-Stage = D
*Variable Speed Drive = V
Unconfigured = U
Power Exhaust Control [4]
Not Installed = N
Damper Position = A
*Pressure Switches = B
*A34 Pressure Sensor = C
[5] Network Module
N = Not Installed
B = BACnet
L = LonTalk
[6] Blower Variable
Frequency Drive Bypass
N = Not Installed
A = Automatic Electronic Bypass
M = Manual Electronic Bypass
U = Electronic Bypass Field
Un-configured
[7] Smart Air Flow
N = Not Installed
S = Installed with Standard
Economizer
L = Installed with Low Leak
Economizer
U = Unconfigured
[8] Outdoor Air Control
N = No Outdoor Air CFM Control
L = Outdoor Air Control Installed
with A24 Sensor set for low range.
M = Outdoor Air Control Installed
with A24 Sensor set for medium
range.
H = Outdoor Air Control Installed
with A24 Sensor set for high
range.
IMPORTANT: Always refer to the white sticker titled ORIGINAL FA CTORY UNIT CONFIGURATION located inside the control box area.
1 2 3 4 5 6 7 8
Figure 5. CongurationID1