Replacingthebattery
Attention:
Donotopenyourcomputerorattemptanyrepairbeforereadingandunderstandingthe“Importantsafetyinformation”
onpagev
.
Yourcomputerhasaspecialtypeofmemorythatmaintainsthedate,time,andsettingsforbuilt-infeatures,
suchasparallel-portassignments(conguration).Abatterykeepsthisinformationactivewhenyouturn
offthecomputer.
Thebatterynormallyrequiresnochargingormaintenancethroughoutitslife;however,nobatterylasts
forever.Ifthebatteryfails,thedate,time,andcongurationinformation(includingpasswords)arelost.An
errormessageisdisplayedwhenyouturnonthecomputer.
Refertothe“Lithiumcoincellbatterynotice”intheSafety,Warranty,andSetupGuidethatcamewithyour
computerforinformationaboutreplacinganddisposingofthebattery.
Toreplacethebattery,dothefollowing:
1.Removeallmediafromthedrivesandturnoffallattacheddevicesandthecomputer.Then,disconnect
allpowercordsfromelectricaloutletsanddisconnectallcablesthatareconnectedtothecomputer.
2.Removethecomputercover.See“Removingthecomputercover”onpage36.
3.Removetheheatsinkfanduct.See“Replacingtheheatsinkandfanassembly”onpage65.
4.Dependingonyourcomputermodel,youmightneedtoremovethePCIExpressx16graphicscardfor
easieraccesstothebattery.See“InstallingorreplacingaPCIcard”onpage38.
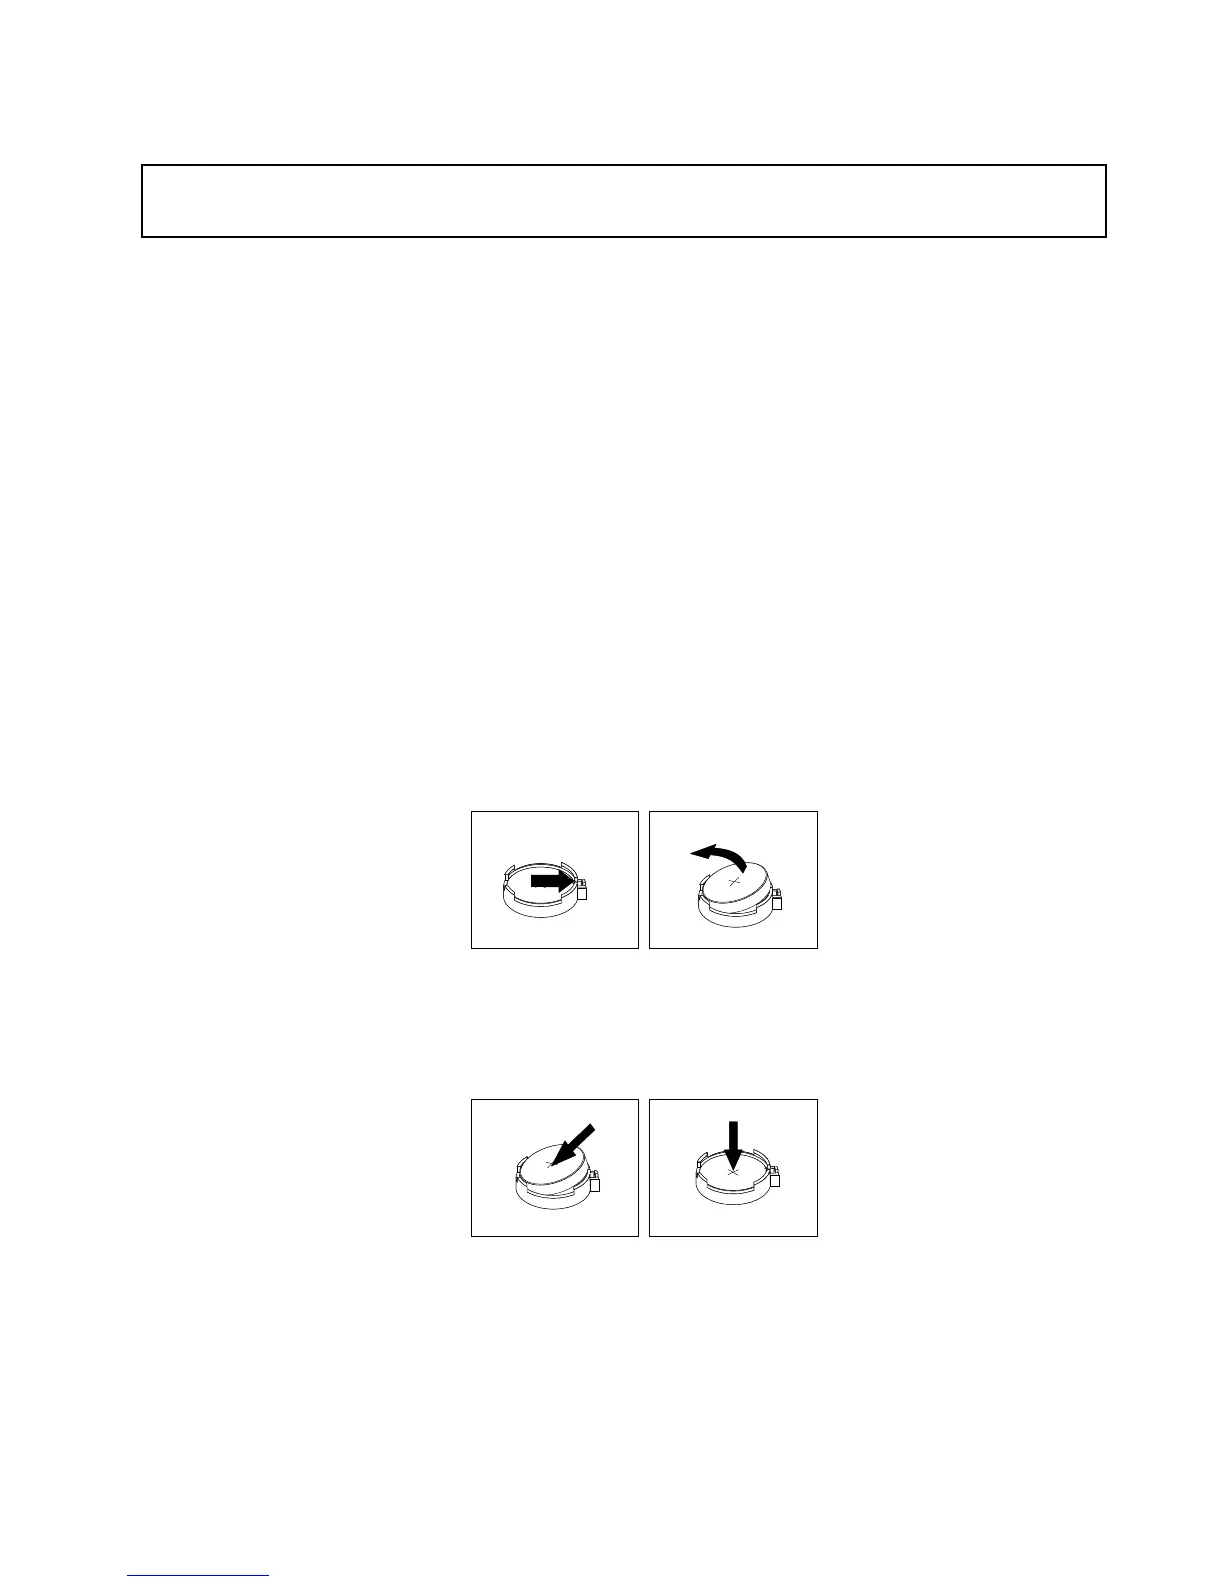
5.Removetheoldbattery.
Figure43.Removingthebattery
6.Installanewbattery.
Figure44.Installingthebattery
7.ReinstallthePCIExpressx16graphicscardifyouhadremovedit.See“InstallingorreplacingaPCI
card”onpage38
.
8.Reinstalltheheatsinkfanduct.See“Replacingtheheatsinkandfanassembly”onpage65.
9.Reinstallthecomputercoverandreconnectthecables.See“Completingthepartsreplacement”on
page103
.
Chapter5.Installingorreplacinghardware55



 To Next Page