Whattodonext:
•Toworkwithanotherpieceofhardware,gototheappropriatesection.
•Tocompletetheinstallationorreplacement,goto“Completingthepartsreplacement”onpage103.
Replacingthemicroprocessor
Attention:
Donotopenyourcomputerorattemptanyrepairbeforereadingandunderstandingthe“Importantsafetyinformation”
onpagev.
Thissectionprovidesinstructionsonhowtoreplacethemicroprocessor.
CAUTION:
Theheatsinkandmicroprocessormightbeveryhot.Turnoffthecomputerandwaitthreetove
minutestoletthecomputercoolbeforeremovingthecomputercover.
Toreplacethemicroprocessor,dothefollowing:
1.Removeallmediafromthedrivesandturnoffallattacheddevicesandthecomputer.Then,disconnect
allpowercordsfromelectricaloutletsanddisconnectallcablesthatareconnectedtothecomputer.
2.Removethecomputercover.See“Removingthecomputercover”onpage36.
3.Removethefrontbezel.See“Removingandreinstallingthefrontbezel”onpage36.
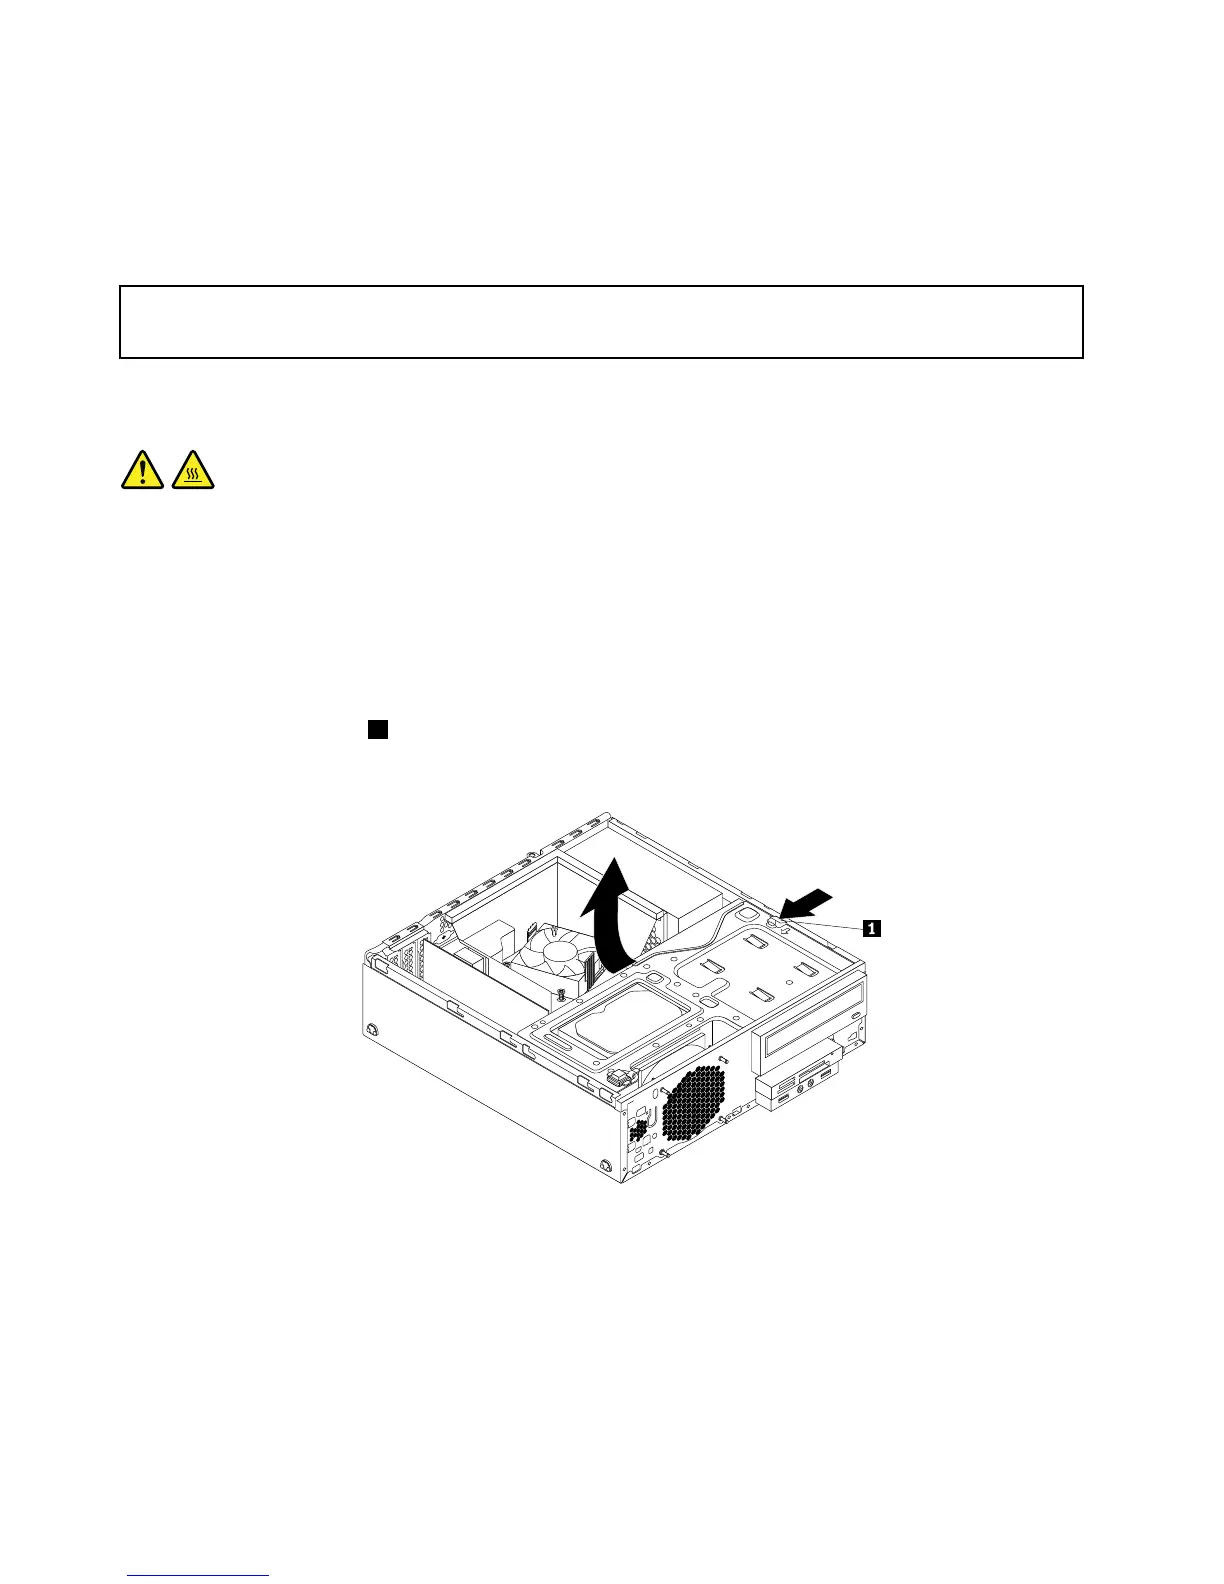
4.Presstheretainingclip1inthedirectionasshownandpivotthedrivebayassemblyupwardatthe
sametime.
Figure64.Pivotingthedrivebayassemblyupward
5.Removetheheatsinkandfanassembly.See“Replacingtheheatsinkandfanassembly”onpage65.
Note:Donotletthethermalgreaseonthebottomoftheheatsinkandfanassemblygetincontact
withanything.
6.Recordthecableroutingandconnections.Then,locatethesystemboardanddisconnectallcables
connectedtothesystemboard.See“Locatingpartsonthesystemboard”onpage14.
68ThinkCentreM83,M93/pUserGuide