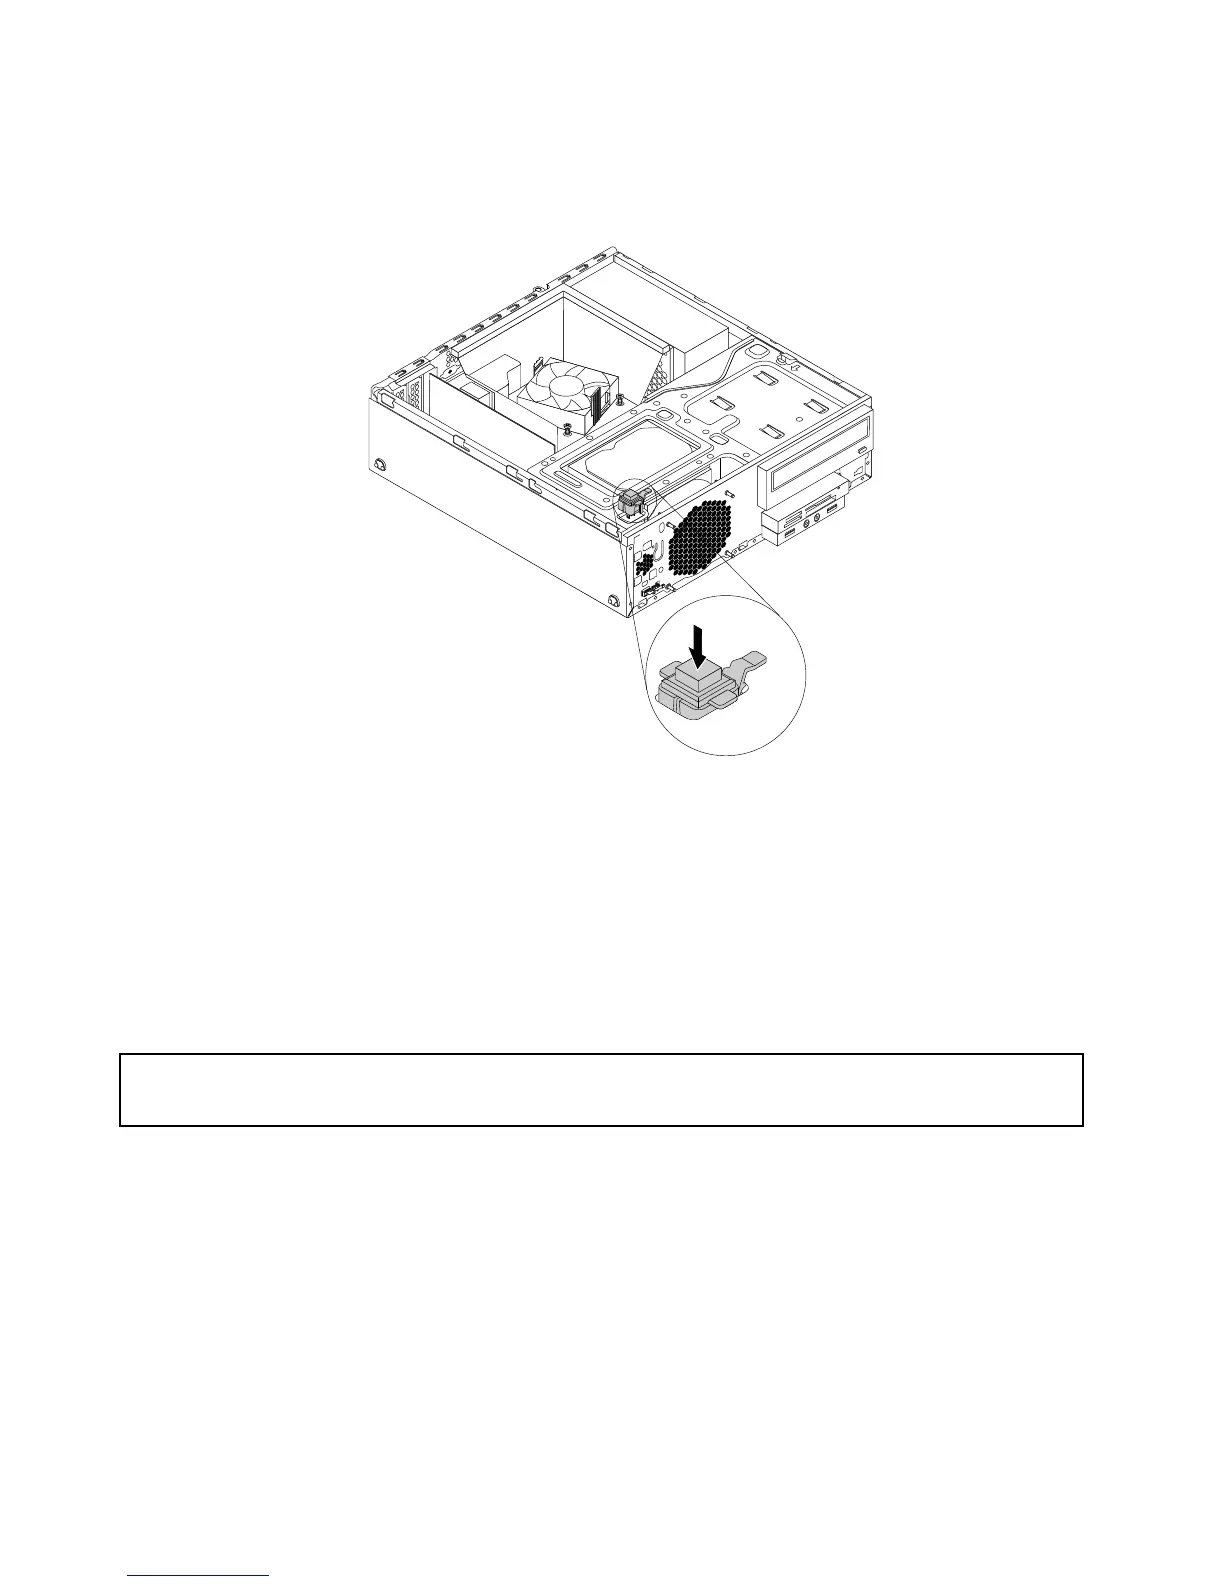
7.Putthenewcoverpresenceswitchintotheholeandpressitdownuntilitsnapsintoposition.
Note:Notetheorientationofthecoverpresenceswitch.
Figure69.Installingthecoverpresenceswitch
8.Connectthecableofthenewcoverpresenceswitchtothecoverpresenceswitchconnectoronthe
systemboard.See“Locatingpartsonthesystemboard”onpage14.
Whattodonext:
•Toworkwithanotherpieceofhardware,gototheappropriatesection.
•Tocompletetheinstallationorreplacement,goto“Completingthepartsreplacement”onpage103.
Replacingtheprimaryharddiskdrive
Attention:
Donotopenyourcomputerorattemptanyrepairbeforereadingandunderstandingthe“Importantsafetyinformation”
onpagev.
Thissectionprovidesinstructionsonhowtoreplacetheprimaryharddiskdrive.
Toreplacetheprimaryharddiskdrive,dothefollowing:
1.Removeallmediafromthedrivesandturnoffallattacheddevicesandthecomputer.Then,disconnect
allpowercordsfromelectricaloutletsanddisconnectallcablesthatareconnectedtothecomputer.
2.Removethecomputercover.See“Removingthecomputercover”onpage36.
3.Removethefrontbezel.See“Removingandreinstallingthefrontbezel”onpage36.
72ThinkCentreM83,M93/pUserGuide



 To Next Page