11.Connectthenewpowersupplyassemblycablestoalldrivesandthesystemboard.See“Locating
partsonthesystemboard”onpage14.
Whattodonext:
•Toworkwithanotherpieceofhardware,gototheappropriatesection.
•Tocompletetheinstallationorreplacement,goto“Completingthepartsreplacement”onpage103.
Replacingtheheatsinkandfanassembly
Attention:
Donotopenyourcomputerorattemptanyrepairbeforereadingandunderstandingthe“Importantsafetyinformation”
onpagev.
Thissectionprovidesinstructionsonhowtoreplacetheheatsinkandfanassembly.
CAUTION:
Theheatsinkandfanassemblymightbeveryhot.Turnoffthecomputerandwaitthreetove
minutestoletthecomputercoolbeforeremovingthecomputercover.
Toreplacetheheatsinkandfanassembly,dothefollowing:
1.Removeallmediafromthedrivesandturnoffallattacheddevicesandthecomputer.Then,disconnect
allpowercordsfromelectricaloutletsanddisconnectallcablesthatareconnectedtothecomputer.
2.Removethecomputercover.See“Removingthecomputercover”onpage36.
3.Removethefrontbezel.See“Removingandreinstallingthefrontbezel”onpage36.
4.Locatetheheatsinkandfanassembly.See“Locatingcomponents”onpage14
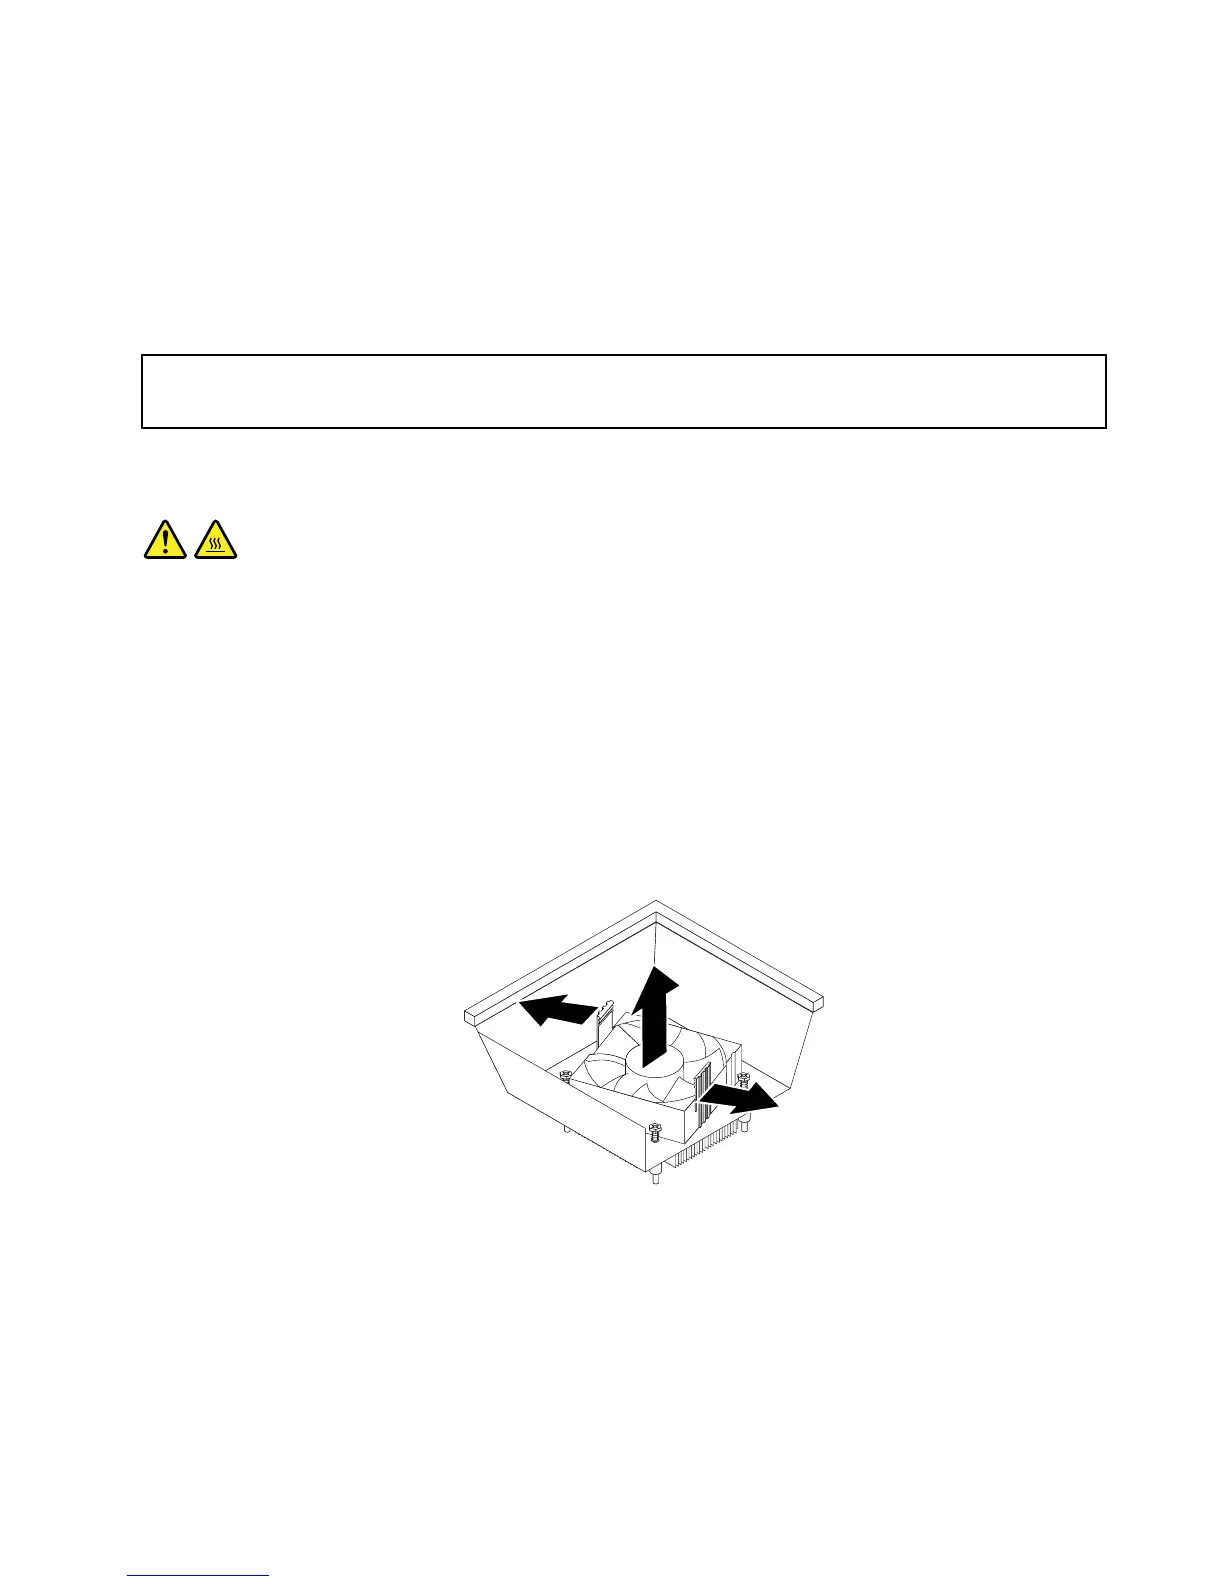
5.Pivotthetwoplasticretainingclipsthatsecuretheheatsinkfanductoutward.Then,removetheheat
sinkfanductfromthefailingheatsinkandfanassembly.
Figure60.Removingtheheatsinkfanduct
6.Disconnectthecableoftheheatsinkandfanassemblyfromthesystemboard.
Chapter5.Installingorreplacinghardware65



 To Next Page