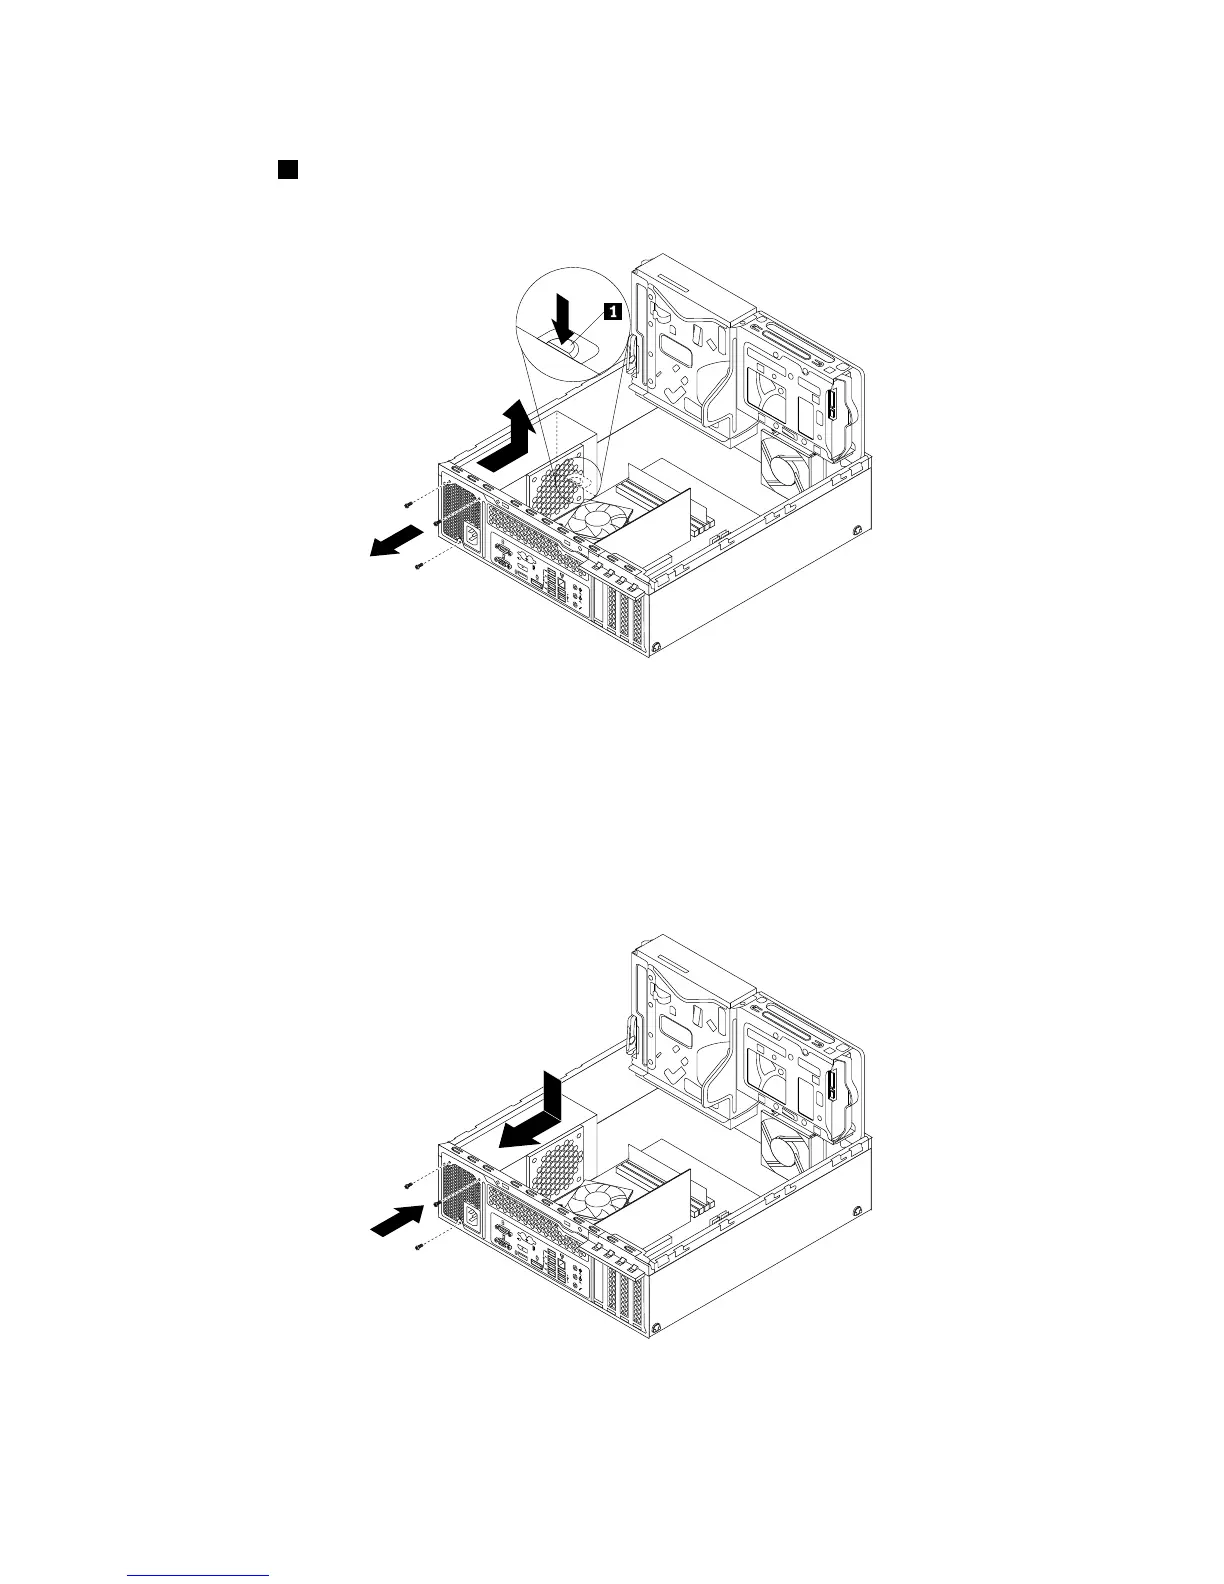
8.Attherearofthecomputer,removethethreescrewsthatsecurethepowersupplyassembly.Pressthe
retainingclip1downwardandslidethepowersupplyassemblytothefrontofthecomputer.Then,lift
thepowersupplyassemblyoutofthecomputer.
Figure58.Removingthepowersupplyassembly
9.Ensurethatthenewpowersupplyassemblyisthecorrectreplacement.
10.Installthenewpowersupplyassemblyintothechassissothatthescrewholesinthenewpowersupply
assemblyarealignedwiththecorrespondingholesintherearofthechassis.Then,installthethree
screwstosecurethenewpowersupplyassembly.
Note:UseonlyscrewsprovidedbyLenovo.
Figure59.Installingthepowersupplyassembly
64ThinkCentreM83,M93/pUserGuide