Whattodonext:
•Toworkwithanotherpieceofhardware,gototheappropriatesection.
•Tocompletetheinstallationorreplacement,goto“Completingthepartsreplacement”onpage103.
ReplacingthefrontaudioandUSBassembly
Attention:
Donotopenyourcomputerorattemptanyrepairbeforereadingandunderstandingthe“Importantsafetyinformation”
onpagev.
ThissectionprovidesinstructionsonhowtoreplacethefrontaudioandUSBassembly.
ToreplacethefrontaudioandUSBassembly,dothefollowing:
1.Removeallmediafromthedrivesandturnoffallattacheddevicesandthecomputer.Then,disconnect
allpowercordsfromelectricaloutletsanddisconnectallcablesthatareconnectedtothecomputer.
2.Removethecomputercover.See“Removingthecomputercover”onpage36.
3.Removethefrontbezel.See“Removingandreinstallingthefrontbezel”onpage36.
4.LocatethefrontaudioandUSBassembly.See“Locatingcomponents”onpage14.
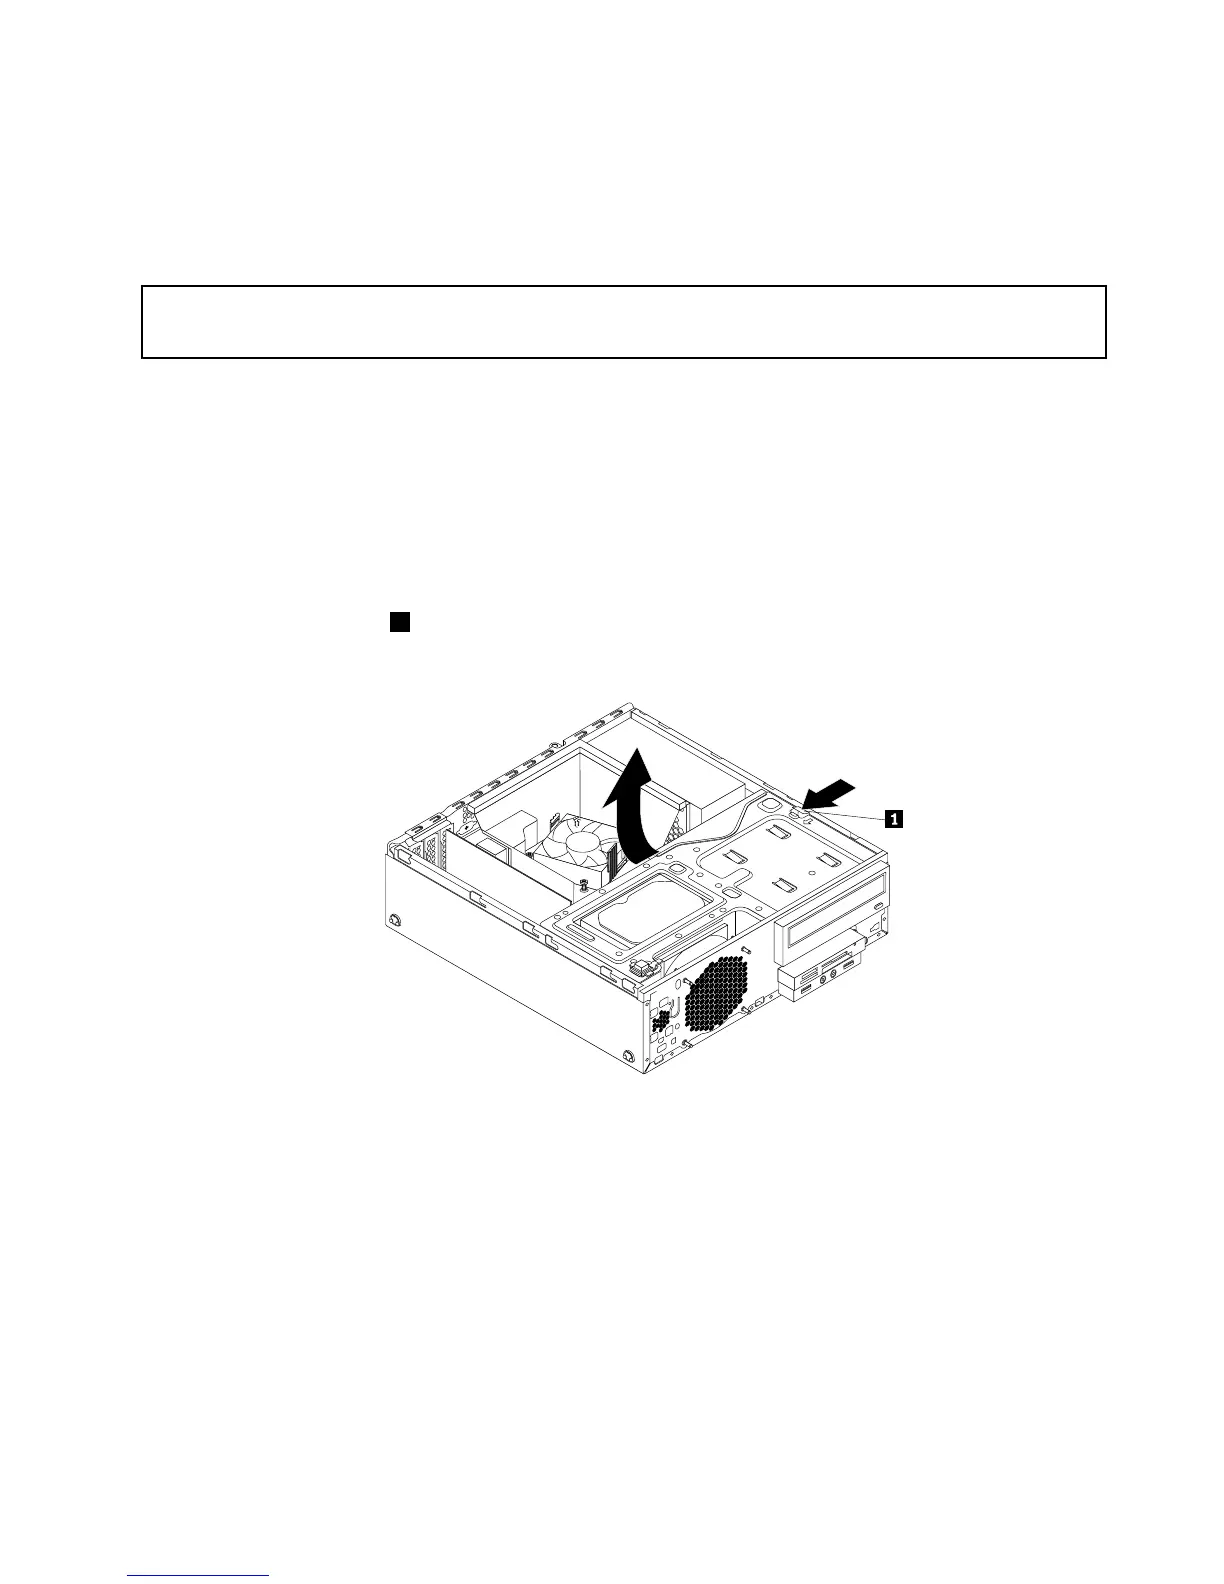
5.Presstheretainingclip1inthedirectionasshownandpivotthedrivebayassemblyupwardatthe
sametime.
Figure90.Pivotingthedrivebayassemblyupward
6.DisconnectthefrontaudioandUSBassemblycablesfromthesystemboard.
Chapter5.Installingorreplacinghardware85
 Loading...