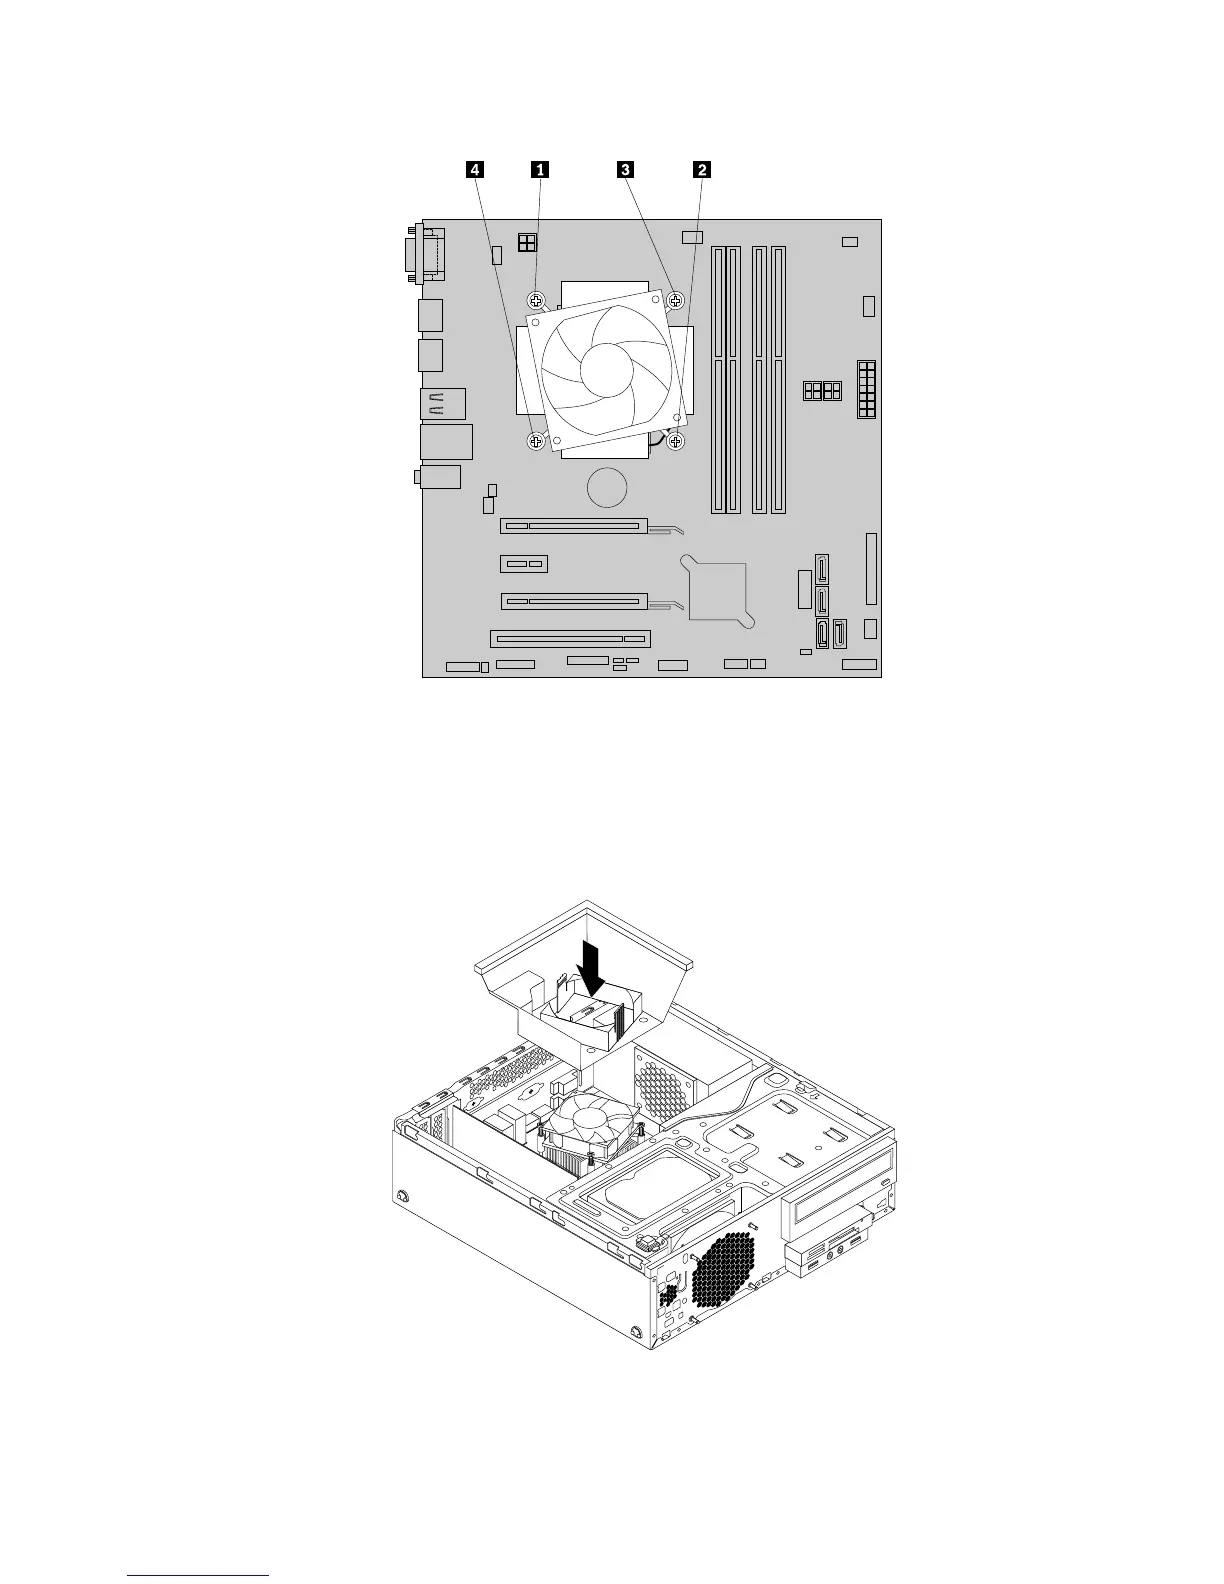
Figure62.Removingtheheatsinkandfanassembly
11.Connectthecableofthenewheatsinkandfanassemblytothemicroprocessorfanconnectoronthe
systemboard.See“Locatingpartsonthesystemboard”onpage14.
12.Positiontheheatsinkfanductonthetopofthenewheatsinkandfanassemblyasshown.Then,press
theheatsinkfanductstraightdownuntilitsnapsintoposition.
Figure63.Installingtheheatsinkfanduct
Chapter5.Installingorreplacinghardware67