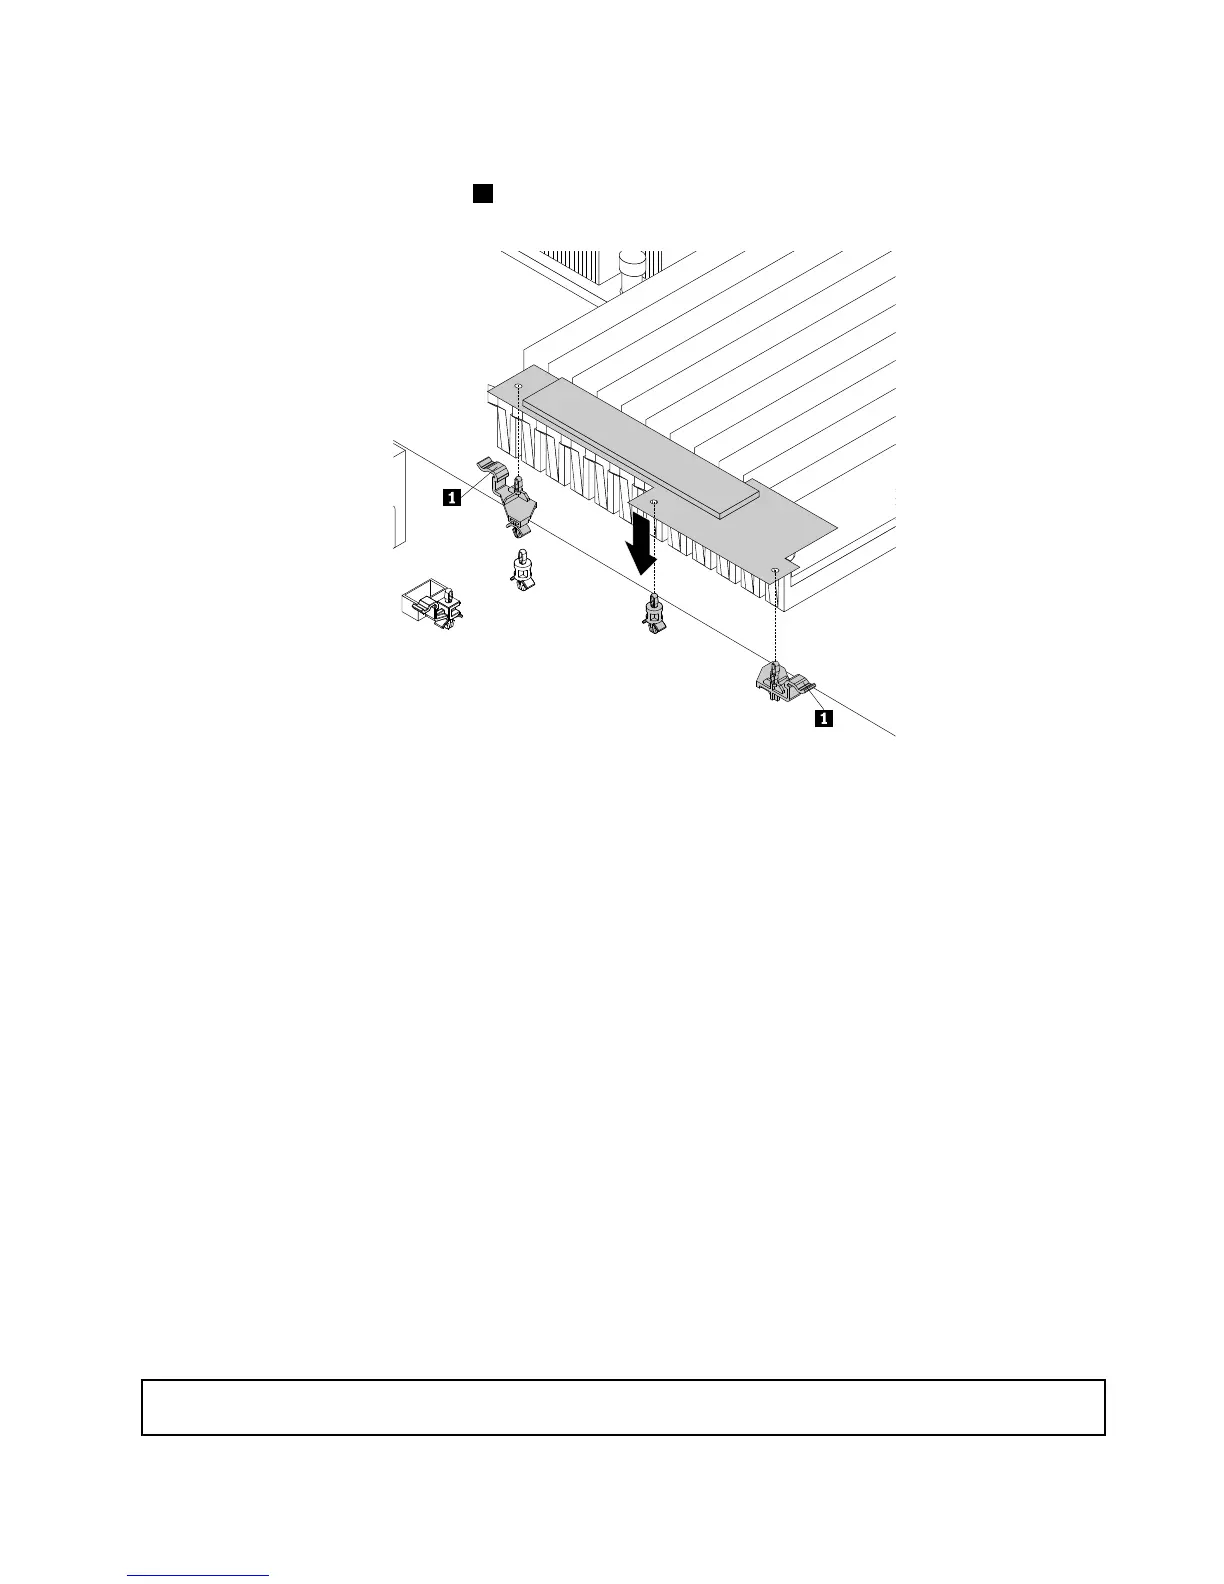
8.PositiontheM.2storagemoduleonthesystemboardsothatthethreeplasticpinspassthrough
thecorrespondingholesintheM.2storagemodule.Then,presstheM.2storagemoduledownward
untilitissecuredbythelatches
1.
Figure53.InstallingtheM.2storagemodule
9.Connectthe6-pinsignalcableoftheM.2storagemoduletotherearbackplanesignalconnector
onthesystemboard.Then,connecttheSATAsignalcableoftheM.2storagemoduletooneofthe
followingconnectors:
•TheSATAconnector1(ports4-7)onthesystemboardifyourserverhasnobackplaneandAnyRAID
adapterinstalled.See“Systemboardcomponents”onpage36.
•TheSATAconnectorontheLenovoThinkServerRAID720ixAnyRAIDAdapterifoneisinstalled.See
“AnyRAIDadapter,HostBusAdapter,andPCIeinterposercard”onpage28.
•Thesignalcableconnectoronthebackplanefor3.5-inchdrivesifyourserverhasoneofthefollowing
AnyRAIDadapterinstalled:
–LenovoThinkServerRAID110iAnyRAIDAdapter
–LenovoThinkServerRAID510iAnyRAIDAdapter
–LenovoThinkServerRAID720iAnyRAIDAdapter
See“Backplanefor3.5-inchdrives”onpage34
.
Whattodonext:
•Toworkwithanotherpieceofhardware,gototheappropriatesection.
•Tocompletetheinstallation,goto“Completingthepartsreplacement”onpage152.
RemovingtheM.2storagemodule
Attention:Donotopenyourserverorattemptanyrepairbeforereadingandunderstanding“Safetyinformation”
onpageiiiand“Guidelines”onpage59.
Chapter6.Replacinghardware87






 To Next Page