4.Removethefourscrewsattherearofthechassisthatsecurethepowersupplyassembly.
Figure29.Removingthescrewsthatsecurethepowersupplyassembly
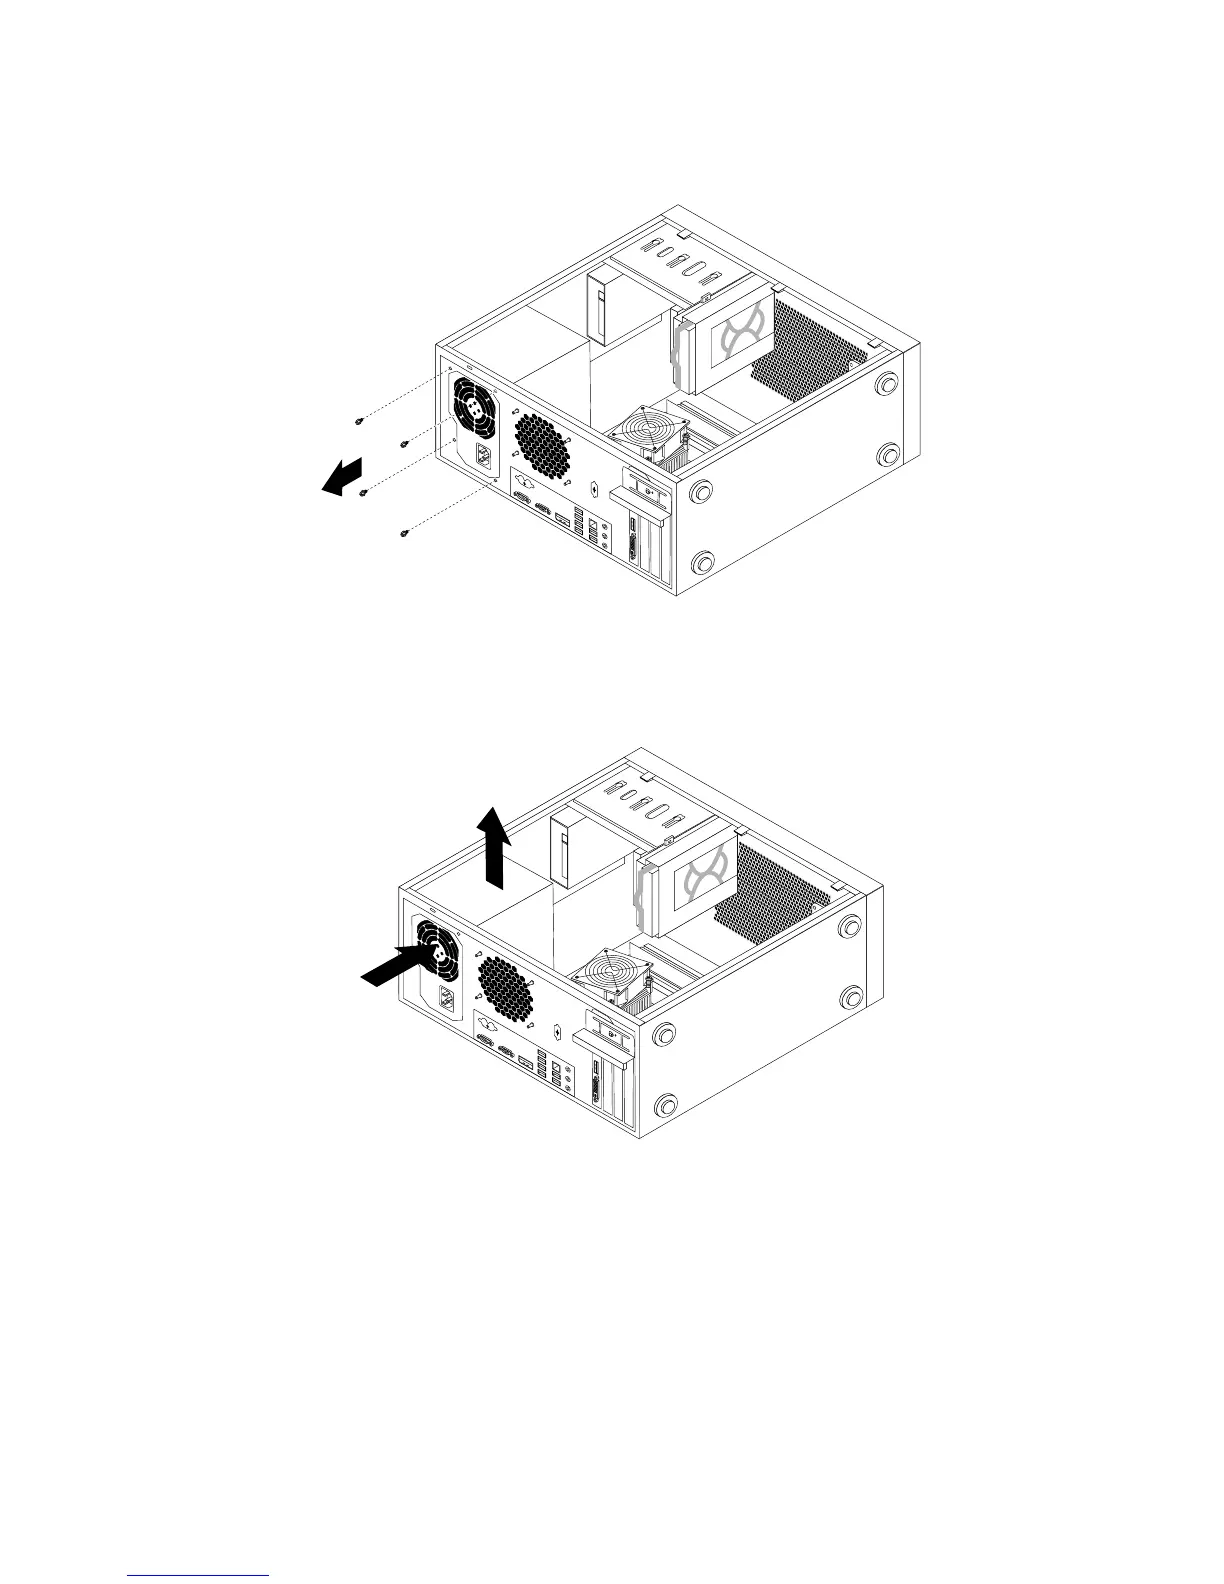
5.Slidethepowersupplyassemblyalittlebitforwardandthenremoveitfromthechassis.
Figure30.Removingthepowersupplyassembly
6.Ensurethatthenewpowersupplyassemblyisthecorrectreplacement.
7.Installthenewpowersupplyassemblyintothechassissothatthescrewholesinthepowersupply
assemblyalignwiththoseinthechassis.
8.Installandtightenthefourscrewstosecurethepowersupplyassembly.
Note:UseonlyscrewsprovidedbyLenovo.
9.Reconnectthepowersupplyassemblycablestothesystemboardandeachofthedrives.
10.Securethepowersupplyassemblycableswiththecableclipsandtiesinthechassis.
38ThinkServerTS130UserGuide
 Loading...


