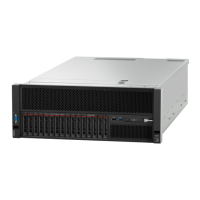
Table 7. Components on the server rear view (continued)
3 M.2 backplane (slot 6, internal) 12 Identification LED (blue)
4 LOM adapter (slot 7) 13 USB 4 (USB 3.0)
5 AC power LED (green) 14 USB 3 (USB 3.0)
6 DC power LED (green) 15 Serial connector
7 Power supply error LED (yellow) 16 VGA connector
8 Power supply unit 2
17 XClarity Controller network connector
9 Power supply unit 1 18 NMI button
1 PCIe slots (slot 1-2, 8-11):
Install PCIe adapters into these slots. Following are detailed descriptions of each slot:
• Slot 1: PCI Express 3.0 x16 (supports PCIe switch card)
• Slot 2: PCI Express 3.0 x8 (supports RAID adapters for SATA/SAS drives)
• Slot 8: PCI Express 3.0 x8
• Slot 9: PCI Express 3.0 x8
• Slot 10: PCI Express 3.0 x8 (supports RAID adapters for SATA/SAS drives)
• Slot 11: PCI Express 3.0 x16 (supports PCIe switch card)
For more information, see “System-board connectors” on page 21 for the location of the slots, and “PCIe
riser-card assembly and adapter replacement” on page 86 for information about installation and removal.
2 PCIe riser-card (slot 3-5):
Install a full-height PCIe riser-card into this slot. Following are the PCIe riser-cards supported by this server.
• x8/x8/x8 PCIe full-height riser assembly provides:
– Slot 3: PCI Express 3.0 x8
– Slot 4: PCI Express 3.0 x8
– Slot 5: PCI Express 3.0 x8
• x8/x8/x8ML2 PCIe full-height riser assembly provides:
– Slot 3: PCI Express 3.0 x8
– Slot 4: PCI Express 3.0 x8
– Slot 5: Customized slot for x16 ML2 adapter
• x8/x16ML PCIe full-height riser assembly provides:
– Slot 3: PCI Express 3.0 x8
– Slot 4: Not available
– Slot 5: Customized slot for ML2 adapter
3 M.2 backplane (slot 6):
Install M.2 backplane to this slot. See “M.2 drive and backplane replacement” on page 74 for more details.
4 LOM adapter (slot 7):
18
ThinkSystem SR850 Maintenance Manual

 Loading...


