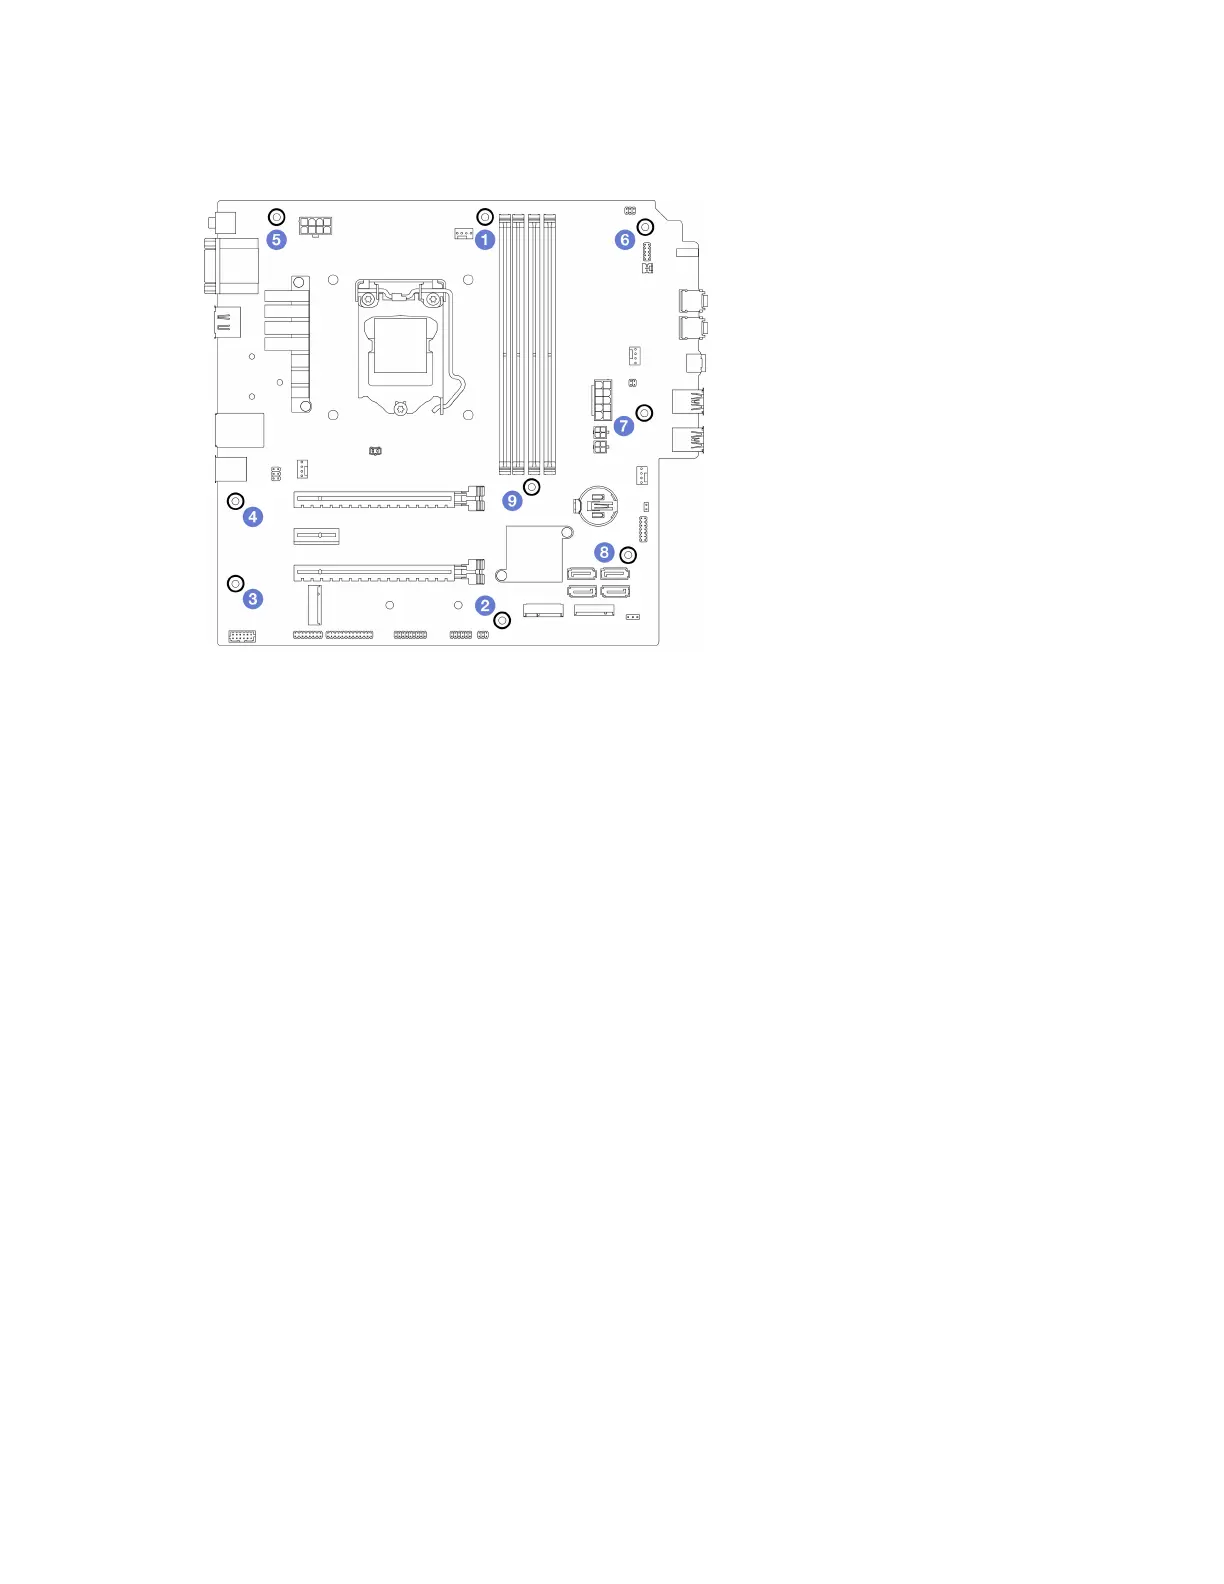
Step 2. Secure the system board to the chassis with nine screws in the sequence shown on the illustration
below.
Figure 122. System-board screws installation sequence
After you finish
Note: Make sure the CMOS battery is installed on the system board, see
“Install the CMOS battery
(CR2032)” on page 47
.
1. Reinstall the processor. see
“Install the processor (trained technician only)” on page 135.
2. Reinstall the heat sink and fan module, see
“Install the heat sink and the fan module (trained technician
only)” on page 96
3. Reinstall the memory modules. see “Install a memory module” on page 112.
4. Reinstall the front panel, see
“Install the front panel” on page 90.
5. If necessary, reinstall the PCIe adapters, see
“Remove a PCIe adapter” on page 119.
6. If necessary, reinstalled the M.2 drive, see
“Install an M.2 drive” on page 105.
7. If applicable, reinstall the rear fan, see
“Install the fan (front and rear)” on page 81.
8. If applicable, reinstall the cage bar, see Step 1 in
“Install the server cover” on page 146.
9. If necessary, reinstall the optical drive cage, see
“Install the optical drive cage” on page 77.
10. If necessary, reinstall the optical drive, see “Install an optical drive” on page 72.
11. Reinstall the front bezel, see
“Install the front bezel” on page 85.
12. Reconnect all the cables that were disconnected.
13. Complete the parts replacement, see
“Complete the parts replacement” on page 158.
14. Update VPD. See
“Update VPD (Vital Product Data)” on page 153.
15. Important Update the system firmware and device driver.
• Go to
https://datacentersupport.lenovo.com/tw/en/products/servers/thinksystem/st50v2/downloads/
driver-list/
to see the latest firmware and driver updates for your server.
• Go to “Update the firmware” on page 8 for more information on firmware updating tools.
152
ThinkSystem ST50 V2 Maintenance Manual

 Loading...


