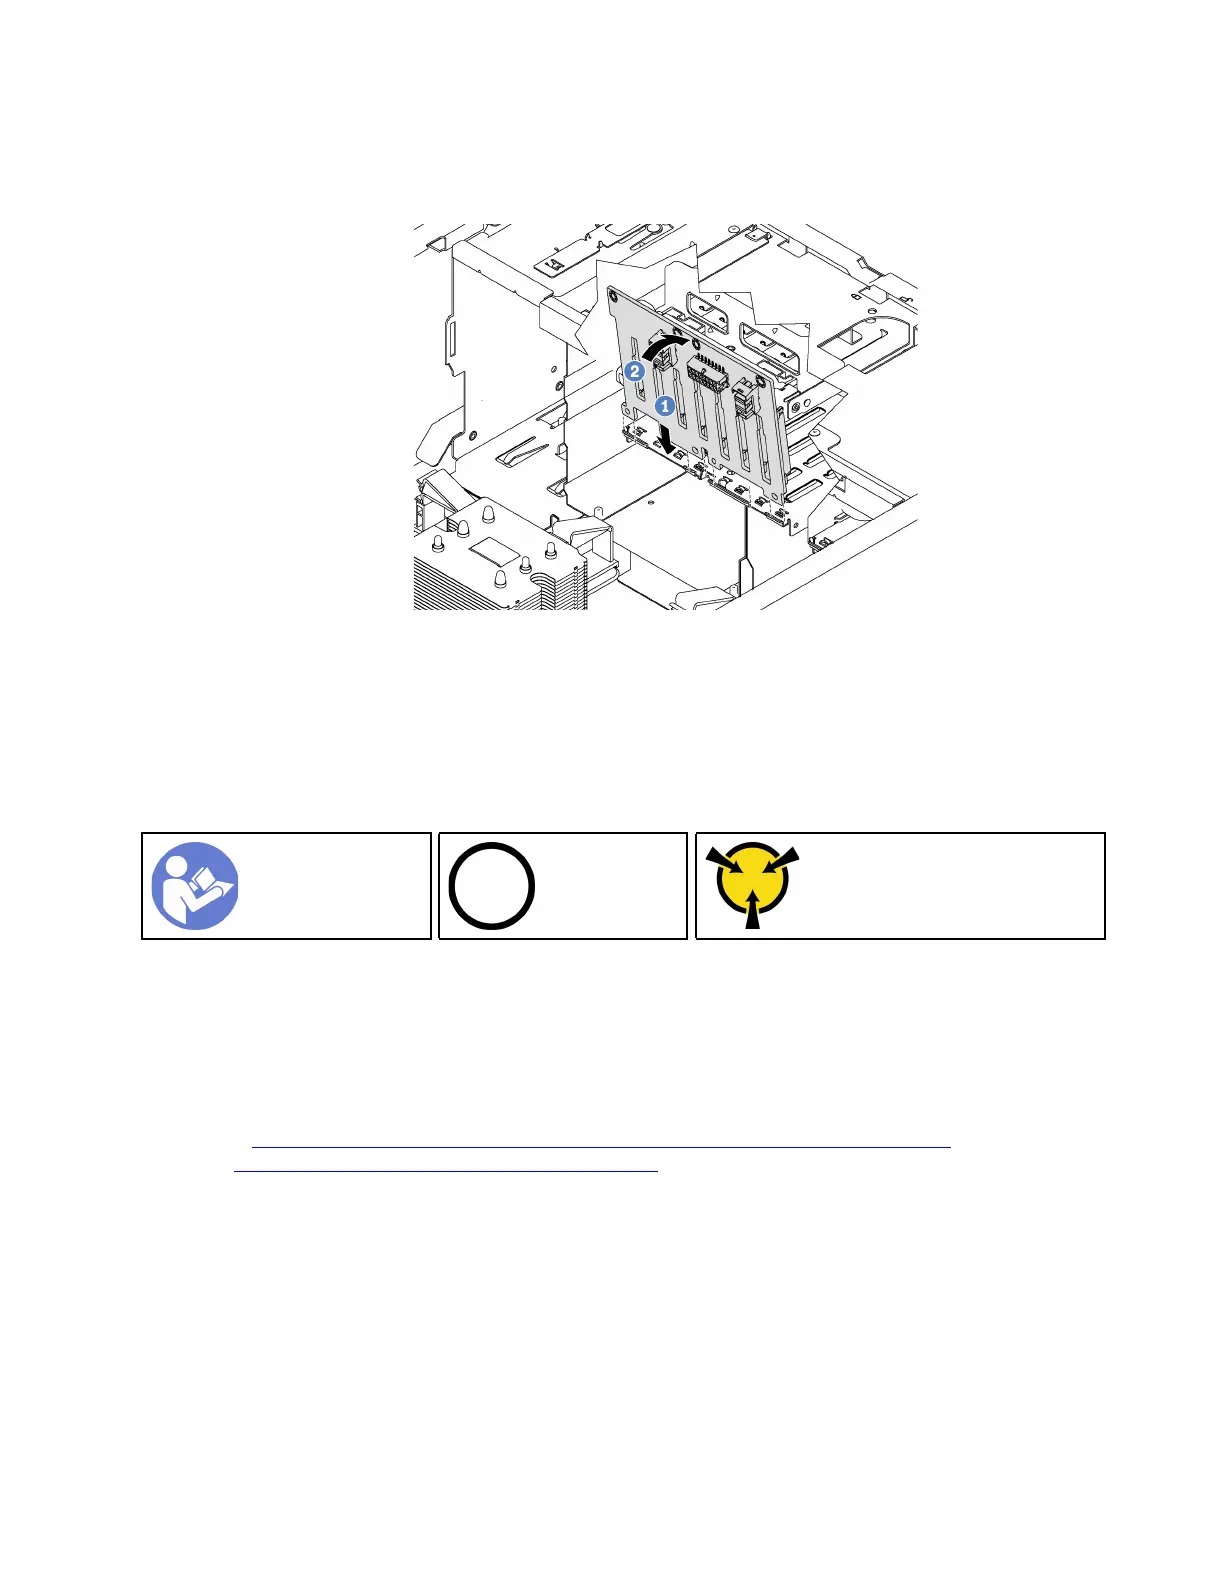
Step 2. Lower the new backplane into the chassis and insert the new backplane into the backplane slot.
Then, carefully rotate the top edge of the new backplane toward the drive cage until it is secured by
the release tab.
Figure 45. Installation of the backplane for eight 2.5-inch hot-swap drives
Step 3. Connect the cables to the new backplane and the system board. See “Hot-swap-drive backplane”
on page 34.
Install the backplane for four 3.5-inch hot-swap drives
Use this information to install the backplane for four 3.5-inch hot-swap drives.
“Read the
installation
Guidelines” on
page 58
“Power off
the server for
this task” on
page 109
“ATTENTION:
Static Sensitive Device
Ground package before opening”
on page 59
Before installing the backplane for four 3.5-inch hot-swap drives, touch the static-protective package that
contains the new backplane to any unpainted surface on the outside of the server. Then, take the new
backplane out of the package and place it on a static-protective surface.
To install the backplane for four 3.5-inch hot-swap drives, complete the following steps:
Watch the procedure. A video of the installation process is available:
• Youtube:
https://www.youtube.com/playlist?list=PLYV5R7hVcs-Acsjj4tU79GzKnWG316BYn
• Youku: http://list.youku.com/albumlist/show/id_50483452
Step 1. Note the orientation of the new backplane.
Chapter 3. Server hardware setup 81