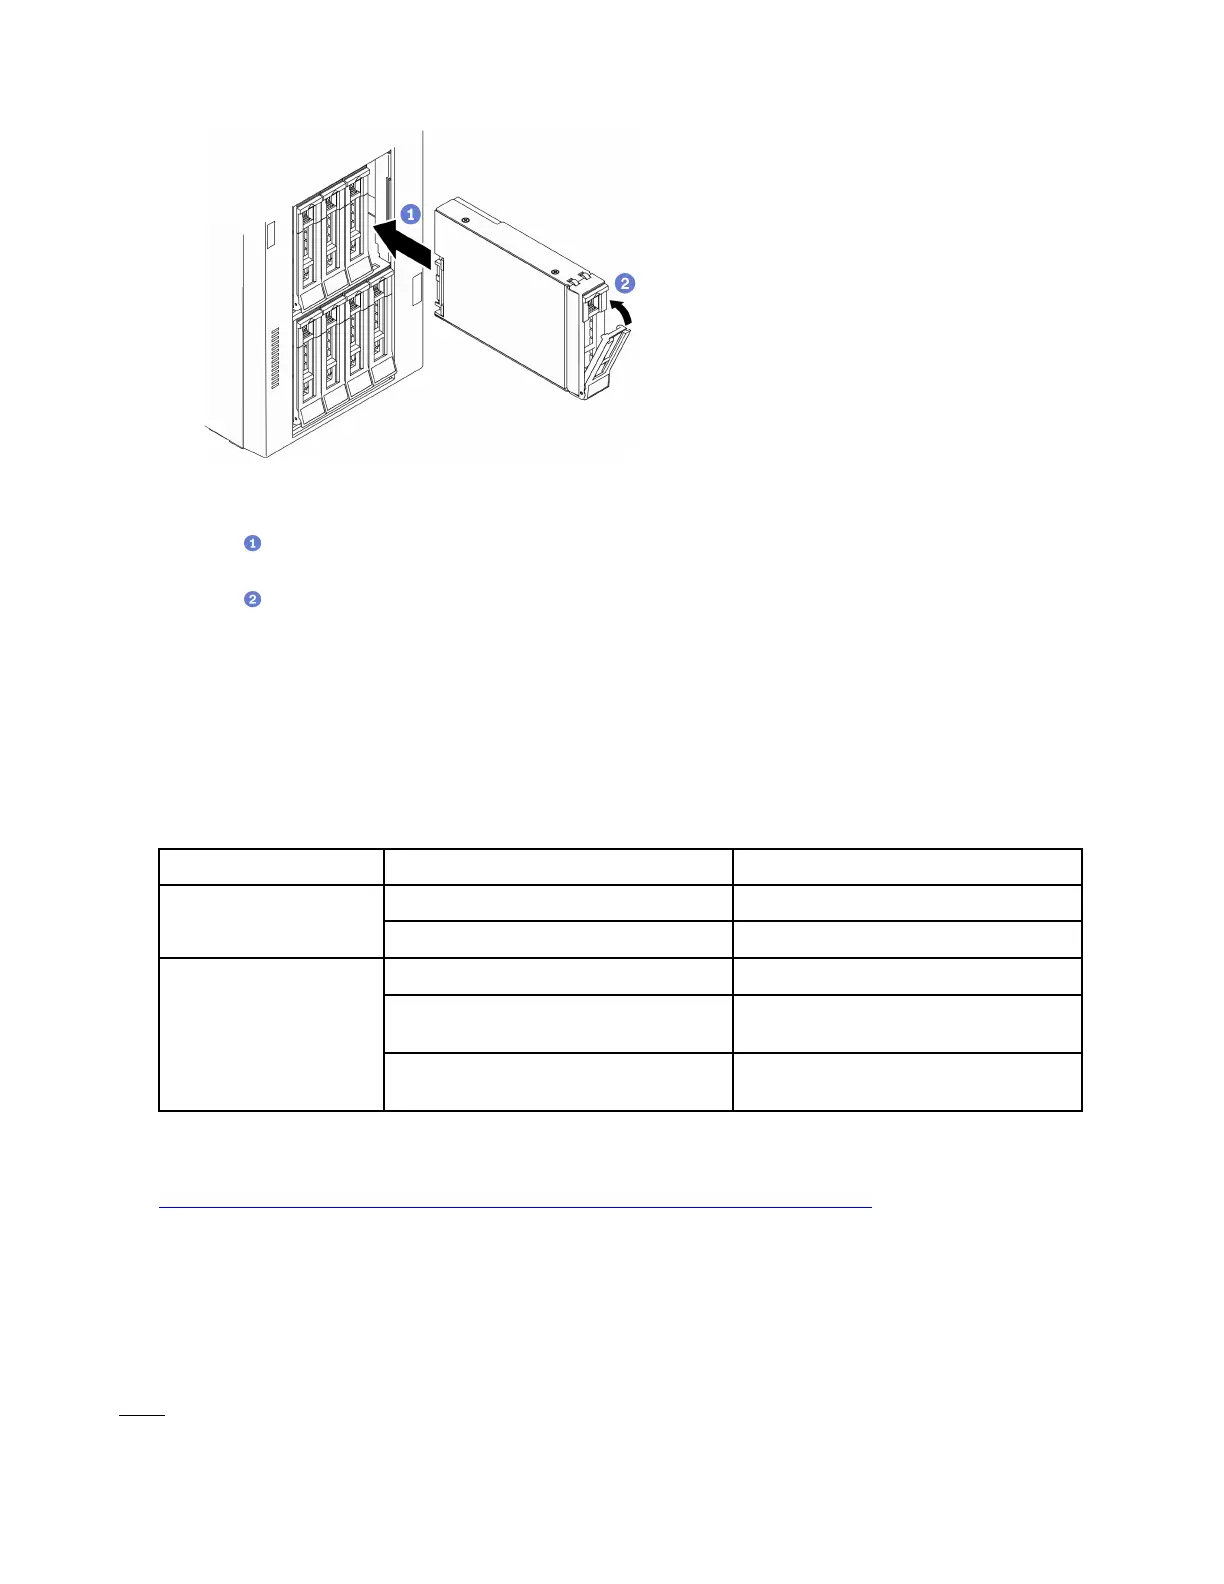
Figure 67. Hot-swap drive installation
a.
Ensure that the tray handle is in the open position. Slide the drive into the drive bay until it
snaps into position.
b.
Close the tray handle to lock the drive in place.
After you finish
1. Install other drives or drive fillers if necessary.
Note: All the drive bays must be occupied. This means that each bay must have a drive or drive filler
installed.
2. Close the front door; then, use the key to lock the server cover.
3. Check the drive LEDs to verify that the drive is operating correctly.
Drive LED
Status
Description
Drive activity LED (top) Solid green The drive is powered but not active.
Blinking green The drive is active.
Drive status LED (bottom) Solid yellow
The drive has an error.
Blinking yellow (blinking slowly, about
one flash per second)
The drive is being rebuilt.
Blinking yellow (blinking rapidly, about
four flashes per second)
The RAID adapter is locating the drive.
4. Use the Lenovo XClarity Provisioning Manager to configure the RAID if necessary. For more information,
see:
http://sysmgt.lenovofiles.com/help/index.jsp?topic=%2FLXPM%2FRAID_setup.html
Install the internal CFF adapter
Use this information to install the internal CFF RAID adapter, internal CFF HBA adapter, or internal CFF RAID
expander adapter.
About this task
S002
112
ThinkSystem ST650 V2 Setup Guide

 Loading...


