4 Press FTP Shortcuts > > select the name of the recipient >
or .
Note: Shortcuts can be created only from the Embedded Web
Server.
Scanning to a computer
Scanning to a computer
1 Open a Web browser, and then type the printer IP address in the
address field.
Notes:
• View the printer IP address in the TCP/IP section in the
Network/Ports menu. The IP address appears as four sets of
numbers separated by periods, such as 123.123.123.123.
• If you are using a proxy server, then temporarily disable it to
load the Web page correctly.
2 Click Scan Profile > Create Scan Profile.
3 Select your scan settings, and then click Next.
4 Select a location on your computer where you want to save the
scanned output file.
5 Type a scan name.
The scan name is the name that appears in the Scan Profile list on
the display.
6 Click Submit.
7 Review the instructions on the Scan Profile screen.
A shortcut number is automatically assigned when you click
Submit. You can use this shortcut number when you are ready to
scan your documents.
a Load an original document faceup, short edge first into the ADF
tray or facedown on the scanner glass.
Notes:
• Do not load postcards, photos, small items,
transparencies, photo paper, or thin media (such as
magazine clippings) into the ADF tray. Place these items
on the scanner glass.
• The ADF indicator light turns on when the paper is
loaded properly.
b If you are loading a document into the ADF tray, then adjust the
paper guides.
c From the printer control panel, press #, and then type the
shortcut number using the keypad, or press the up or down
arrow button to scroll to Held Jobs, and then press the up or
down arrow button to scroll to Profiles.
After entering the shortcut number, the scanner scans and
sends the document to the directory or program you specified.
If you selected Profiles on the printer control panel, then locate
your shortcut on the list.
8 View the file from the computer.
The output file is saved in the location or launched in the program
you specified.
Clearing jams
Avoiding jams
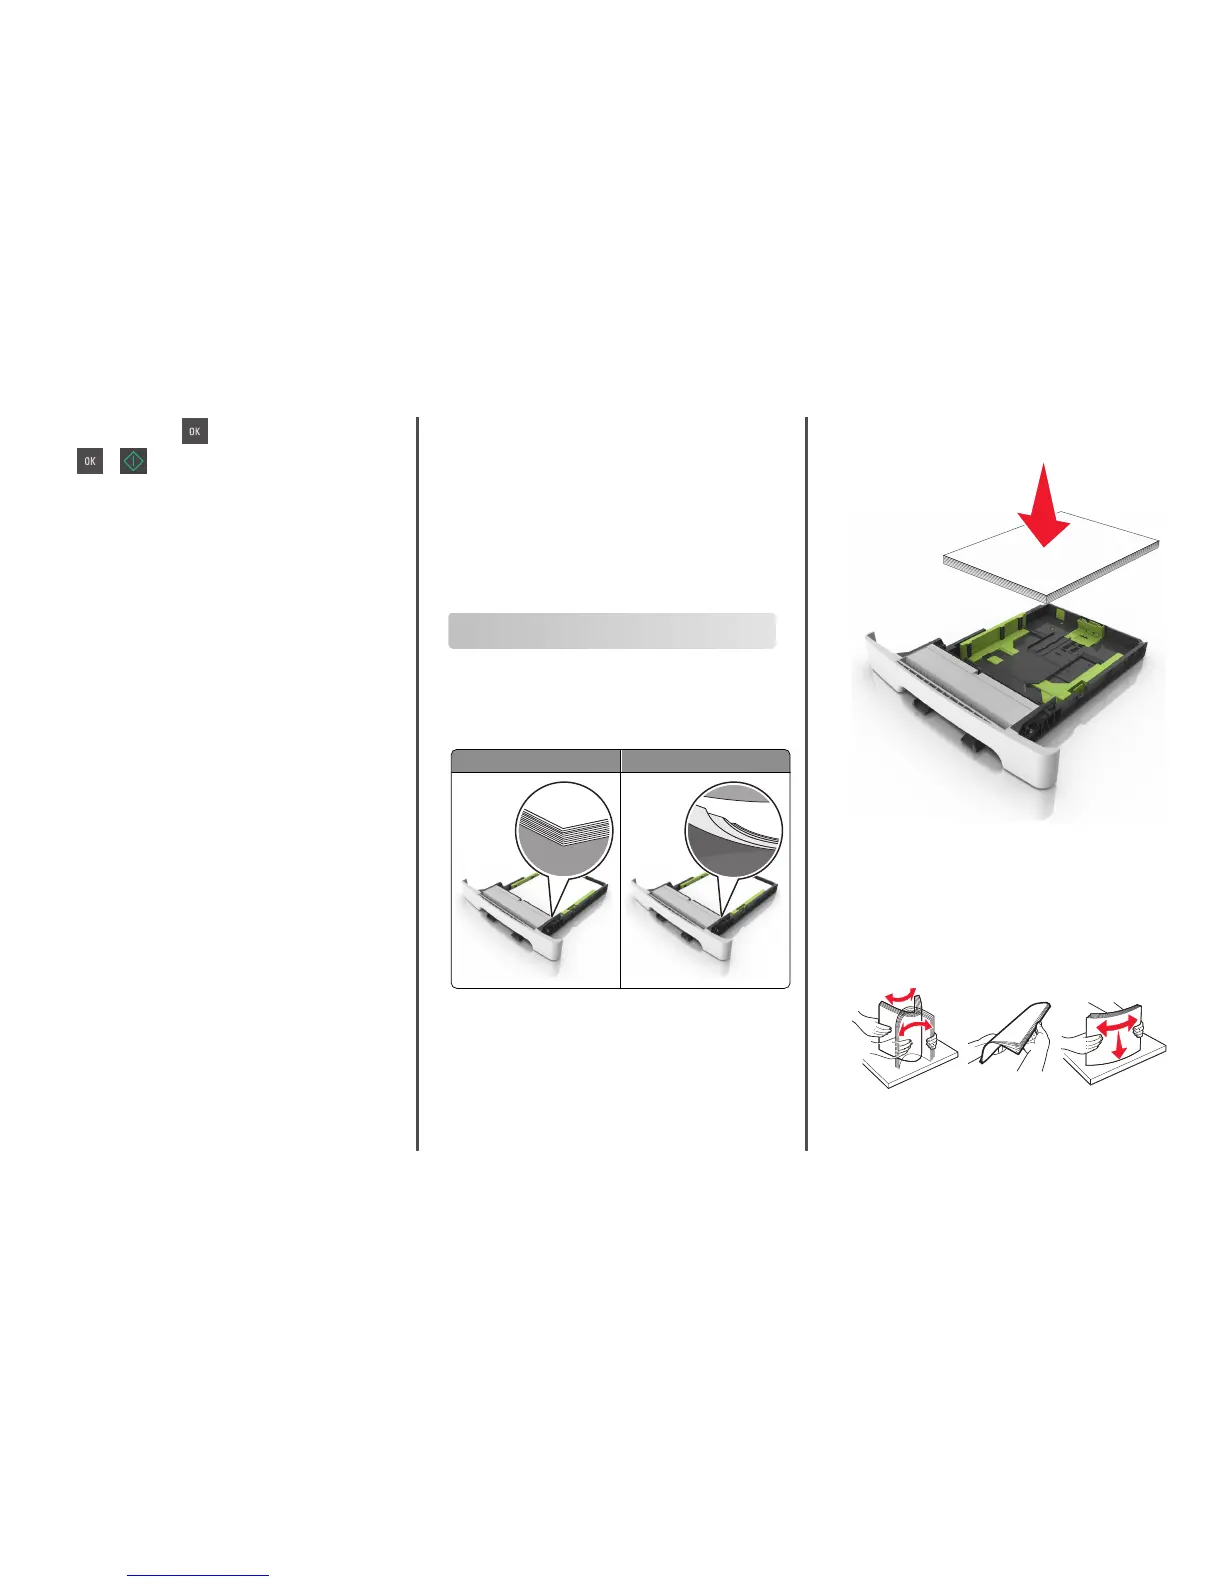
Load paper properly
• Make sure paper lies flat in the tray.
Correct loading of paper Incorrect loading of paper
• Do not remove a tray while the printer is printing.
• Do not load a tray while the printer is printing. Load it before
printing, or wait for a prompt to load it.
• Do not load too much paper. Make sure the stack height is below
the maximum paper fill indicator.
• Do not slide the paper into the tray. Load paper as shown in the
illustration.
• Make sure the guides in the tray or the multipurpose feeder are
properly positioned and are not pressing tightly against the paper
or envelopes.
• Push the tray firmly into the printer after loading paper.
Use recommended paper
• Use only recommended paper or specialty media.
• Do not load wrinkled, creased, damp, bent, or curled paper.
• Flex, fan, and straighten paper before loading it.
• Do not use paper that has been cut or trimmed by hand.
• Do not mix paper sizes, weights, or types in the same tray.
9