EasyManuals Logo

Lexmark E260d Series User Manual

Lexmark E260d Series
141 pages
To Next Page IconTo Next Page
To Previous Page IconTo Previous Page
Page #89 background imageLoading...
Page #89 background image
Place the unit on a flat, clean surface.
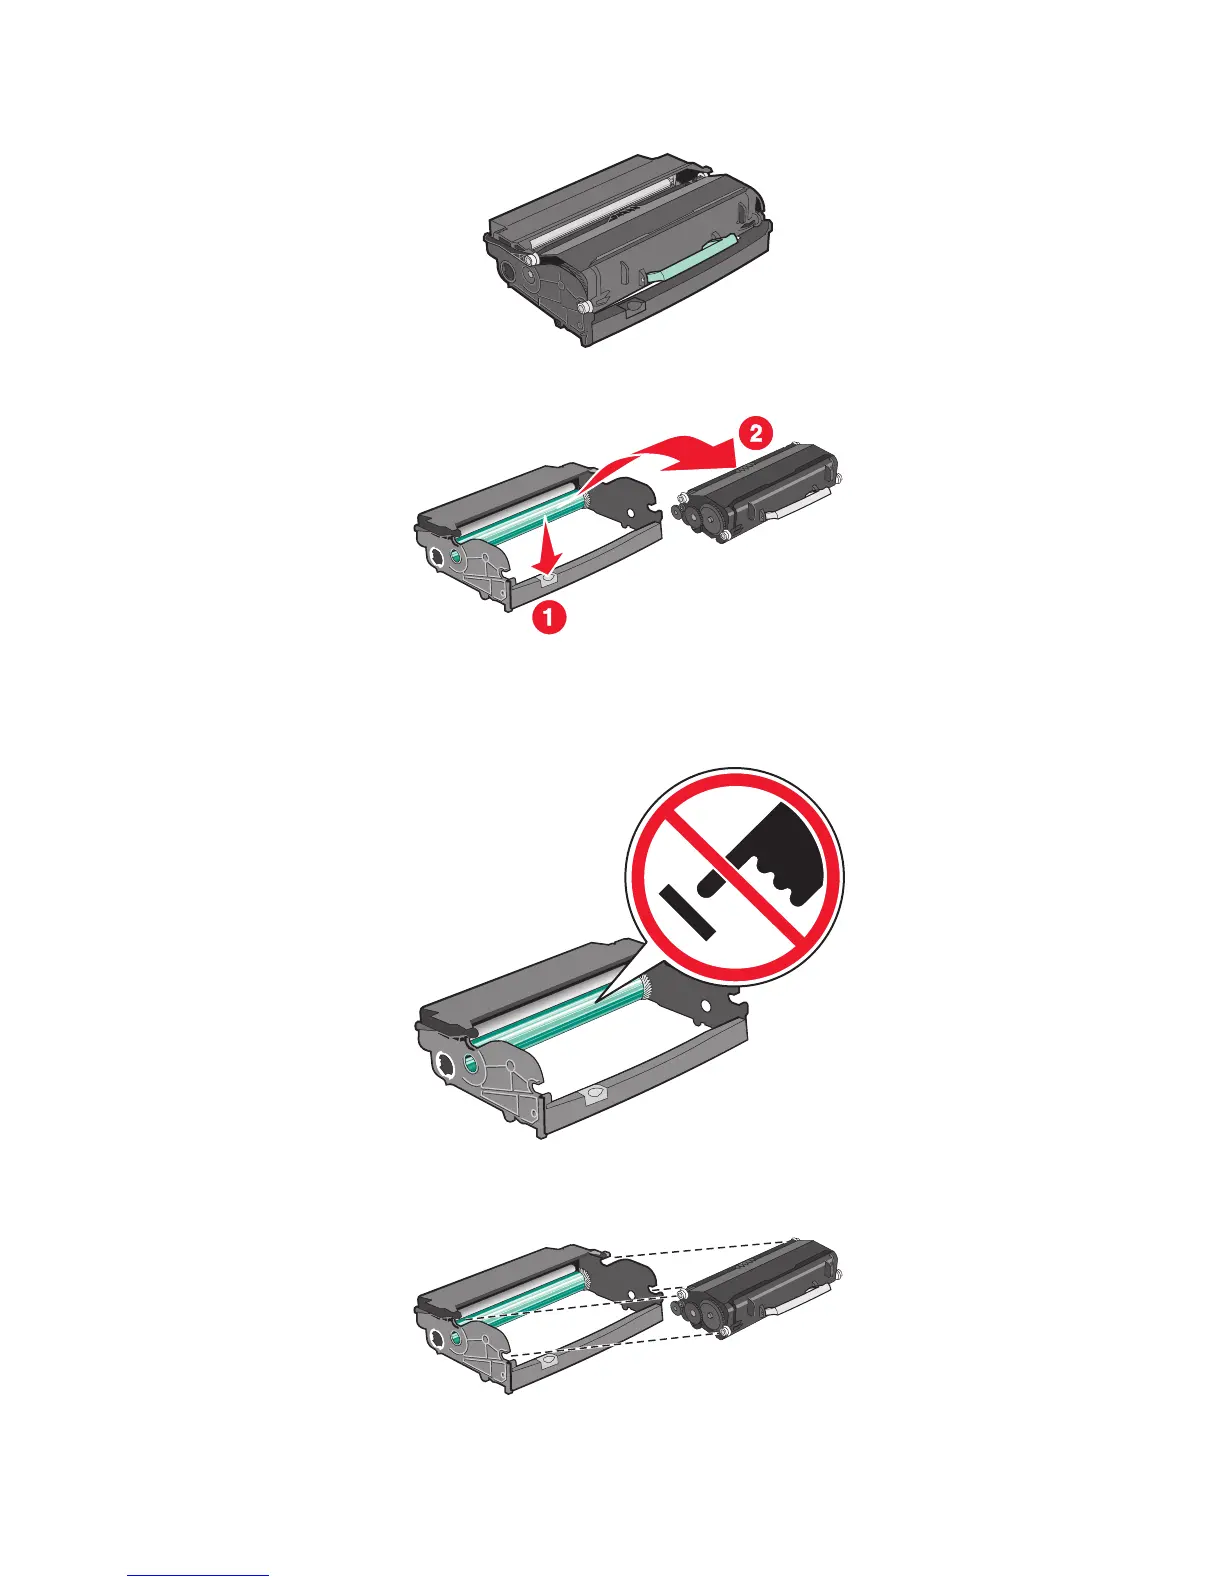
3 Press the button on the base of the photoconductor kit. Pull the toner cartridge up and out using the handle.
4 Unpack the new photoconductor kit.
Warning—Potential Damage: Be careful not to touch the photoconductor drum. Doing so may affect the print
quality of future print jobs.
5 Insert the toner cartridge into the photoconductor kit by aligning the rollers on the toner cartridge with the tracks.
Push the toner cartridge in until it clicks into place.
Maintaining the printer
89

Table of Contents

Questions and Answers:

Question and Answer IconNeed help?

Do you have a question about the Lexmark E260d Series and is the answer not in the manual?

Lexmark E260d Series Specifications

General IconGeneral
Print TechnologyMonochrome Laser
Print SpeedUp to 35 ppm
Print Resolution1200 x 1200 dpi
Processor Speed400 MHz
ConnectivityUSB 2.0, Parallel
Monthly Duty CycleUp to 50, 000 pages
Paper Output Capacity150 sheets
Operating System CompatibilityWindows, Mac OS, Linux
Input Capacity250-Sheet Input Tray
Media Types SupportedCard Stock, Envelopes, Labels, Plain Paper, Transparencies
Media Sizes SupportedA4, A5, Executive, Folio, Letter, Legal, Statement, Universal
Maximum Paper Size8.5 x 14 inches
Duplex PrintingStandard
Recommended Monthly Page Volume500 - 2, 500 pages

Related product manuals