2. Product Overview MMX4x2 series – User's Manual 17
MMX4x2-HDMI-USB20-L
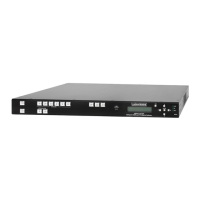
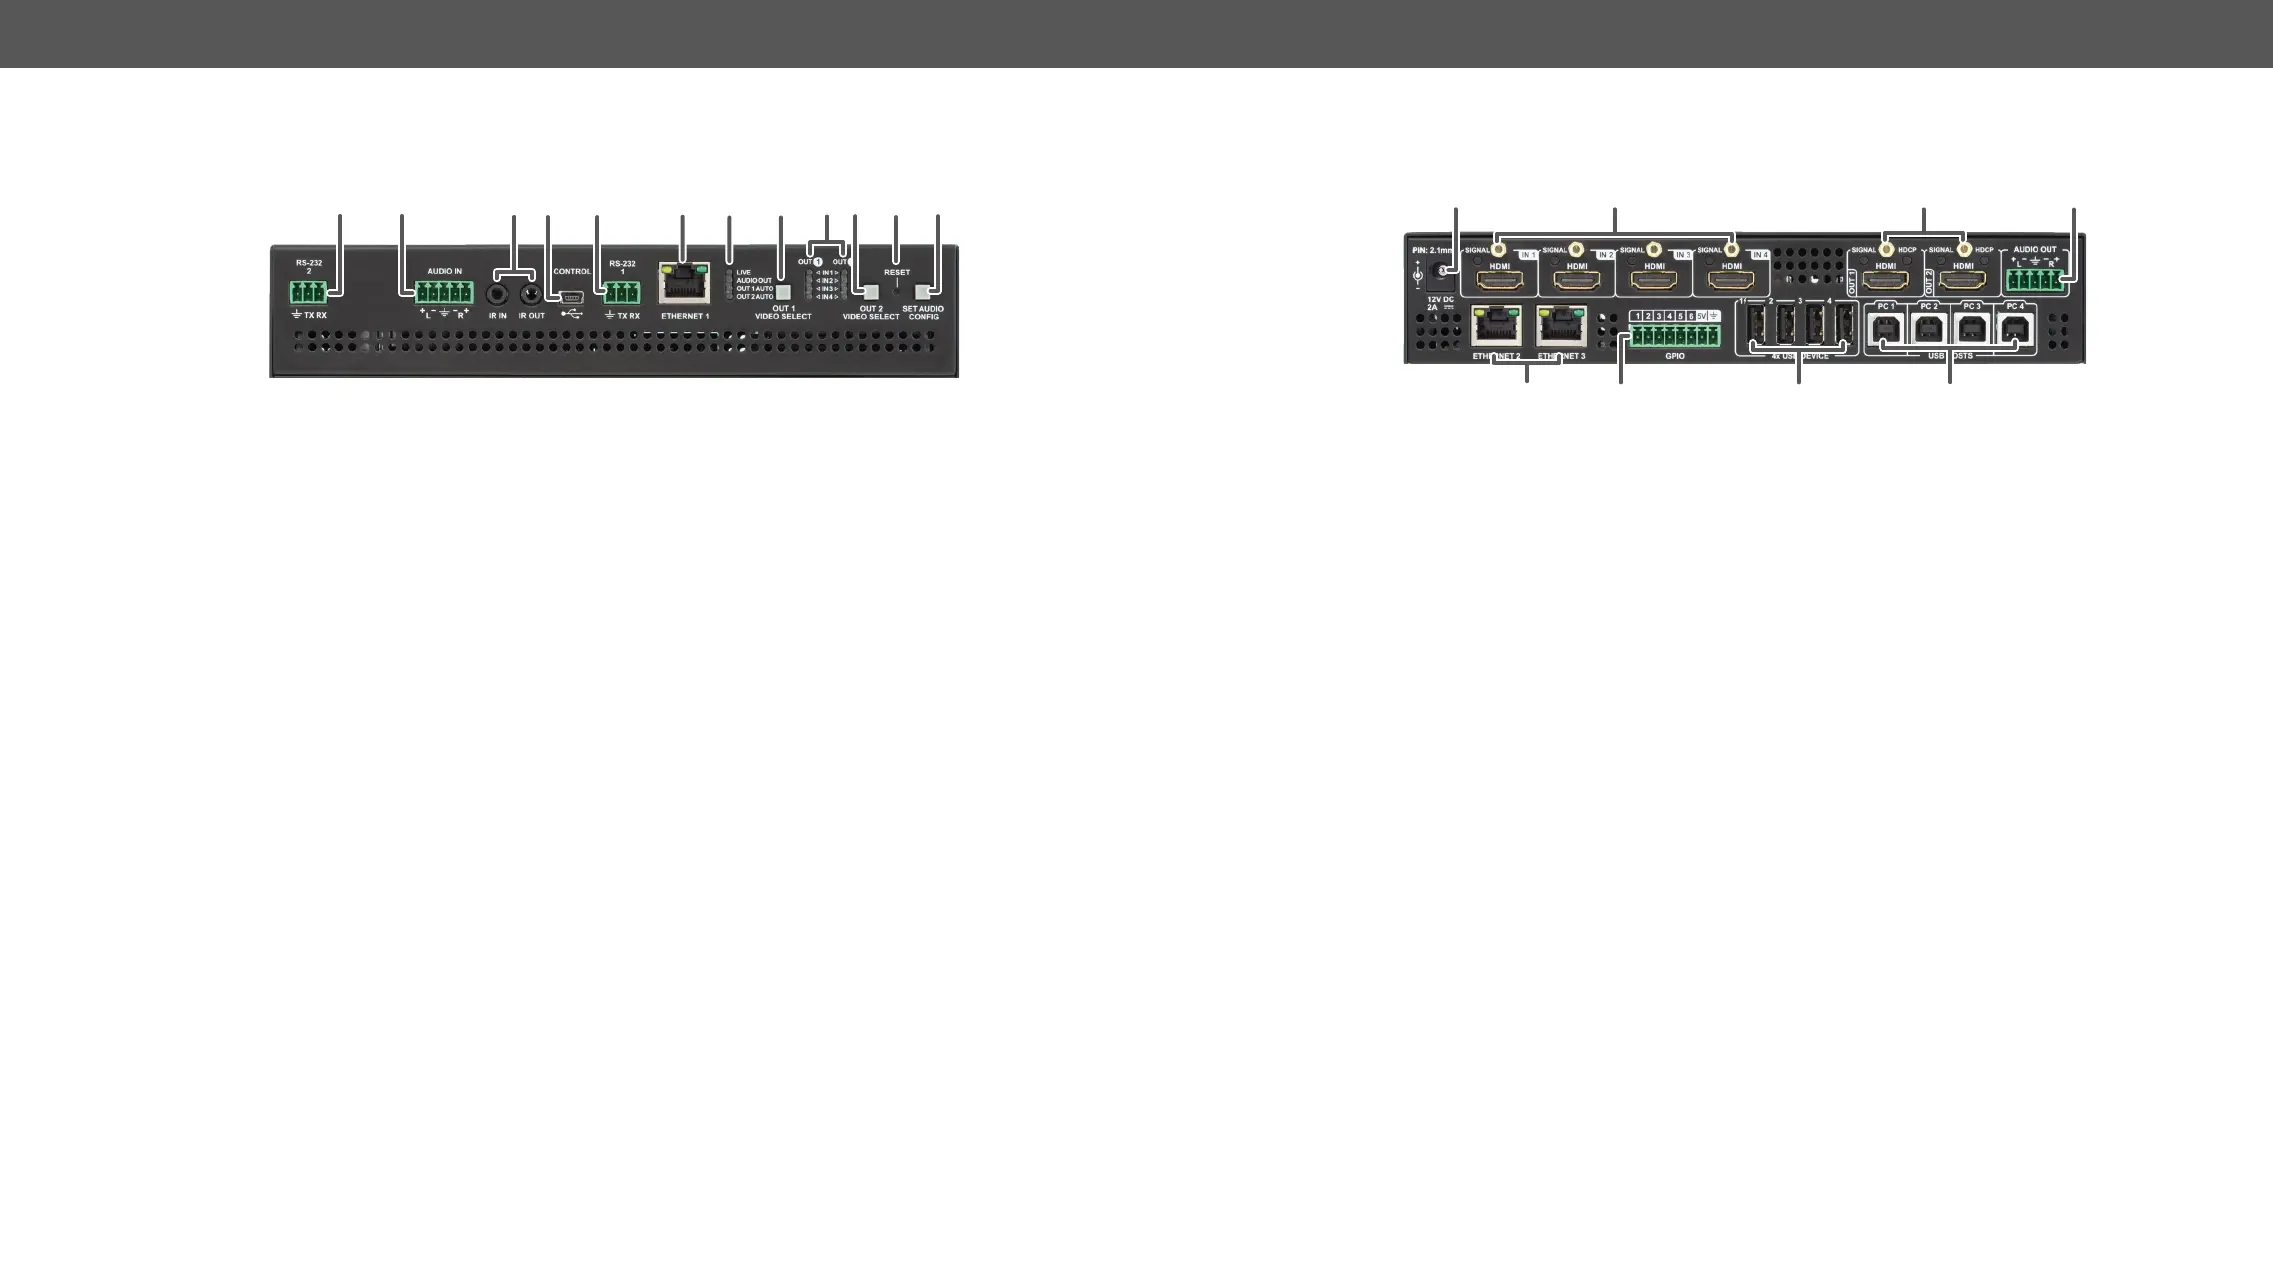
Front View
6 873
9
w eq1 2 4 5
1
RS-232 (#2)
party control systems, or third-party device control. Pin assignment
can be found in the RS-232 Connector section.
2
Audio input port
can be found in the Analog Audio Input and Output section.
3
IR IN and OUT
optional IR receiver (IR IN) and transmitter (IR OUT). Pin assignments
can be found in the IR Connector section.
4
USB
5
RS-232 (#1)
party control systems, or third-party device control. Pin assignment
can be found in the RS-232 Connector section.
6
Ethernet (#1)
7
Status LEDs
device. See the details in the section.
8
Video select button for
Output 1
Pushing the button selects the video source for Output 1. See the
sequence in the section.
9
Input select LEDs
q
Video select button for
Output 2
Pushing the button selects the video source for Output 2. See the
sequence in the section.
w
Reset button Pressing the reset button reboots the device. It has the same result as
unplugging and re-plugging the power connector.
e
in the section and the special functions in the
Enable DHCP (Dynamic) IP Address section.
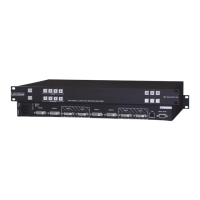
Rear View
3 41
65 7 8
2
1
12V DC input connector
adaptor.
2
HDMI input ports Rear
section.
3
HDMI output ports
operations can be found in thes ection.
4
Audio output port
assignment can be found in the Analog Audio Input and Output
section.
5
Ethernet (#2)
6
GPIO port
output pins.
7
USB-A ports Downstream ports for connecting USB peripherals (e.g. camera,
keyboard, multitouch display).
8
USB-B ports Upstream ports for connecting USB host devices (e.g. computer).
 Loading...