3. Front Panel Control UCX series – User's Manual 17
Enable DHCP IP Address
DIFFERENCE: #new
circumstances during install or usage, DHCP can be enabled from the front panel:
Step 1. Make sure the device is powered on and operational.
Step 2. Press and keep pressed the AUDIO OUT button for 5 seconds.
Step 3.
(within 3 seconds).
Step 4. #dhcp
Reset to Factory Default Settings
There are two ways to restore the factory defaults: #factory
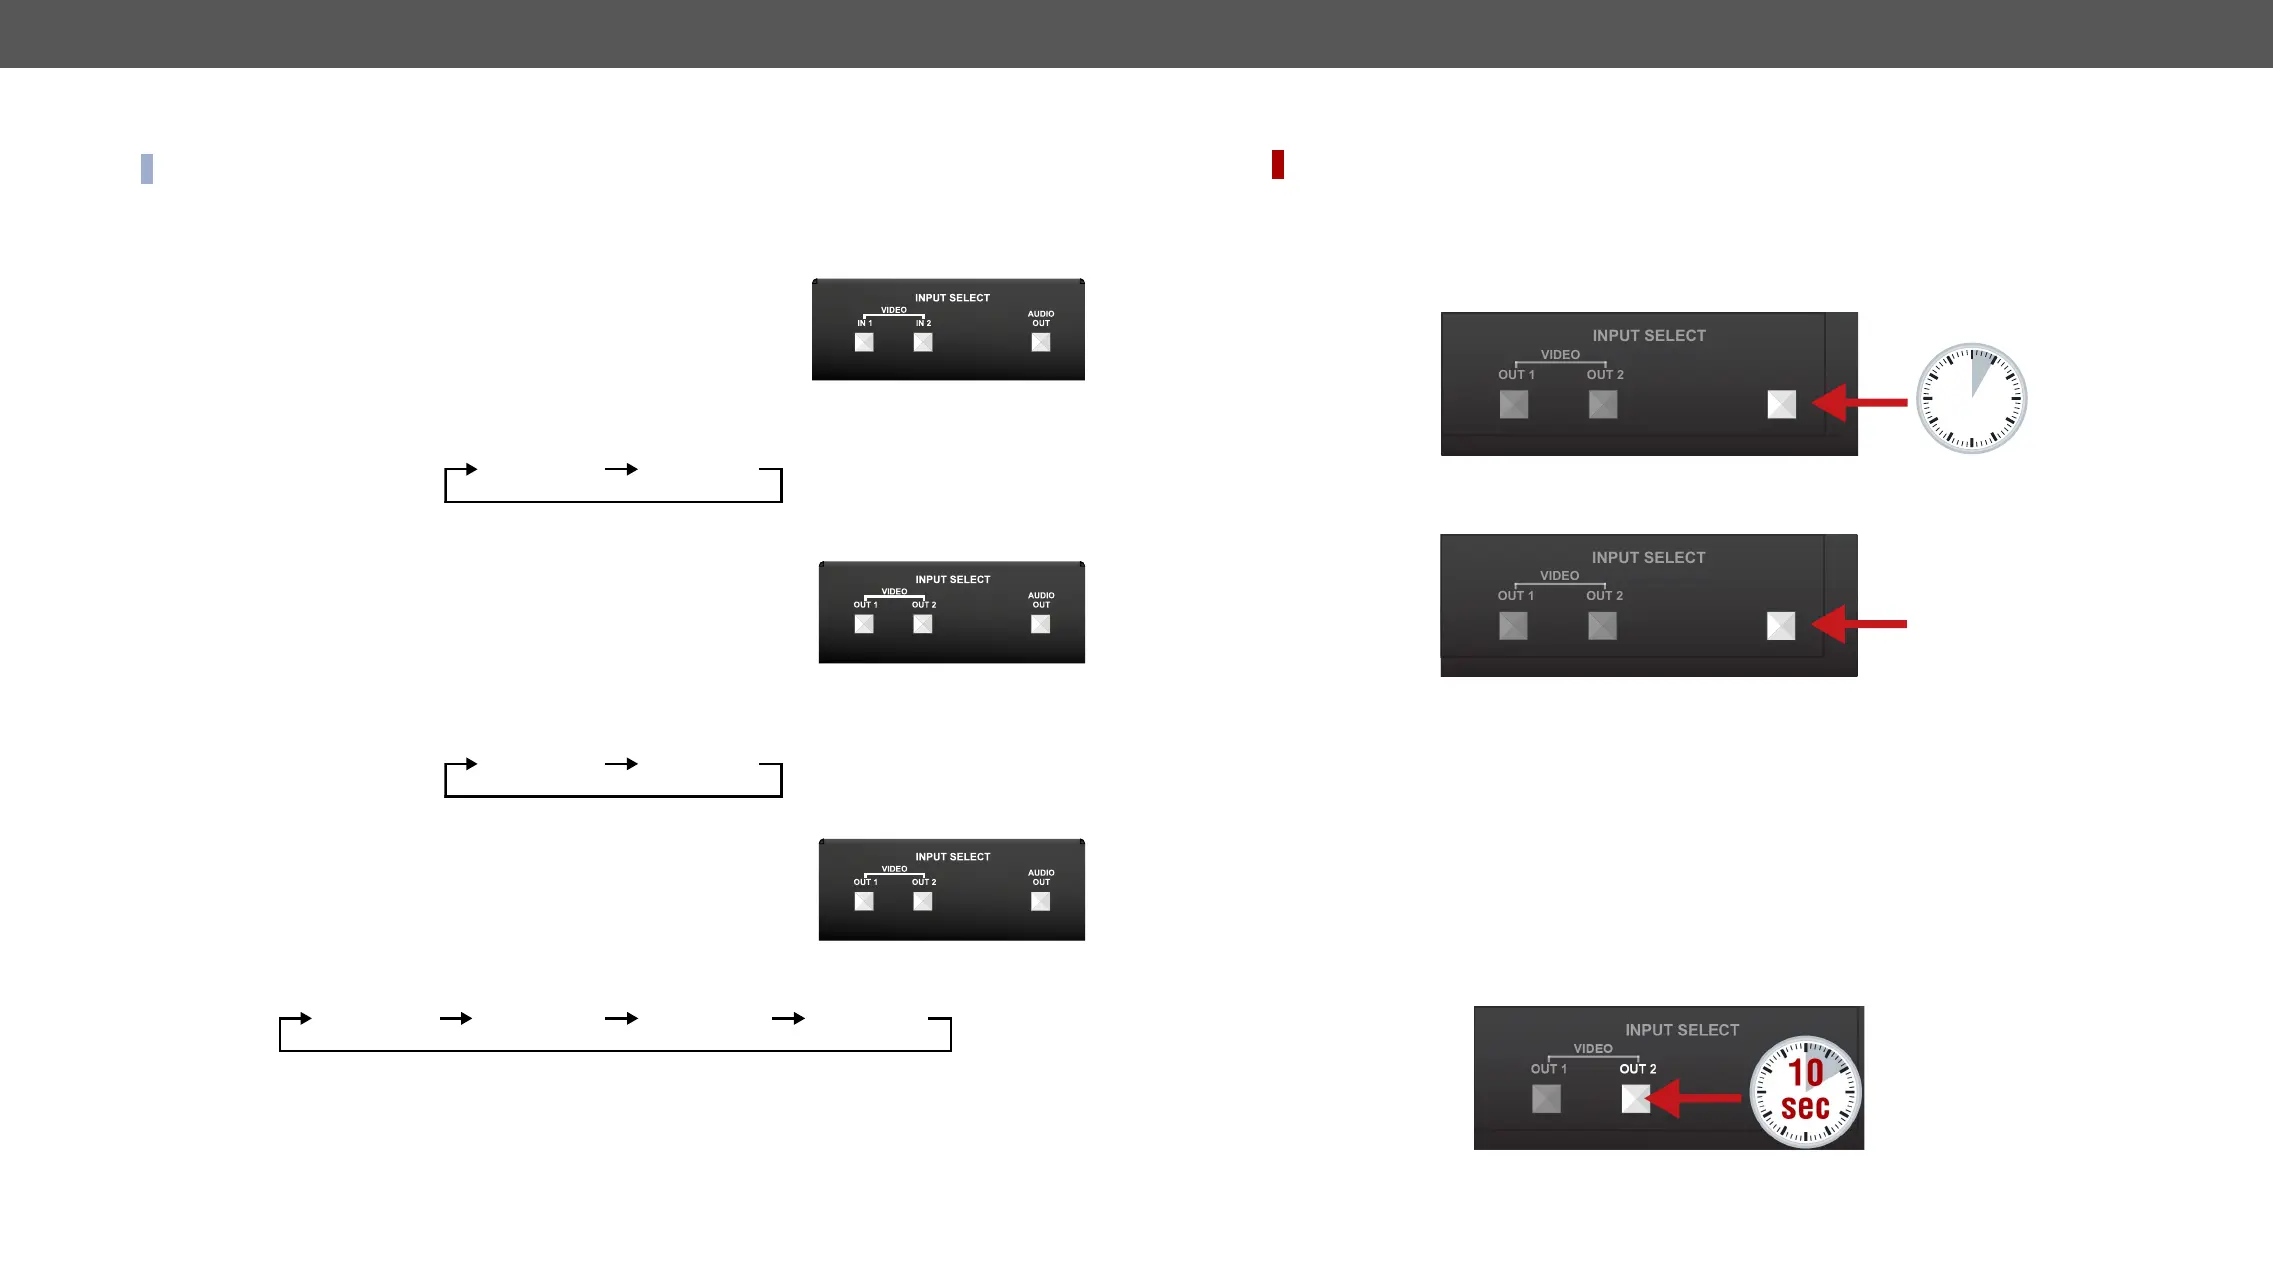
Factory Default By Pressing VIDEO OUT 2 (VIDEO IN2) Button
To restore factory default values, do the following steps:
Step 1. Make sure the switcher is powered off.
Step 2. Power on the switcher while the VIDEO OUT2 (VIDEO IN2 in UCX-2x1-HC30 model) is being pressed for
10 seconds. The device restores the factory default settings and reboots.
AUDIO
OUT
AUDIO
OUT
5
sec
AUDIO
OUT
AUDIO
OUT
3x
Button Functionality
INFO:
Video Source Selection
UCX-2x1-HC30
Use IN1 and IN2 buttons for selecting the video source. IN1 button
switches the USB-C IN1 to the output, IN2 button switches the HDMI IN2
to the output.
Use AUDIO OUT button for selecting the audio source of the analog audio
output.
The sequence is the following (for the audio switching):
UCX-2x2-H30
Use OUT1 and OUT2 buttons for selecting the video source. Push OUT1 to
select the video input for the HDMI OUT1 port, OUT2 button switches the
video input for the HDMI OUT2 port.
Use AUDIO OUT button for selecting the audio source of the analog audio
output.
The sequence is the following (both for the video and audio switching):
UCX-4x2-HC30 and UCX-4x2-HC30D
Push OUT1 to select the video input for the HDMI OUT1 port.
Push OUT2 to select the video input for the HDMI OUT2 port.
Push AUDIO OUT to set the audio source of the analog audio output.
The sequence is the following (both for the video and audio switching): #switch #crosspoint
1
2
1
2
1
2
3
4