35
High Performance Wireless-N Router
Linksys E3000 Chapter 3: Advanced Configuration
Port Range Forwarding
To forward a port, enter the information on each line for
the criteria required.
Application Name In this field, enter the name you
wish to give the application. Each name can be up to 12
characters.
Start~End Port Enter the number or range of port(s)
used by the server or Internet applications. Check with the
Internet application documentation for more information.
Protocol Select the protocol(s) used for this application,
TCP, UDP, or Both.
To IP Address For each application, enter the IP address
of the computer running the specific application. If you
assigned a static IP address to the computer, then you can
look up its static IP address; refer to DHCP Reservation,
page 16.
Enabled Select Enabled to enable port forwarding.
Click Save Settings to apply your changes, or click Cancel
Changes to clear your changes.
Applications & Gaming > Port Range
Triggering
The Port Range Triggering screen allows the Router to
watch outgoing data for specific port numbers. The IP
address of the computer that sends the matching data is
remembered by the Router, so that when the requested
data returns through the Router, the data is pulled back
to the proper computer by way of IP address and port
mapping rules.
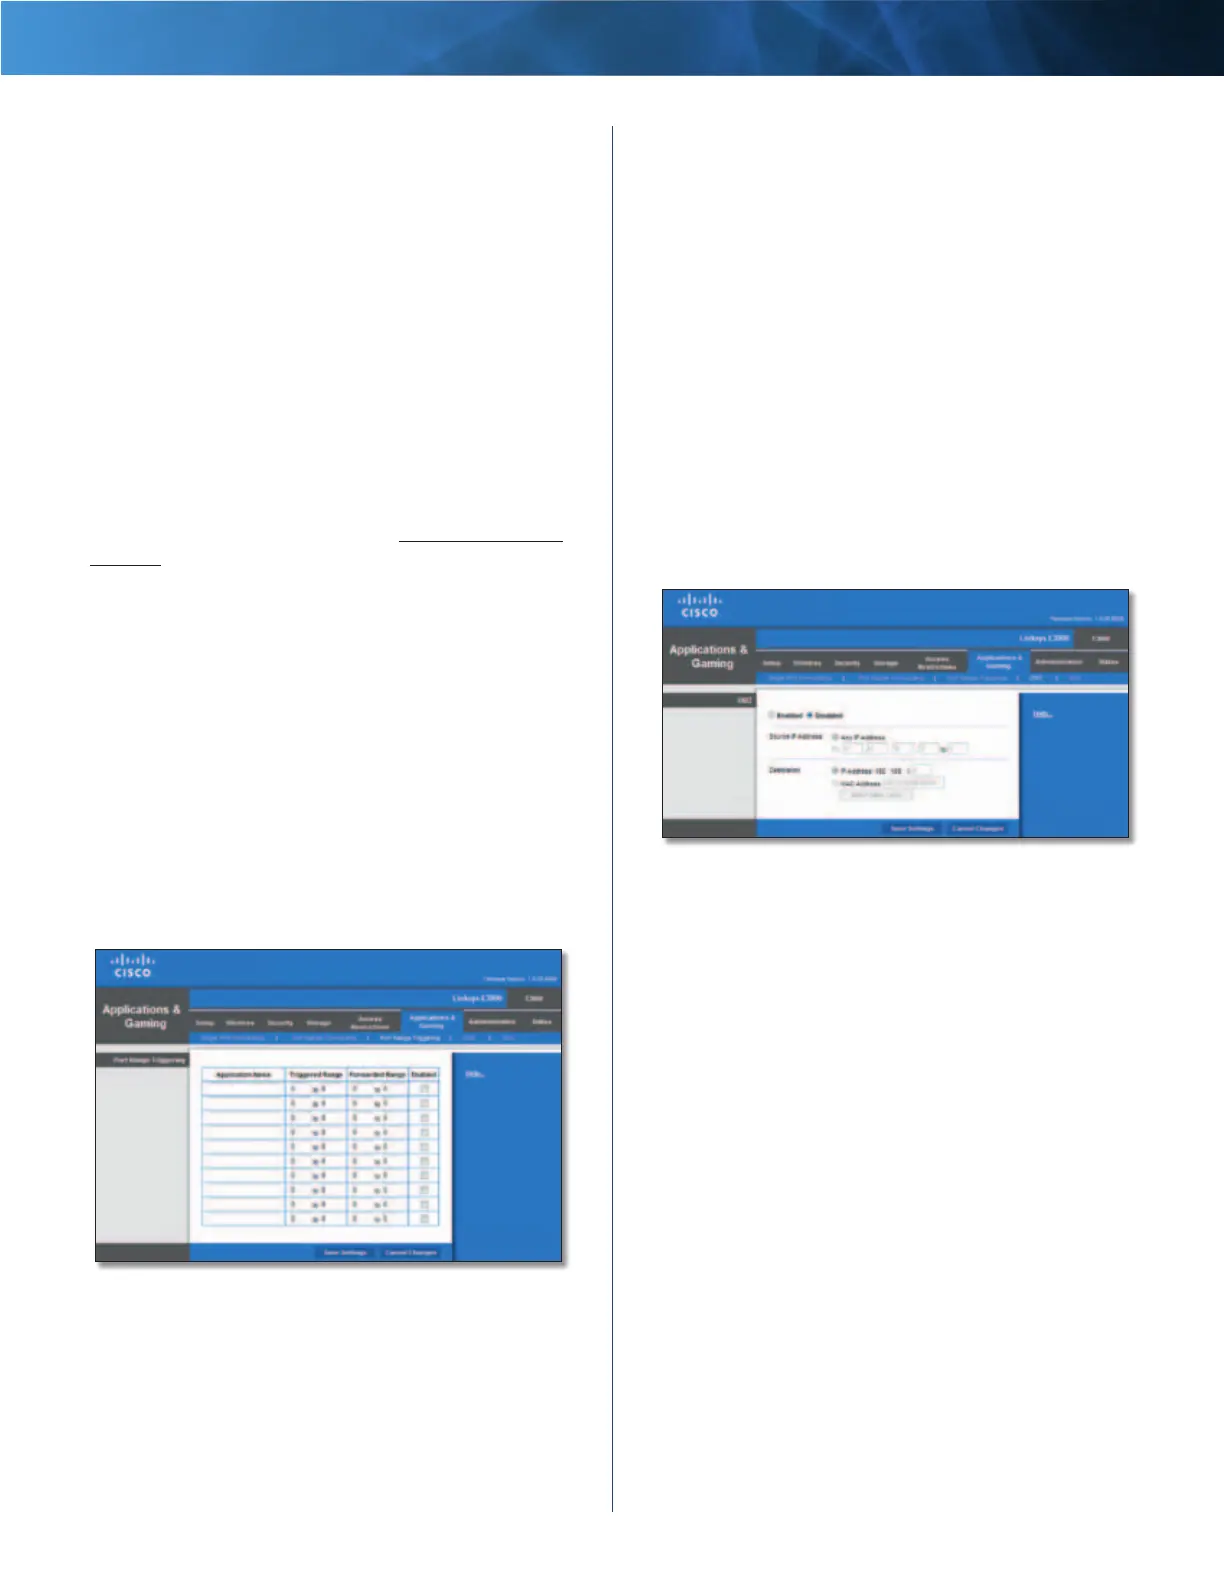
Applications and Gaming > Port Range Triggering
Port Range Triggering
Application Name Enter the application name of the
trigger.
Triggered Range For each application, enter the starting
and ending port numbers of the triggered port number
range. Check with the Internet application documentation
for the port number(s) needed.
Forwarded Range For each application, enter the
starting and ending port numbers of the forwarded
port number range. Check with the Internet application
documentation for the port number(s) needed.
Enabled Select Enabled to enable port triggering.
Click Save Settings to apply your changes, or click Cancel
Changes to clear your changes.
Applications and Gaming > DMZ
The DMZ feature allows one network computer to be
exposed to the Internet for use of a special-purpose
service such as Internet gaming or videoconferencing.
DMZ hosting forwards all the ports at the same time to
one PC. The Port Range Forwarding feature is more secure
because it only opens the ports you want to have opened,
while DMZ hosting opens all the ports of one computer,
exposing the computer to the Internet.
Applications and Gaming > DMZ
DMZ
Any computer whose port is being forwarded should have
its DHCP client function disabled and have a new static IP
address assigned to it because its IP address may change
when using the DHCP function.
Enabled/Disabled To disable DMZ hosting, select
Disabled. To expose one PC, select Enabled. Then
configure the following settings:
Source IP Address If you want any IP address to be the
source, select Any IP Address. If you want to specify an IP
address or range of IP addresses as the designated source,
select and complete the IP address range fields.
Destination If you want to specify the DMZ host by IP
address, select IP Address and enter the IP address in the
field provided. If you want to specify the DMZ host by MAC
address, select MAC Address and enter the MAC address
in the field provided.
Click Save Settings to apply your changes, or click Cancel
Changes to clear your changes.