Linksys E3000 Appendix B: How to Install and Access USB Storage
55
High Performance Wireless-N Router
Advanced Configuration
(Advanced Users Only)
To manage access to the USB storage device, you can
create shared folders, user groups, and user accounts.
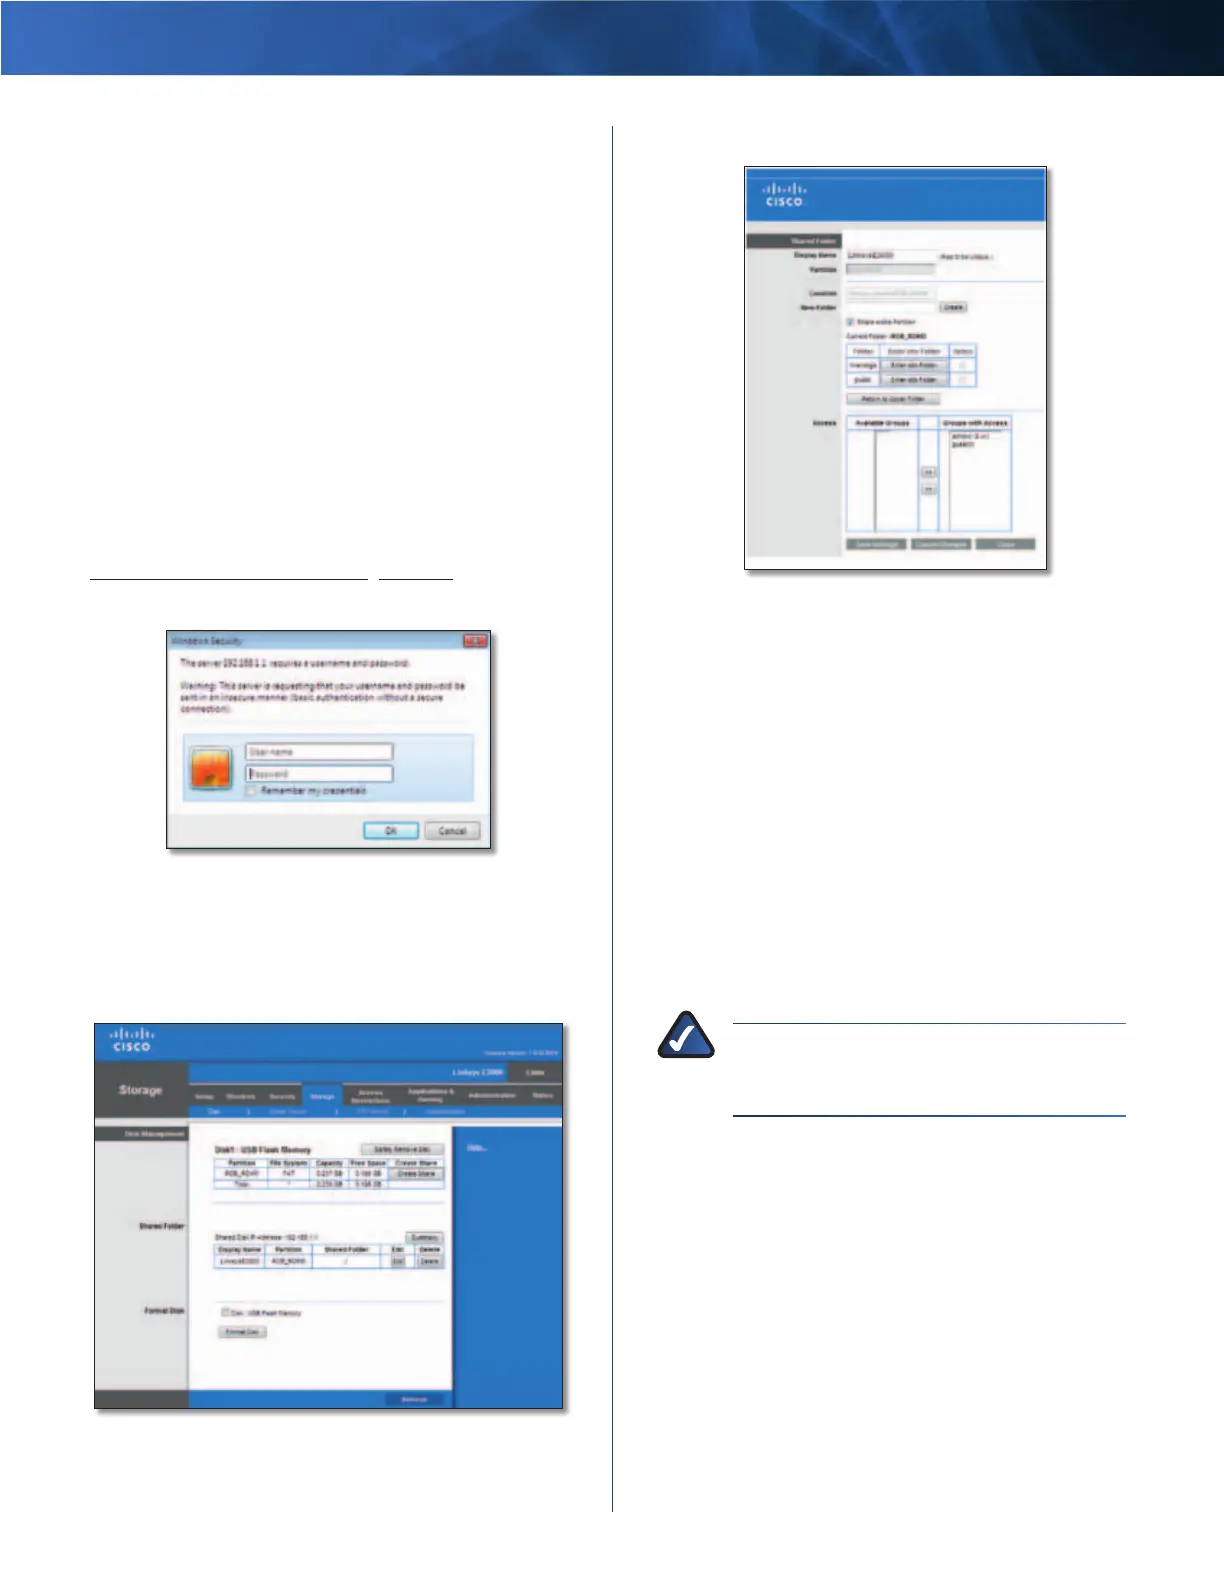
Access the Browser-Based Utility
To access the browser-based utility, launch the web
browser on your computer, and enter the Router’s default
IP address, 192.168.1.1, in the Address field. Then press
Enter.
A login screen will appear. (Non-Windows 7 users will see
a similar screen.) In the User name field, enter admin. Then
enter the password created during the Setup Software.
(If you did not run the Setup Software, then use the
default password, admin. You can set a new password
on the Administration > Management screen. Refer to
Administration > Management, page 38.) Click OK to
continue.
Login Screen
Create a Shared Folder
1. Click the Storage tab.
2. Click the Disk tab.
Storage > Disk
3. To create a shared folder, click Create Share.
Shared Folder
4. In the Display Name field, create a display name for the
shared folder.
5. In the New Folder field, create a name for the physical
location of the shared folder. Then click Create.
6. If the shared folder should include the entire partition,
select Share entire Partition and proceed to step 8.
If you do not want to share the entire partition, then
specify the folder you do want to share.
7. Select the appropriate folder. To display subfolders,
click Enter into Folder. To return to the previous
folder, click Return to Upper Folder.
8. To allow a group access to the shared folder, select it
from the Available Groups column, and then click the
>> button.
NOTE: Specify which user groups have read-
and-write or read-only access to the shared
folders.
9. To block a group from accessing the shared folder,
select it from the Groups with Access column, and
then click the << button.
10. Click Save Settings to apply your changes, or click
Cancel Changes to clear your changes. Click Close to
exit the screen and return to the Disk screen.