Linksys E3000 Appendix B: How to Install and Access USB Storage
48
High Performance Wireless-N Router
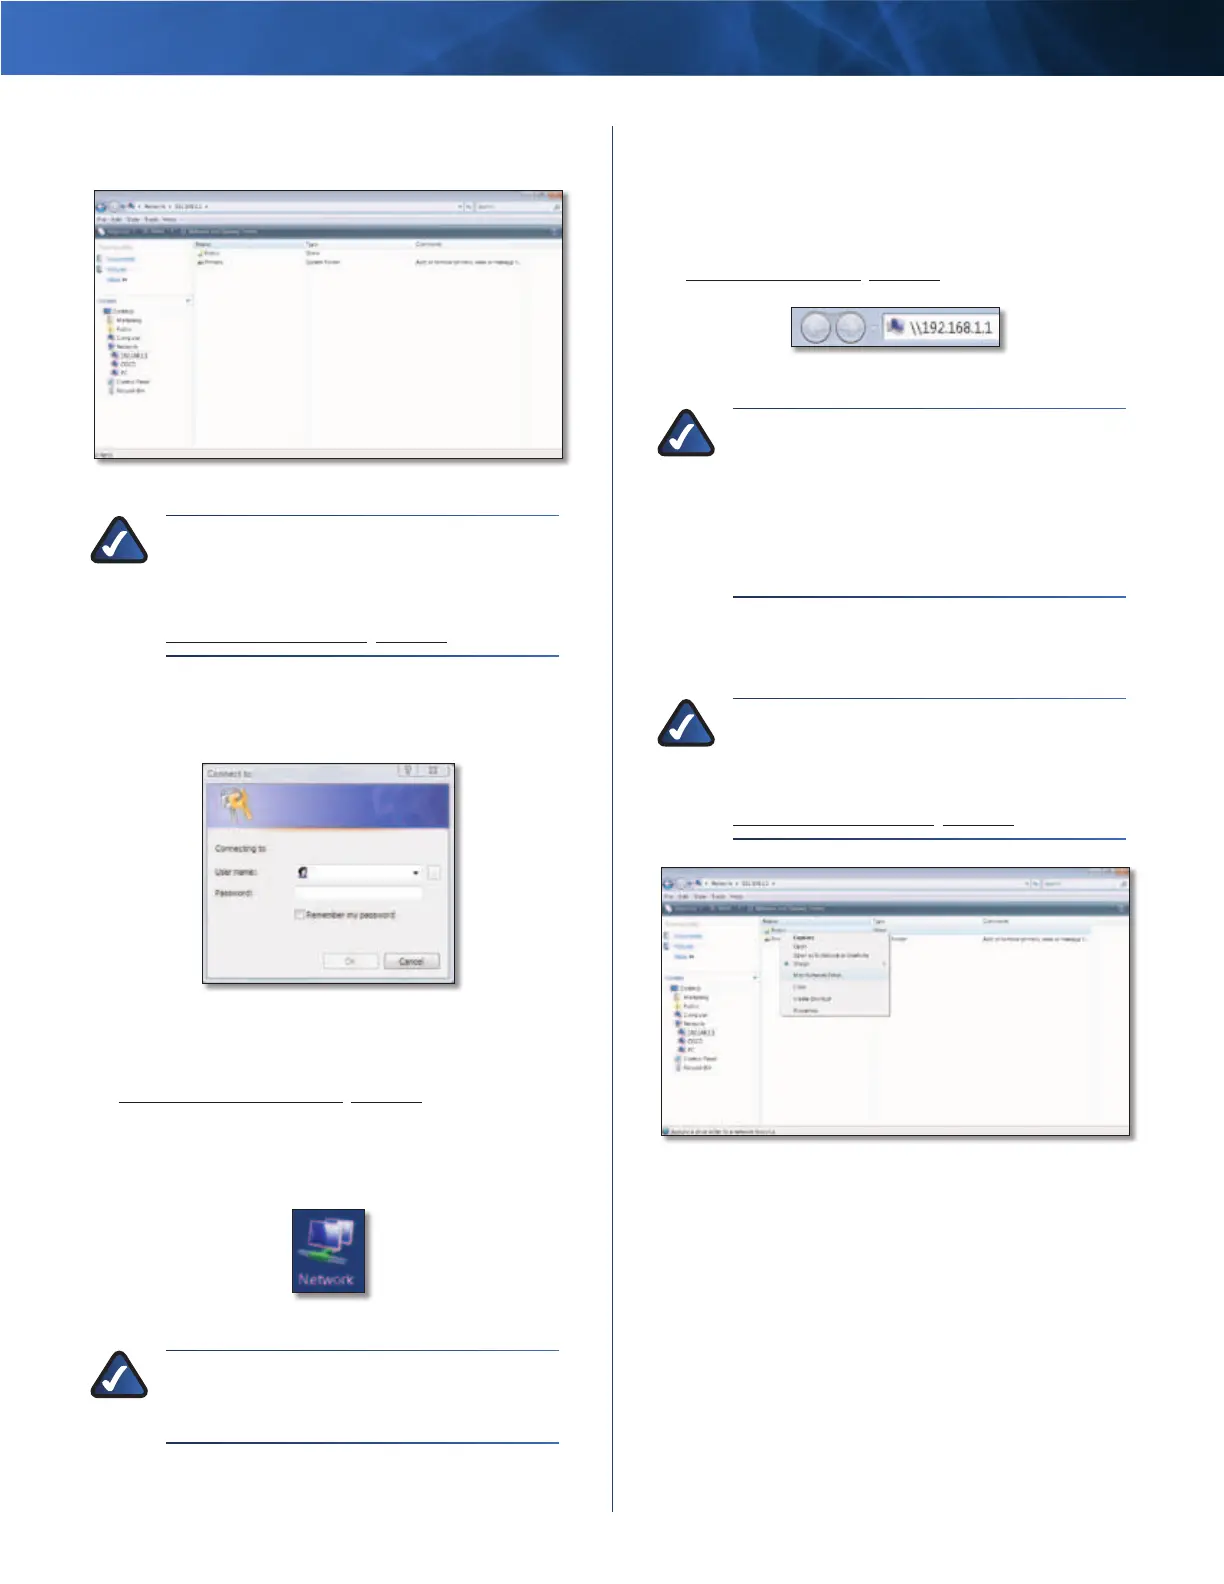
3. Double-click the Public folder. (By default the Router
creates a shared folder called Public.)
Double-Click Public Folder
NOTE: If the USB storage device has
pre-existing folders, then you will have to
create shared folders so there is network
access to these pre-existing folders. Proceed to
Create a Shared Folder, page 55.
4. Enter your account user name and password. (For the
admin account, admin is both the default user name
and password.) Click OK.
Enter Account User Name and Password
User accounts are set up on the Storage >
Administration screen; for more information, refer to
Storage > Administration, page 31.
Map a Drive
1. On your desktop, double-click the Network icon.
Network Icon
NOTE: If the My Computer icon is not displayed,
then go to Start > All Programs > Accessories
> Windows Explorer.
2. In the Address field, enter the local IP address of the
Router:
\\xxx.xxx.xxx.xxx
The default is 192.168.1.1. You can change this IP
address on the Setup > Basic Setup screen; refer to
Setup > Basic Setup, page 13.
Enter Local IP Address of Router
NOTE: Another option is to use the default server
name of the Router. In the Address field, enter:
\\Ciscoxxxxx (xxxxx represents the last
five digits of the Router’s serial number.)
If you used the setup software for installation,
then enter the name of your wireless network
(up to 15 characters) in the Address field.
3. Right-click the folder you want to map, and click Map
Network Drive. (The default shared folder is named
Public.)
NOTE: If the USB storage device has
pre-existing folders, then you will have to
create shared folders so there is network
access to these pre-existing folders. Proceed to
Create a Shared Folder, page 55.
Map Network Drive