Rev: 10.22.19 Page 6
CCD-0001541
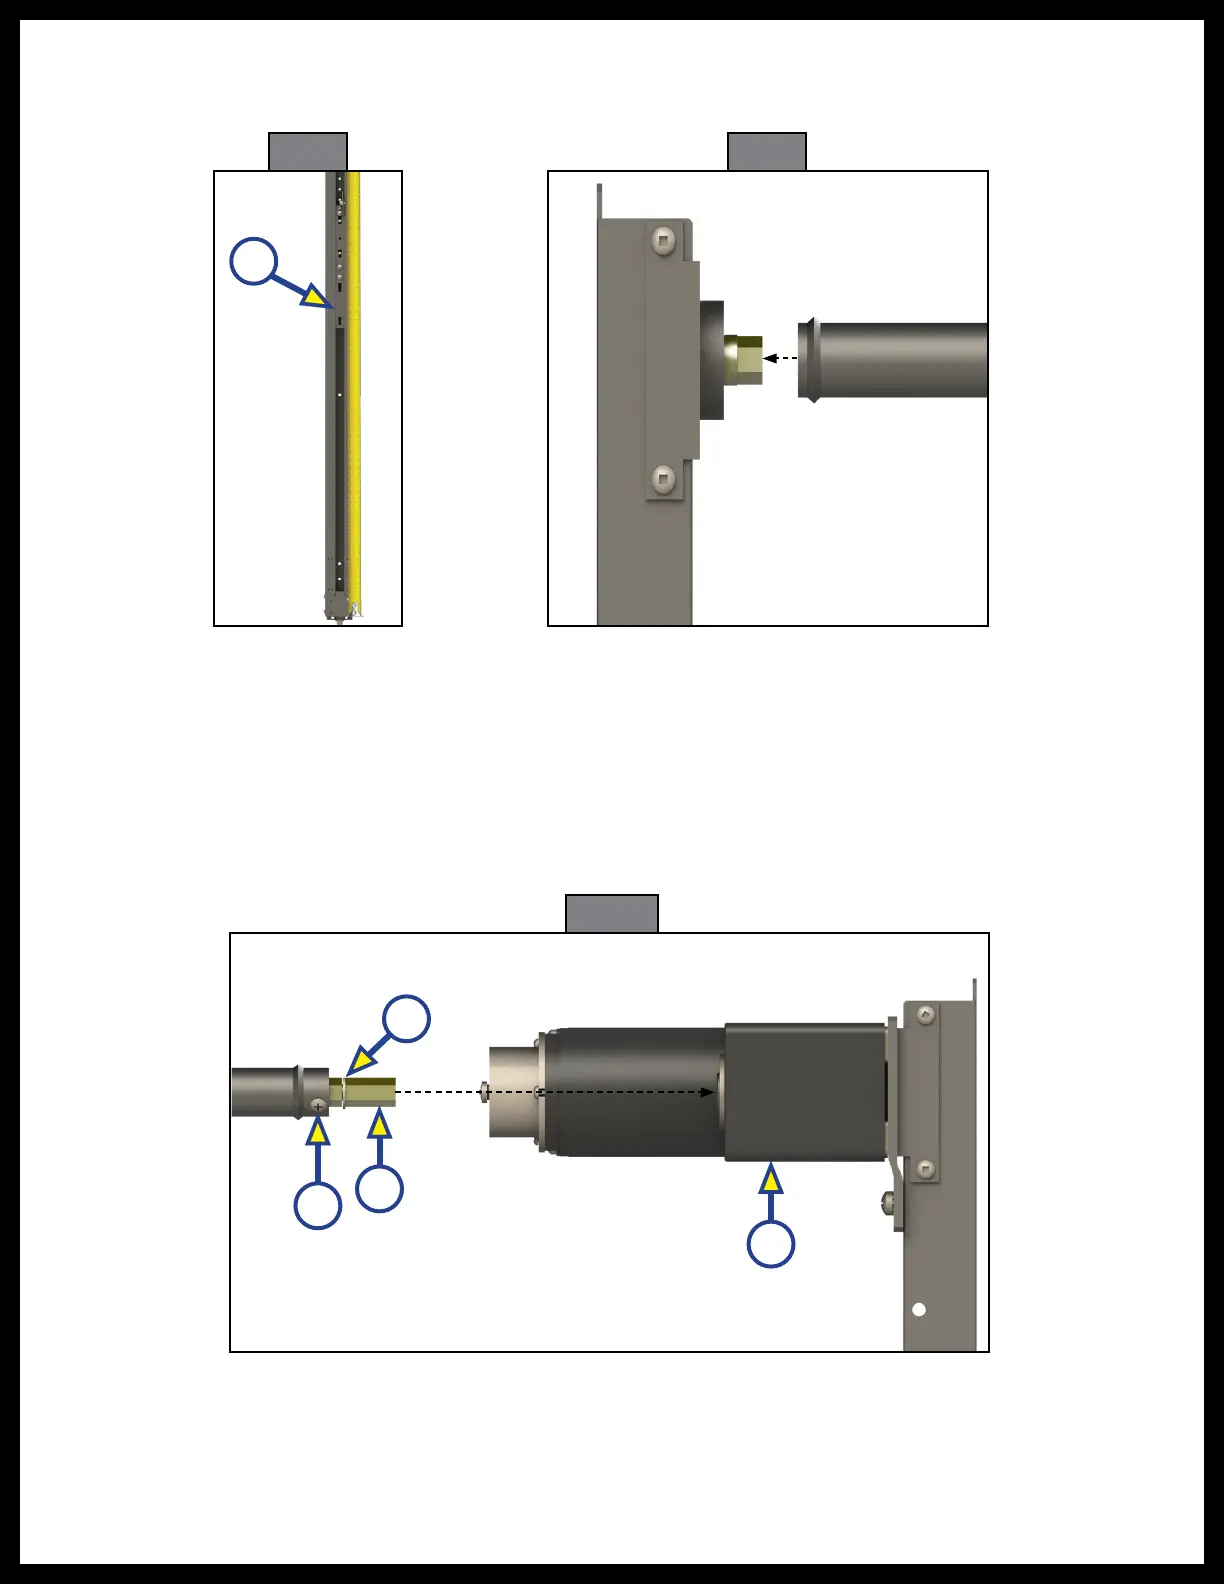
3. Make sure that the drive (lower) trolleys (Fig. 8A) are at the same height on both sides of the bed lift.
4. Install connecting shaft by sliding open end of shaft over the hex shaft on the side opposite the motor (Fig. 9).
NOTE: If a gap forms due to the timing shaft "walking" the sprocket will twist.
5. Loosen the set screw (Fig. 10A) in the collar of the connecting shaft where the gold hex shaft protrudes.
6. Draw out the hex shaft (Fig. 10B) and insert it into the motor (Fig. 10C) until the E-clip (Fig. 10D) is
seated against the motor. Make sure the opposite end of the connecting shaft remains seated.
NOTE: It may be necessary to slightly rotate the connecting shaft back and forth to get the shaft to engage
the motor. Side-to-side leveling will be affected by no more than
¼
" (6.4 mm). The ideal setting is
having the non-motor side trolleys
½
" (13 mm) higher than the motor side to facilitate the lock-up
pins. Small incremental changes can be made by utilizing the 12 pt. socket ends on the timing shaft.
7. Tighten the set screw.
A
Fig. 8
A
D
B
C
Fig. 9
Fig. 10