PITCH ARM AWNING ASSEMBLY REPLACEMENT
TI-258
DOORS
Make sure to adequately support the roll tube during this process. Failure to support the roll tube
may result in personal injury or property damage.
3. With an assistant holding the roll tube, remove the star washer on the pin where the pitch arm and the outer
arm meet (Fig. 1A).
NOTE: Squeezing the outer arm may assist in removal of the star washer. Tin snips may also be needed to remove
the star washers.
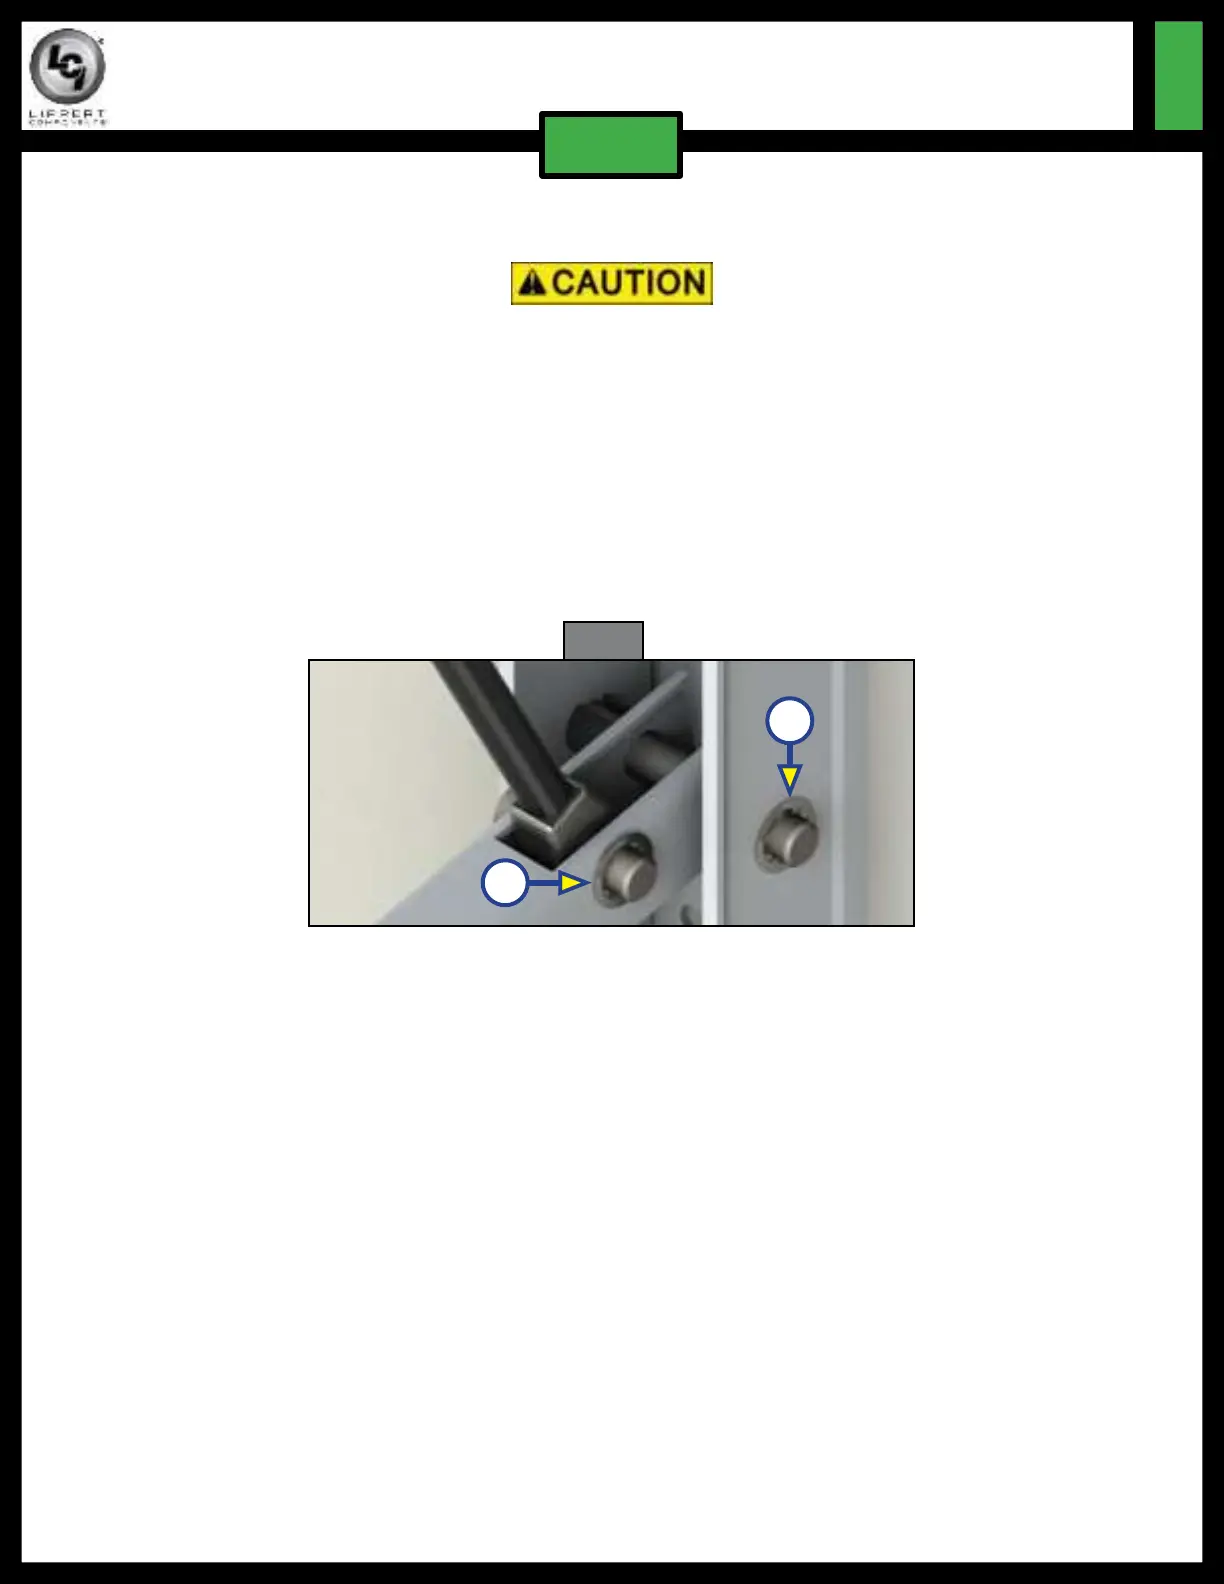
4. Remove the star washer where the pitch arm meets the gas strut (Fig. 5A) and where the pitch arm meets the
mount arm (Fig. 5B).
NOTE: A C-clamp may be used carefully to squeeze the mount arm for easier removal of the star washer.
A
B
NOTE: Make sure to keep all the black spacers that are placed in between the pitch arm and the outer arm
(Fig. 3A) and in between the pitch arm and the mount arm (Fig. 4A).
5. Making sure the assistant has a firm hold on the roll tube so it will not fall, remove the pin where the pitch
arm meets the outer arm. Remove the pin holding the gas strut to the pitch arm and remove the pin holding
the pitch arm to the mount arm.
6. Discard the old pitch arm and install the new pitch arm in place.
NOTE: The assistant holding the roll tube may have to raise or lower it in order to align the holes for the pins.
7. Replace the pin that holds the gas strut to the pitch arm.
8. Replace the pin that holds the pitch arm to the mount arm.
9. Replace the pin that holds the pitch arm to the outer arm.
10. Replace the 2 black spacers in between the pitch arm and the outer arm (Fig. 3A) by pushing the gap side
onto the pin.
11. Replace the 2 black spacers in between the pitch arm and the mount arm (Fig. 4A) by pushing the gap side
onto the pin.
12. Use a
⁄
" deep well socket to push new star washers on to all 3 pins. The star washers can only be installed
in one direction (with the points facing out).
NOTE: Always use new star washers when replacing the pins.
Fig. 5