AWNING FABRIC REPLACEMENT
TI-166
AWNINGS
Manual Awning Tensioning
Awning Length Proper Tensioning (# of turns)
6'* 15
7'-16' 9
17'-21' 10
22'-28' 11
NOTE: 6' Awnings only have one spring to tension on the drive side.
Fig. 5
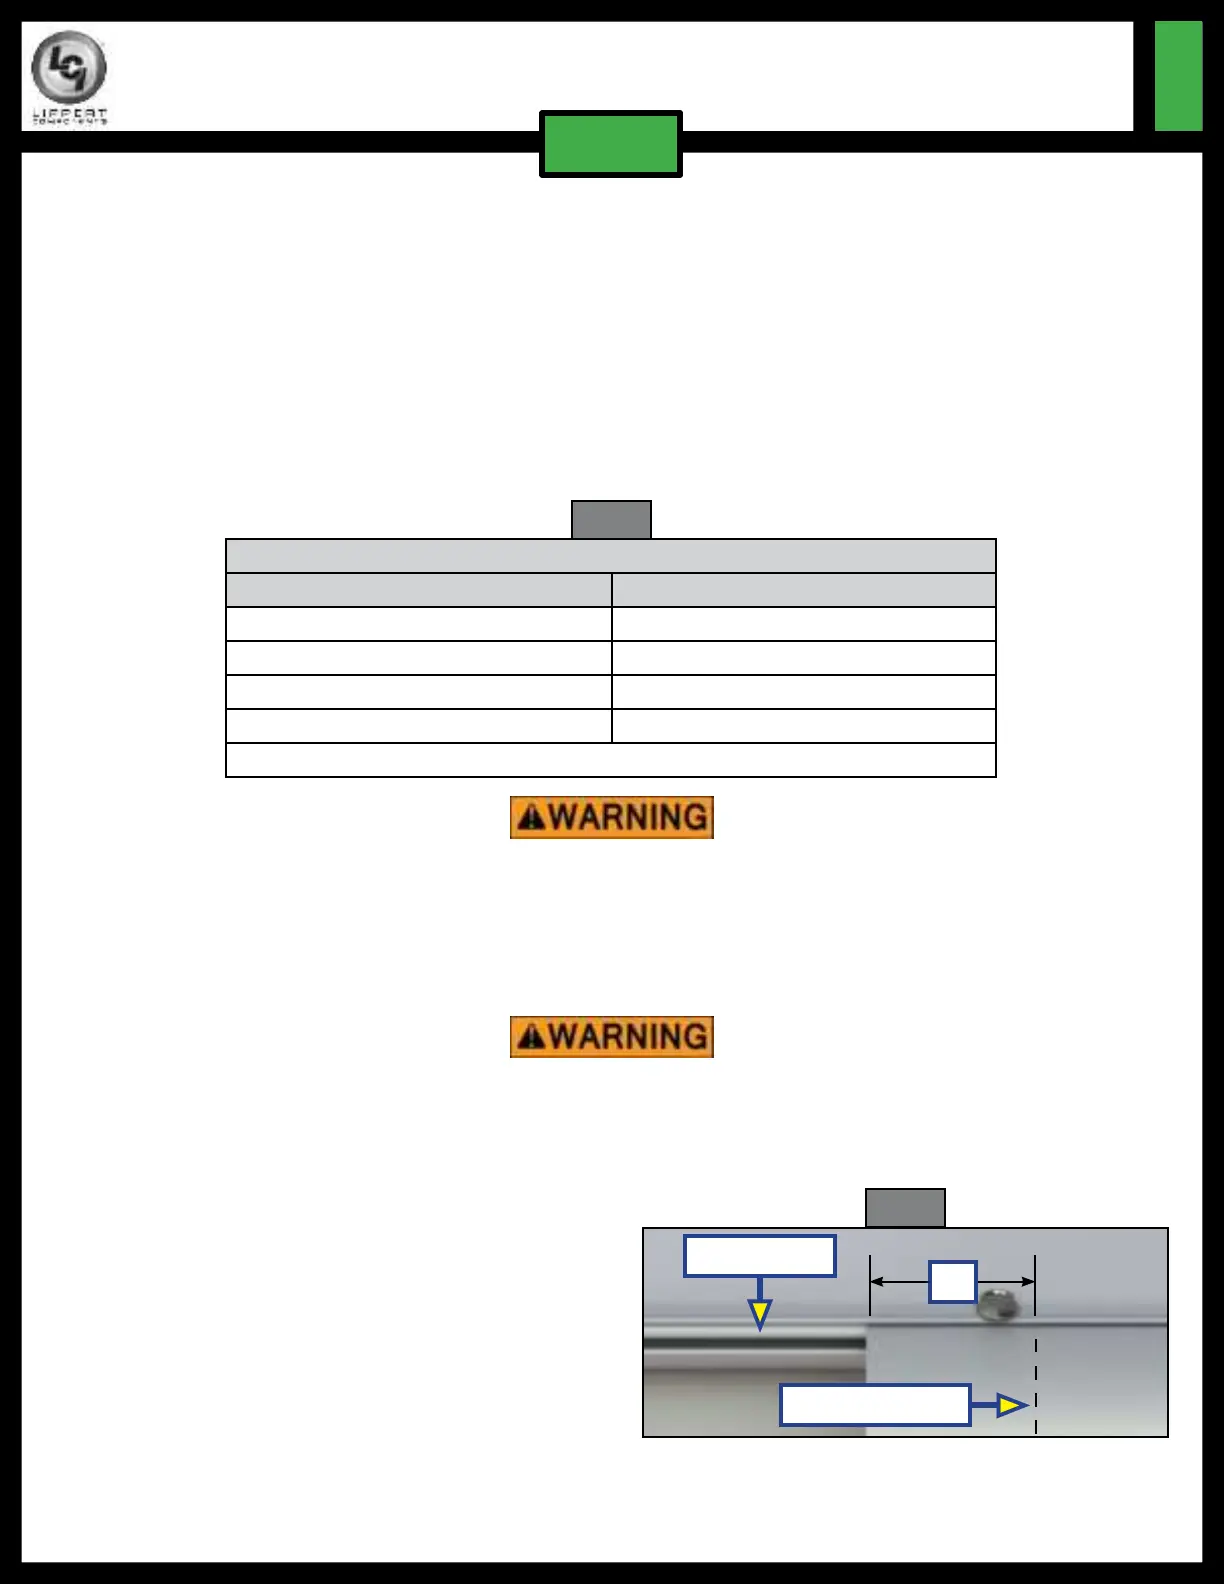
Fig. 6
Awning Rail
1"
Fabric Stitching
6. Using the three screws previously removed from the drive head assembly end cap, attach the drive
head to the roll tube, making sure the orientation is the same.
NOTE: Be sure the drive head assembly with the cam lock is on the right-hand side of the awning.
7. Secure the idler head and roll tube to the work bench.
8. Rotate the drive head assembly counterclockwise, proper turns according to the length of the awning
(Fig. 5) and insert a cotter pin into the end cap into the shaft on the drive head assembly.
NOTE: If the awning is longer than 6' and the idler head assembly tension had previously been released,
rotate the idler head assembly clockwise according to the length of the awning (Fig. 5) and insert
a cotter pin into the end cap into the shaft on the idler head assembly. Be sure that both head
assemblies are parallel once tension has been added.
Failure to maintain control of the roll tube, fabric and drive/idler heads
may result in serious injury or property damage.
Failure to support the roll tube, fabric and drive/idler head assembly during installation
may result in serious injury or property damage.
9. Working together, install the roll tube assembly (which includes the drive/idler head assemblies) to the
awning rail and support arms by sliding the assembly along the awning rail. Make sure the awning will
unroll with the printed side of the fabric up.
10. Install the previously removed drive/idler head
assembly retaining bolts into the outer arms to
secure.
11. Remove the cotter pins from both end caps and cut
the zip ties from the support arm assemblies.
12. Extend and retract the awning several times to
ensure that the fabric is square on the roll tube.
13. Secure the fabric in the awning rail 1" inside the
edge of the fabric on both ends using a #6 x
½
”
hex head screw. Install the screw down through the
awning rail into the fabric and the polycord (Fig 6).
14. Reinstall the drip cap (if previously equipped).